
Legend Coupe V6-3206cc 3.2L SOHC FI (1991)
Impact Sensor: Service and Repair
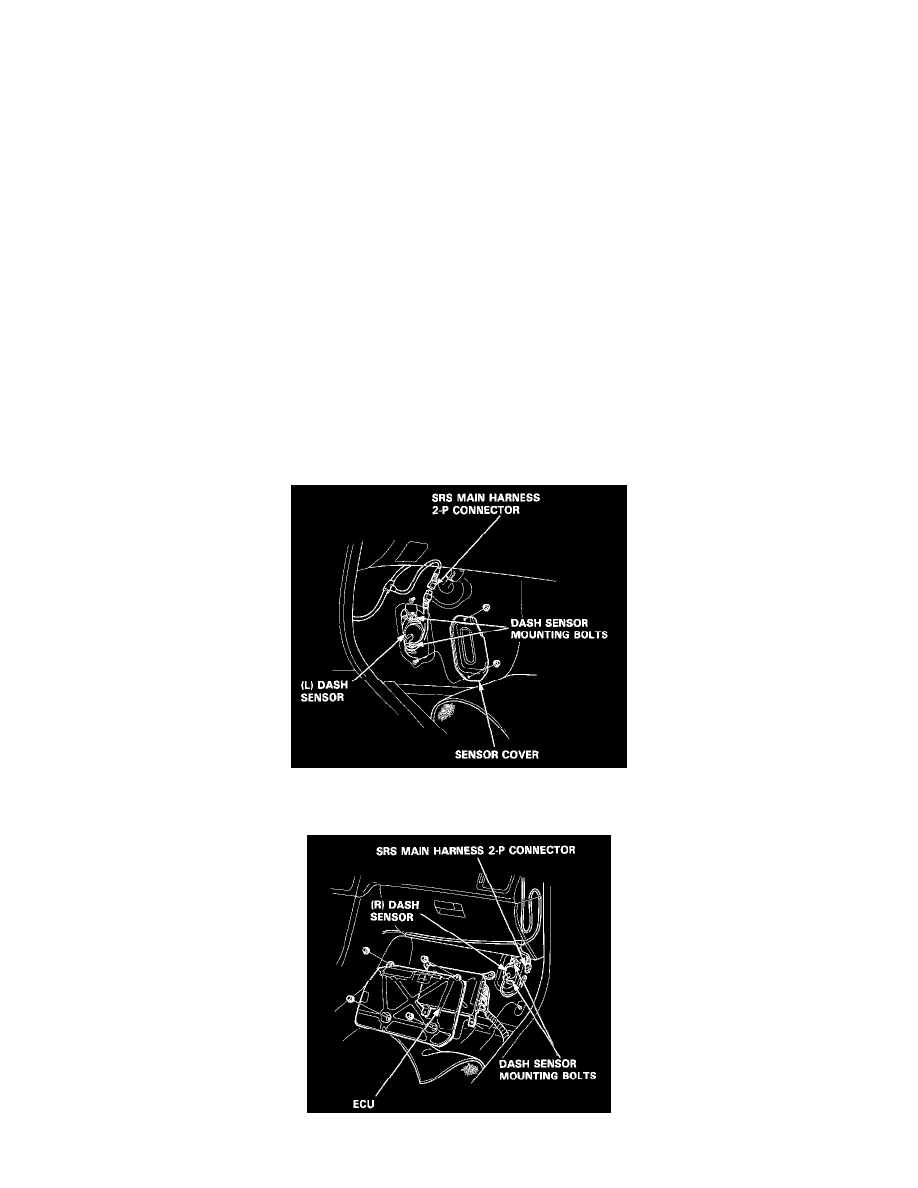
Dash Sensor Removal
Dash Sensor Removal
CAUTION:
-
Do not damage the sensor wiring.
-
Do not install used SRS parts from another car. When repairing: use only new SRS parts.
-
Carefully inspect the dash sensors for signs of being dropped or improperly handled, such as dents, cracks or deformation.
-
Before disconnecting the airbag connector(s), turn off the ignition switch and wait for at least 3 minutes to let the capacitor in the
back-up circuit discharge. This will prevent a malfunction of the seat belt pretensioners.
-
Before disconnecting any part of the SRS wire harness, install short connectors (RED) on the air- bag(s) and both seat belt
pretensioners. After installing the short connector(s) on the airbag(s), immediately install one Short Connector "A" (Tool Number
O7MAZSPOO2OO) on the cable reel connector (for the driver's airbag), and another on the SRS main harness connector (for the
passenger's airbag). This will prevent any static electricity from triggering the seat belt pretensioners before you disconnect them -
refer to "Short Connector Installation" procedure.
NOTE: Before disconnecting the battery cable, be sure you get the customer's anti-theft radio code number.
1. Disconnect the battery negative cable, then the positive cable.
2. Install the short connector on the airbag(s). and the seat belt pretensioners - refer to "Short Connector Installation" procedure.
3. Left Dash Sensor:
Remove the footrest, and left door sill molding, then pull the carpet back, and remove the sensor cover.
4. Right Dash Sensor:
Remove the right door sill molding and pull back the carpet. Remove the ECU.
5. Remove the 2 mounting bolts, then remove the dash sensor.