
Legend Coupe V6-3206cc 3.2L SOHC FI (1991)
Voltage Regulator: Testing and Inspection
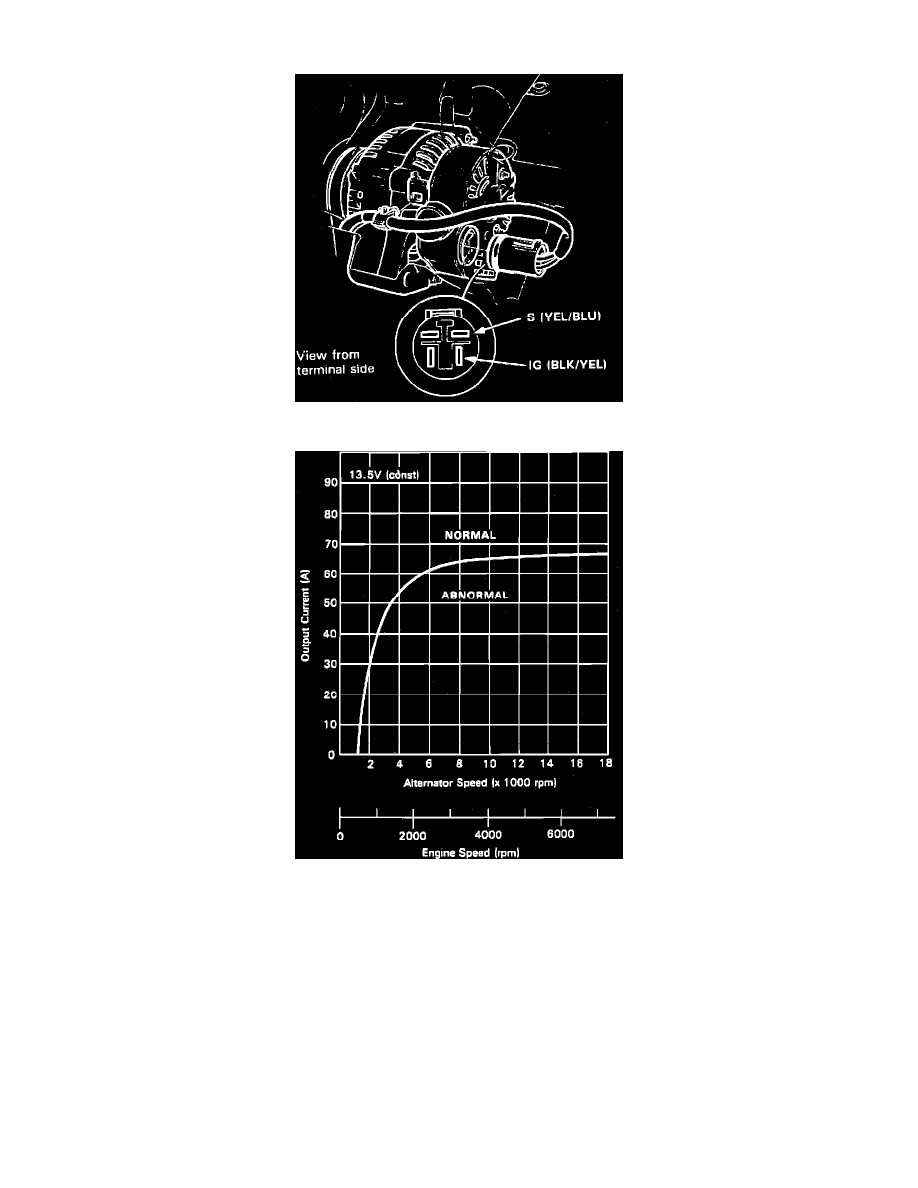
Fig. 7 Alternator Test Connections
Fig. 2 Connecting Charging System Analyzer
1.
Ensure battery is fully charged and that alternator belt, connections at alternator and main fuses are in satisfactory condition.
2.
Ensure that fuse No. 9 on 1989-90 models or fuse No. 15 on 1991-92 models, in the dash fuse panel and fuse No. 38 on 1989-90 models or fuse
No. 22 on 1991-92 models, in underhood relay box are in satisfactory condition.
3.
Disconnect electrical connector from alternator.
4.
Turn ignition switch on and ensure battery voltage exists between alternator connector black/yellow wire terminal and ground, and between
yellow/blue wire terminal and ground, Fig. 7. If no voltage exists, check for blown fuse No. 9 on 1989-90 models or fuse No. 15 on 1991-92
models, or open in black/yellow or yellow/blue wires.
5.
Connect Sun VAT-40 charging system analyzer or equivalent to system as shown in Fig. 2, then position selector switch in No. 1 position.
6.
With all accessories Off, start engine, move selector switch to No. 2 position, then remove inductive pickup and zero ammeter.
7.
Reconnect inductive pickup, ensuring arrow on pickup points away from battery.