
Legend Coupe V6-3206cc 3.2L SOHC FI (1991)
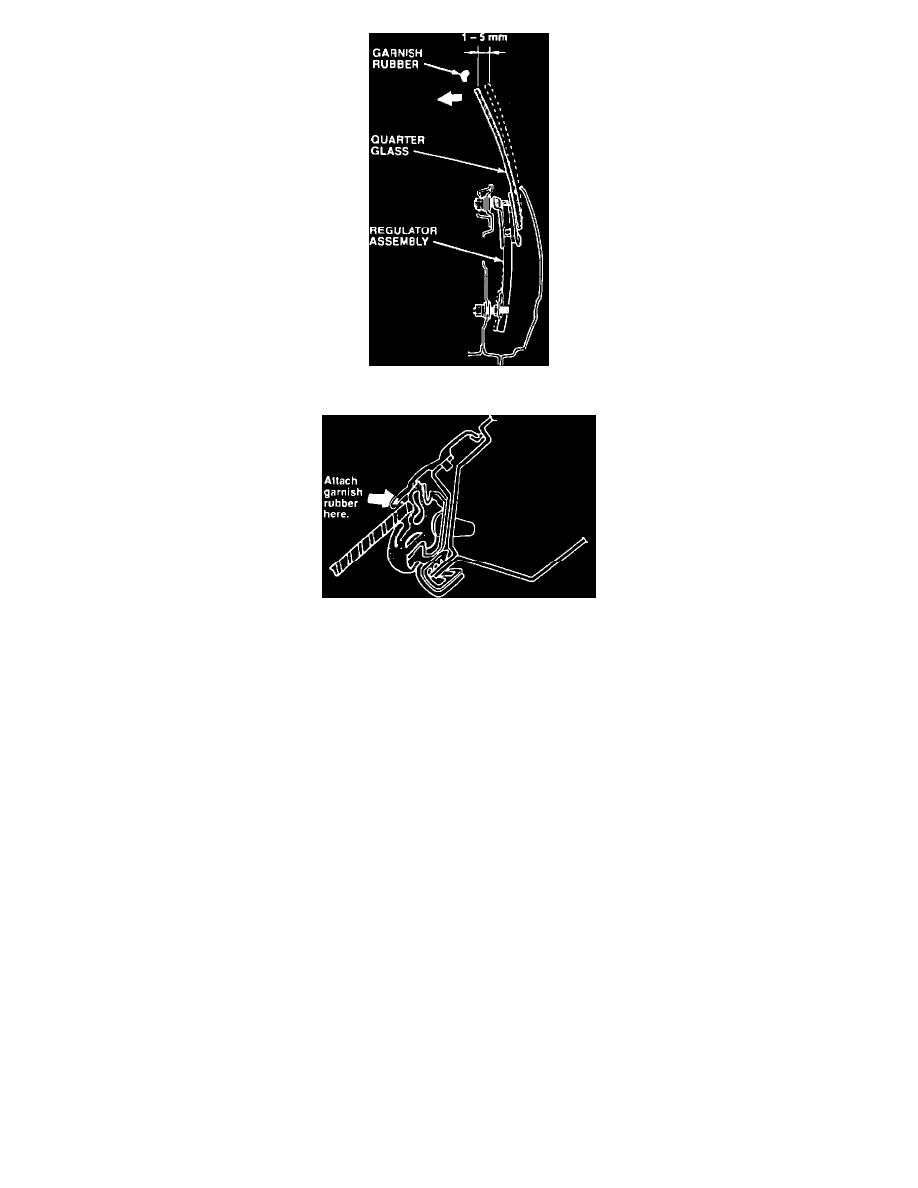
4.
Adjust the top of the glass to just clear the garnish rubber.
5.
If the garnish rubber is loose, reattach it to the garnish with super-glue.
6.
If the garnish rubber is deformed, remove it and the run channel from the body. Use 3M General Purpose Adhesive Cleaner (P/N 08984) to clean
the garnish rubber attachment surface.
7.
Install the replacement garnish rubber listed under PARTS INFORMATION. Add a liftle super-glue to the self adhesive. Make sure it doesn't get
on the exposed surfaces of the garnish rubber.
8.
Reinstall the run channel.
9.
Check the clearance of the other quarter glass garnish rubber and adjust or repair as necessary.
10.
Reinstall the vinyl seal, the trim panel, and the rear seat.
PARTS INFORMATION
Rubber, garnish
P/N 73820-SP1-999
WARRANTY CLAIM INFORMATION
In warranty:
The normal warranty applies.
Out-of-warranty: Any repair performed after warranty expiration may be eligible for goodwill consideration by the District Service Manager. You must
request consideration, and get the DSM's decision, before starting work.
Operation number:
829133 - left side
830133 - right side
Flat rate time
0.7 (each side)
Failed P/N:
73820-SP1-013