
Legend Sedan V6-2494cc 2.5L SOHC FI (1987)
Evaporator Temperature Sensor / Switch: Service and Repair
NOTE: Remove Evaporator unit as outlined below, then, disassemble as necessary to remove evaporator sensor.
Evaporator Unit Replacement
1. Disconnect the battery negative terminal.
2
Recover the refrigerant.
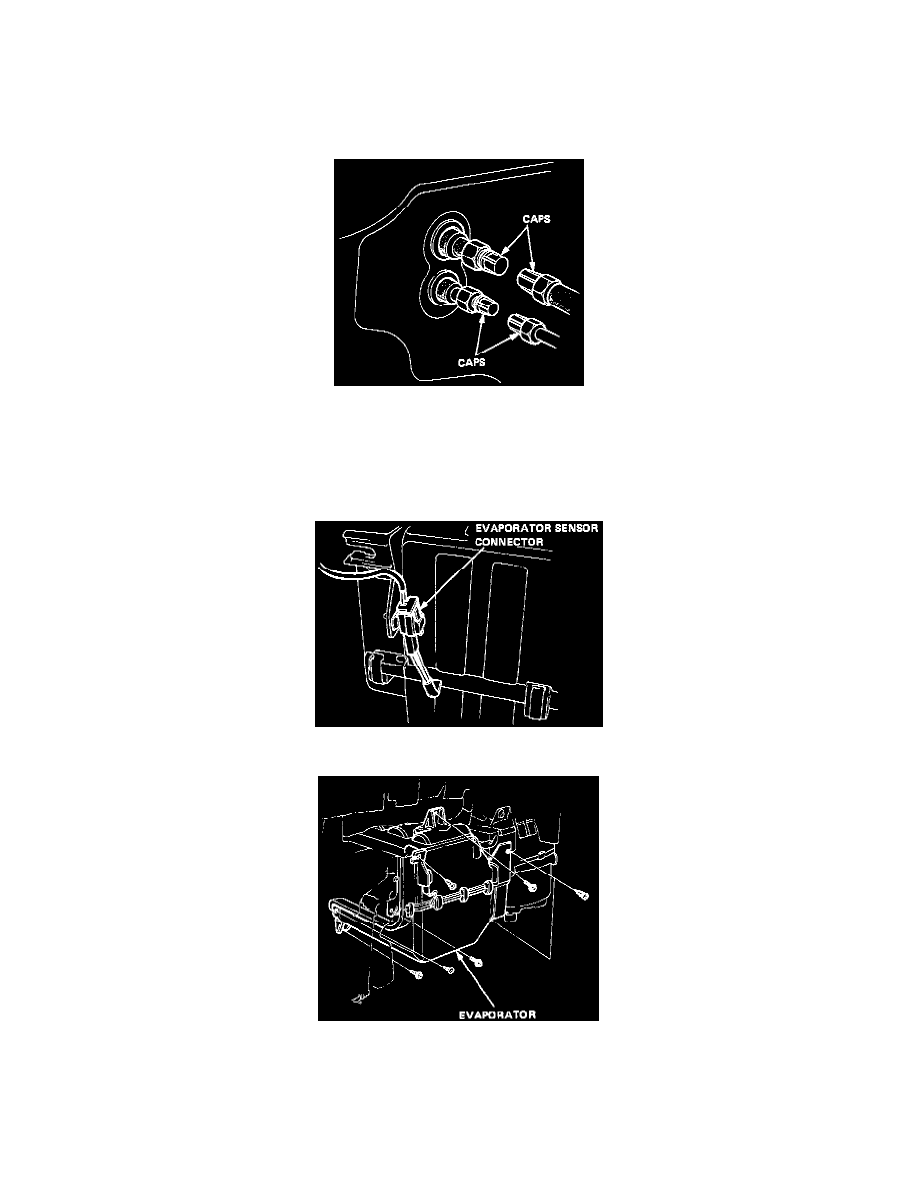
3. Disconnect the receiver line and suction hose from the evaporator.
CAUTION: Cap the open fittings immediately to keep moisture out of the system.
4. Remove the 5 screws, then remove the glove box lower cover and glove box.
5. Remove the 4 screws, then remove the glove box frame and side duct.
6. Disconnect the wire harness from the evaporator sensor connector.
7. Remove the 4 tapping screws and 3 mounting bolts.
8. Pull the evaporator away from the body.
9. Install in the reverse order of removal, and:
-
Apply a sealant to the grommets.
-
Make sure that there is no air leakage.
10. Charge the system and test performance.