Legend Sedan V6-3206cc 3.2L SOHC FI (1995)

3. Unbolt the brake line bracket (located under the emission control box) to allow for brake line fitting removal.
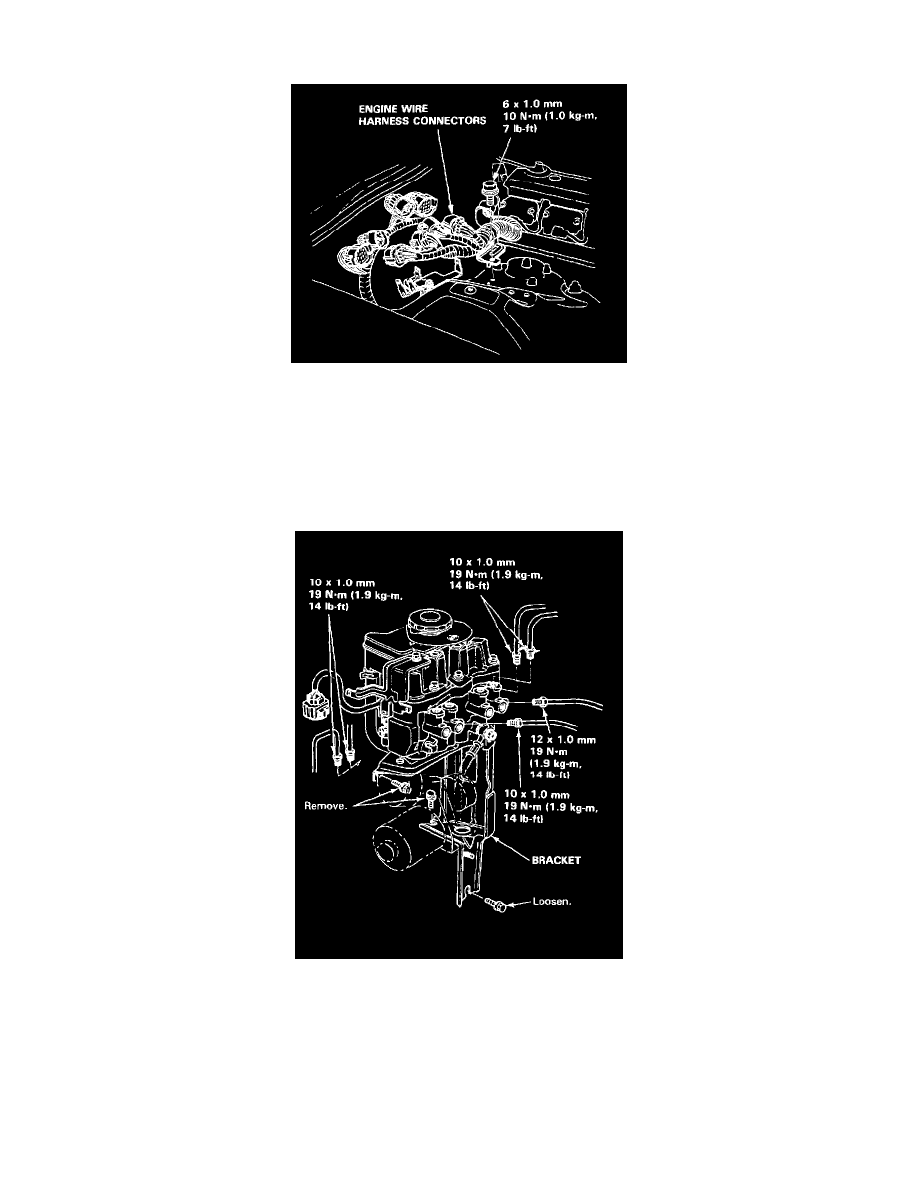
4. Disconnect the four engine wire harness connectors and unbolt the harness clamp. Disconnect the three solenoid/pump connectors.
5. Remove the two upper heat shield mounting bolts. Raise the car and loosen, but do not remove, the lower heat shield mounting bolt. (The lower
heat shield mounting hole is shaped like a keyhole.)
6. Lower the car and remove the heat shield.
7. Use the Bleeder T-wrench to relieve the accumulator/line pressure. See: Brake Bleeding/Service and Repair
8. Disconnect the six steel brake lines from the modulator unit. Cap or plug the two lines from the master cylinder to prevent fluid loss.
9. Loosen, but do not remove the lower modulator bracket mounting bolt. Remove the two upper modulator bracket mounting bolts, then lift the
modulator unit, pump assembly, and bracket out of the car as an assembly.
Installation
Except for the following steps, installation is the reverse of the removal procedure.
1. When tightening the steel brake lines, have an assistant depress the brake pedal lightly to bleed the lines.
