
Legend Sedan V6-3206cc 3.2L SOHC FI (1995)
8. Remove the evaporator seal plate mounting nuts and evaporator seal plate.
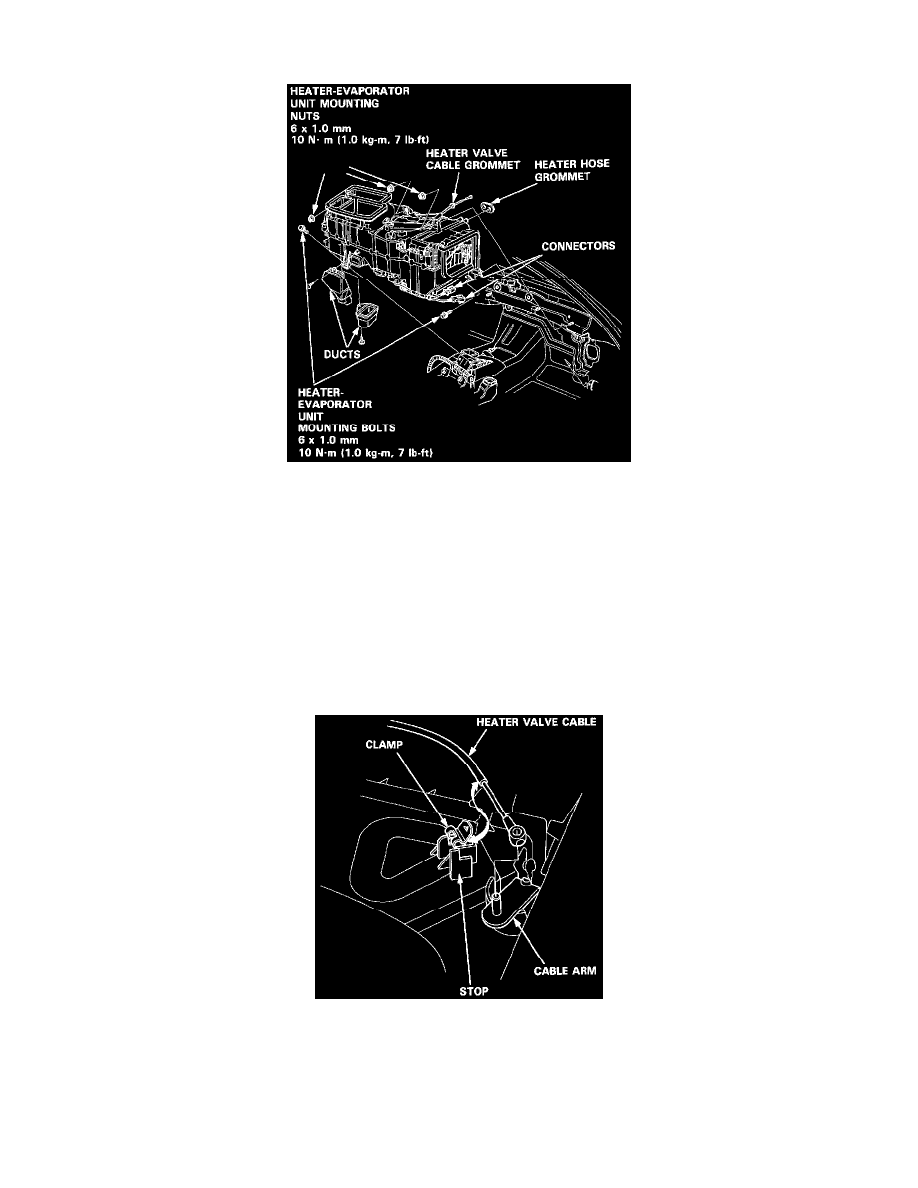
9. Remove the ducts and disconnect the connectors, then remove the heater-evaporator unit mounting nuts and bolts.
10. Disconnect the air mix control motor connector.
Remove the heater-evaporator unit.
11. Install the heater-evaporator unit in the reverse order of removal, and:
-
If you're installing a new evaporator, add refrigerant oil (ND-OIL 8).
-
Replace 0-rings with new ones at each fitting, and apply a thin coat of refrigerant oil before installing them.
NOTE: Be sure to use the right O-rings for R-134a to avoid leakage.
12. Fill the radiator and reservoir tank with the proper engine coolant mixture. Bleed the air from the cooling system.
CAUTION: Follow the sequence described in the air bleed procedure. If you don't, you may leave air in the system which could damage the
engine.
13. If necessary, adjust the heater valve cable of the heater-evaporator unit side:
-
Set the air mix control motor at COOL position.
-
Connect the end of the heater valve cable to the cable arm.
-
Gently slide the heater valve cable outer housing back from the end enough to take up any slack in the heater valve cable, but not enough to
make the other end move the arm on the air mix control motor. Hold the end of the heater valve cable housing against the stop, then snap the
heater valve cable housing into the clamp.