
Legend Sedan V6-3206cc 3.2L SOHC FI (1995)
CAUTION:
-
Be sure to install the harness wires so that they are not pinched or interfering with other car parts.
-
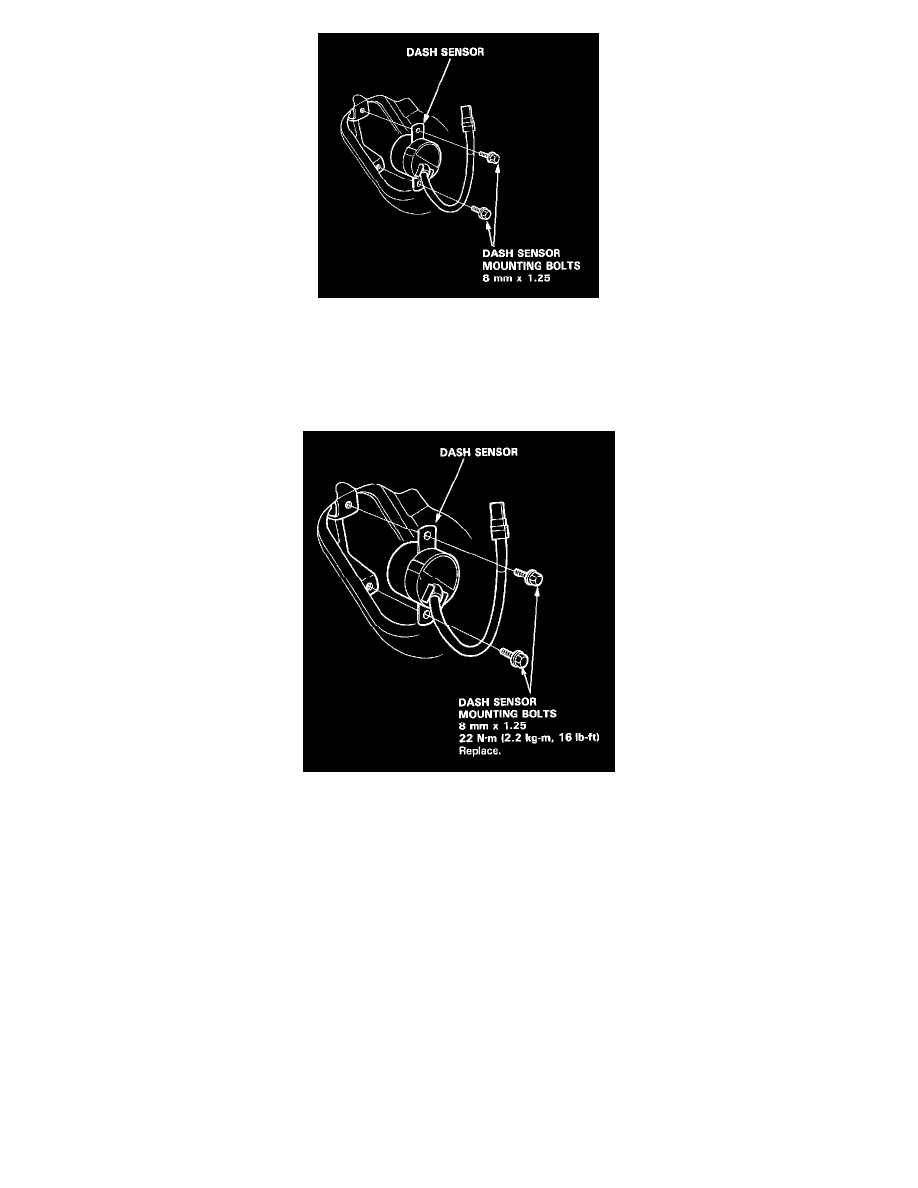
Carefully inspect the new dash sensor(s) for signs of being dropped or improperly handled, such as dents, cracks or deformation.
-
For the SRS to function properly, the right and left sensors must be installed on the proper sides.
6. Install the sensor securely.
7. Reinstall all other removed parts.
8. Remove the short connectors from the front passenger's airbag connector, and from the SRS main harness connector.
9. Reconnect the front passenger's airbag 3-P connector to the SRS main harness connector.
10. Remove the short connectors from the driver's air-bag connector and from the cable reel 3-P connector.
11. Reconnect the driver's airbag 3-P connector to the cable reel 3-P connector. Attach the short connector (RED) to the access panel, then reinstall the
panel on the steering wheel.
12. Remove the short connectors (RED) from the seat belt pretensioners, then attach them to their holders.
13. Reconnect the left side wire harness 3-P connector to the driver's seat belt pretensioner and the main wire harness 3-P connector to the front
passenger's seat belt pretensioner.
14. Reinstall the "B" pillar lower panel.
15. Reconnect the battery positive cable, then the negative cable.
16. After installing the dash sensor, confirm proper system operation: Turn the ignition ON (II): The instrument panel SRS indicator light should go