
MDX V6-3.7L (2007)
7.
Connect the USB PC interface cable to the workstation and to the GNA600.
*8.
Connect the GNA600 unit to the power supply unit, and connect the power supply unit to an electrical outlet. The GNA600 unit starts a self-check,
and after about 30 seconds, the LEDs on the GNA600 unit flash green and yellow. This indicates the GNA600 is ready to capture the current
program ID on the vehicle.*
9.
Disconnect the GNA600 unit from the USB PC interface cable and the power supply.
At the vehicle: Capturing the current program ID
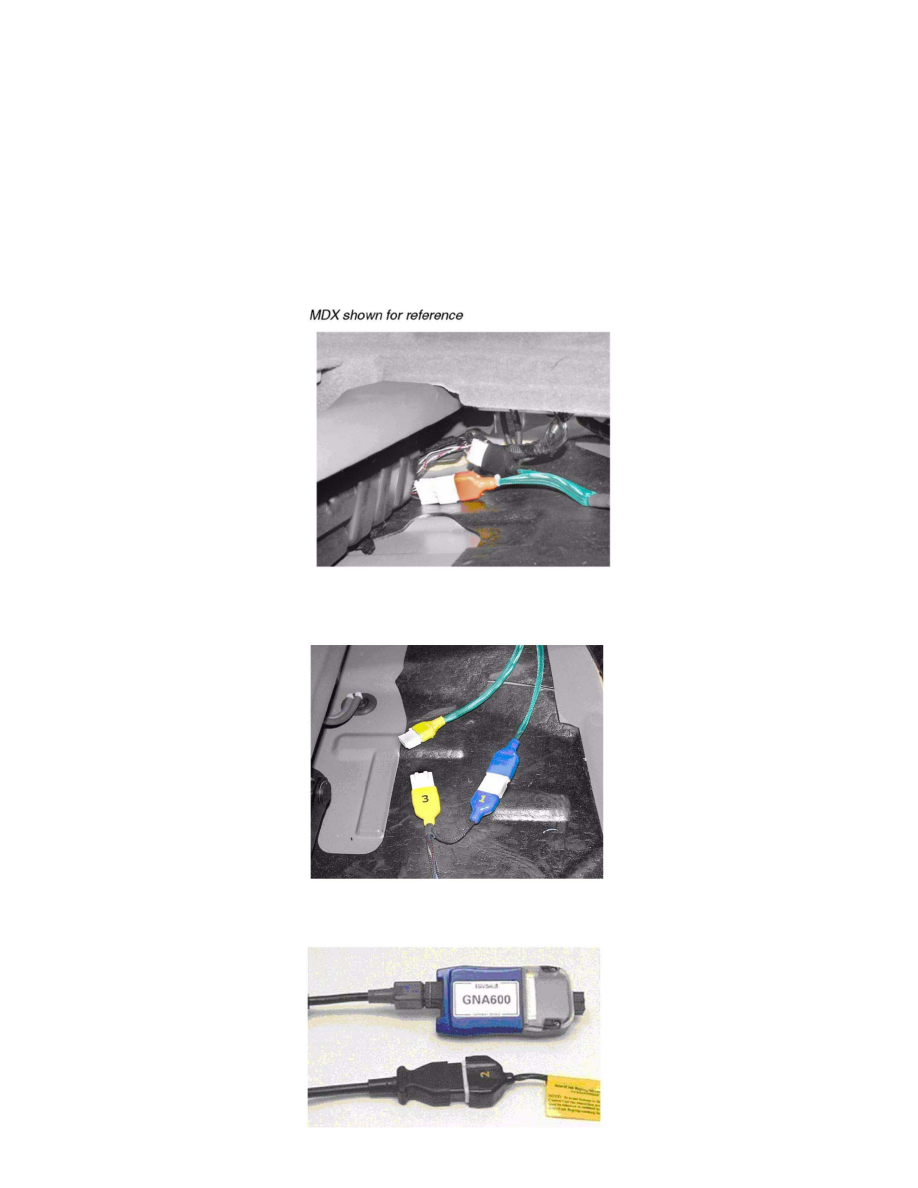
10.
Make sure the ignition switch is turned to LOCK (0). Locate and disconnect the AcuraLink 5P connector.
NOTE:
The AcuraLink update software shows the connector location on the workstation screen.
11.
Connect the black connector of the AcuraLink reprogramming cable adapter to the 5P connector (with female terminals) on the vehicle, then
connect the orange connector to the other 5P connector.
12.
Connect the blue No.1 connector of the AcuraLink reprogramming cable to the blue connector of the reprogramming cable adapter.