
MDX V6-3.7L (2007)
Timing Belt: Service and Repair
Timing Belt Installation
Timing Belt Installation
NOTE: The following is the installation procedure for a used belt. If you are installing a new belt, refer to the timing belt replacement procedure.
1. Clean the timing belt pulleys, timing belt guide plate, and the upper and lower covers.
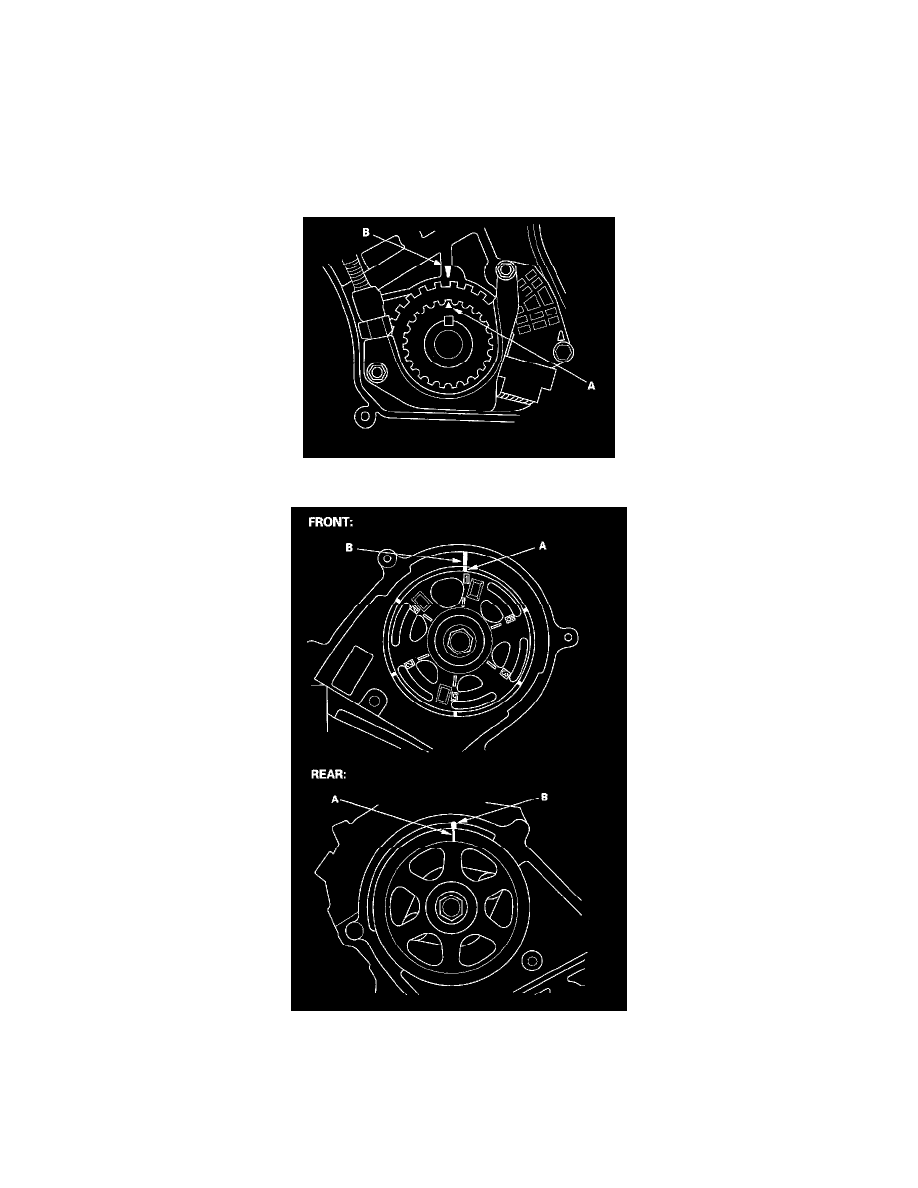
2. Set the timing belt drive pulley to top dead center (TDC) by aligning the TDC mark (A) on the tooth of the timing belt drive pulley with the
pointer (B) on the oil pump.
3. Set the camshaft pulleys to TDC by aligning the TDC marks (A) on the camshaft pulleys with the pointers (B) on the back covers.
4. Loosely install the idler pulley with a new idler pulley bolt so the pulley can move but does not come off.
5. If the auto-tensioner has extended and the timing belt cannot be installed, do the timing belt replacement procedure.
6. Install the timing belt in a counterclockwise sequence starting with the drive pulley. Take care not to damage the timing belt when installing it.
-
1 Drive pulley (A)
-
2 Idler pulley (B)
-
3 Front camshaft pulley (C)
-
4 Water pump pulley (D)