
MDX V6-3.7L (2007)
7. Enter the number of cylinders on the OTC tester.
8. Start the engine, set the parking brake to turn off the DRL (daytime running lights), and turn off all other electrical accessories.
9. Press the CHARGING SYSTEM TEST button.
10. Raise and hold the engine speed at 2,000 rpm until RUN AT IDLE appears on the display.
NOTE:
Stand back from the battery, and do not place any objects on top of the OTC tester; it gets hot during testing.
11. Let the engine idle until TEST COMPLETE appears on the display.
12. Press CONTINUE to see the results, and write them down. The first screen lists the REGULATOR VOLTS. Press CONTINUE again to list the
PEAK AMPS.
13. Refer to the AMPERAGE LOAD SPECIFICATIONS table, and compare the vehicle results against the listed amperage value.
Is the vehicle amperage (PEAK AMPS) equal to or greater than the value listed in the AMPERAGE table?
Yes - Go to step 14.
No - Replace the alternator, and retest.
14. Check the regulator voltage you wrote down in step 12.
^
If it's between 13.5 and 15.1 V, the alternator is OK. Continue with normal troubleshooting.
^
If it's not between 13.5 and 15.1 V, replace the alternator, and retest.
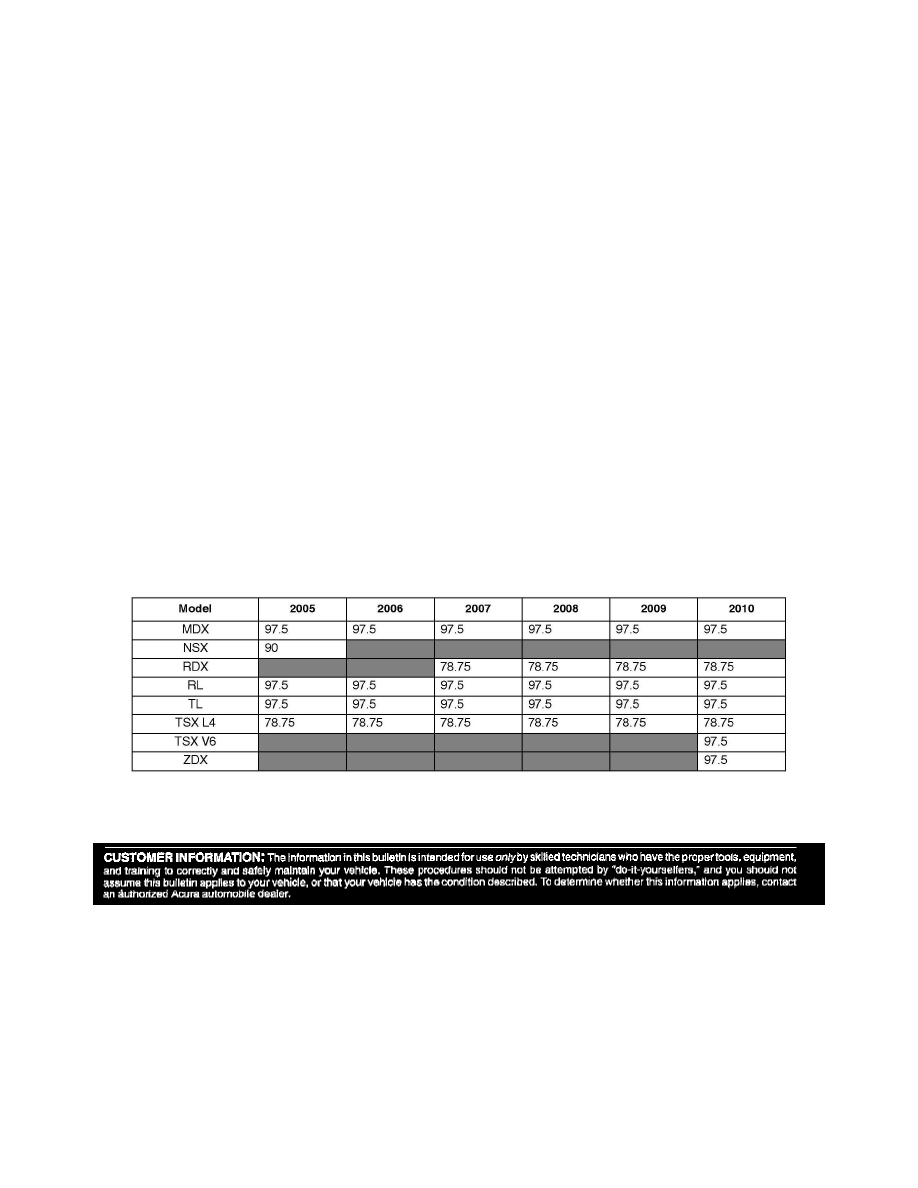
AMPERAGE LOAD SPECIFICATIONS
NOTE:
The amperage values listed below are used for testing purposes and represent 75% of the alternator's maximum output.
Disclaimer