
MDX V6-3.7L (2007)
Transmission Cooler: Procedures
ATF Cooler Cleaning
Special Tools Required
^
ATF cooler cleaner GHTTTCF6H
^
Magnetic nonbypass spin-on filter GTHGNBP2
These special tools are available through the American Honda Tool and Equipment Program 1-888-424-6857.
Before installing an overhauled or remanufactured automatic transmission, you must thoroughly clean the ATF cooler to prevent system
contamination. Failure to do so could cause a repeat automatic transmission failure.
The cleaning procedure involves heated ATF-Z1 delivered under high pressure (100 psi). Check the security of all hoses and connections. Always
wear safety glasses or a face shield, along with gloves and protective clothing. If you get ATF in your eyes or on your skin, rinse with water
immediately.
WARNING:
^
Improper use of the ATF cooler cleaner can result in burns and other serious injuries.
^
Always wear eye protection and protective clothing, and follow all instructions in this manual.
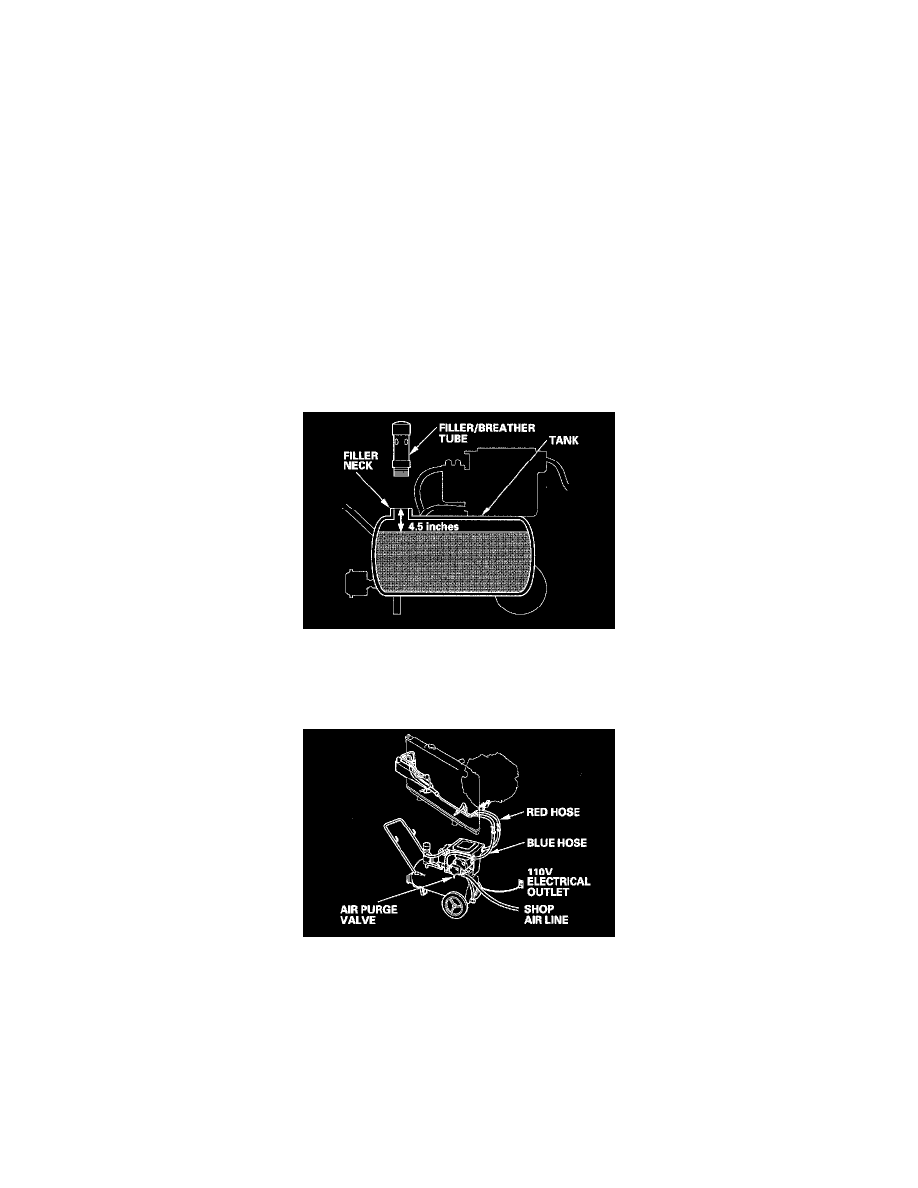
1. Check the fluid in the cooler cleaner tank. (The fluid level should be 4.5 inches from the top of the filler neck.) Adjust the level if needed; do not
overfill. Use only Acura ATF-Z1; do not use any additives.
2. Plug the cooler cleaner into a 110 V grounded electrical outlet.
NOTICE: Make sure the outlet has no other appliances (light fixtures, drop lights, extension cords) plugged into it. Also, never plug the cooler
cleaner into an extension cord or drop light; you could damage the unit.
3. Flip the HEAT toggle switch to ON; the green indicator above the toggle switch comes on. Wait 1 hour for the cooler cleaner to reach its
operating temperature. (The cooler cleaner is ready to use when the temperature gauge reads 140° to 150°F.)
NOTE: If the red indicator above the HEAT toggle switch comes on, the fluid level in the tank is too low for the tank heater to work (see step 1 of
this procedure).
4. Select the appropriate pair of fittings, and attach them to the radiator, to the hoses, or to the banjo bolts for flow through the ATF cooler cleaner.