
MDX V6-3.7L (2007)
Pressure Regulating Solenoid: Service and Repair
A/T Clutch Pressure Control Solenoid Valve C Replacement
A/T Clutch Pressure Control Solenoid Valve C Replacement
1. Make sure you have the anti-theft codes for the audio system and the navigation system (if equipped).
2. Disconnect the negative terminal from the battery, then disconnect the positive terminal.
3. Remove the battery hold-down bracket, and remove the battery cover, battery, and battery tray.
4. Remove the under-hood subfuse box from its bracket, and remove the bracket from the battery base.
5. Remove the intake air duct and air cleaner housing.
6. Remove the battery base and battery base bracket.
7. Disconnect the A/T clutch pressure control solenoid valve C connector.
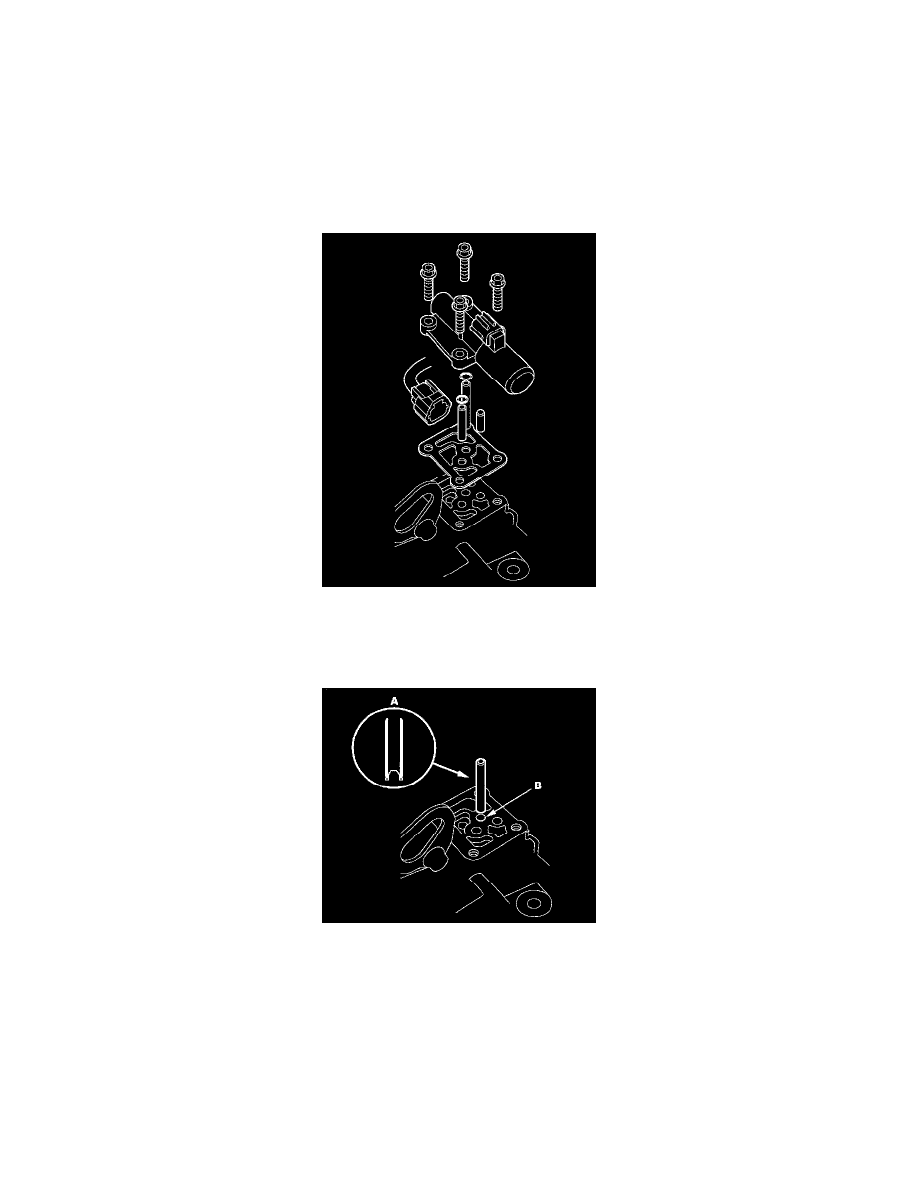
8. Remove A/T clutch pressure control solenoid valve C.
9. Remove the ATF joint pipes, O-rings, ATF pipe, and gasket.
10. Clean the mounting surface and the fluid passage of the solenoid valve body and transmission housing.
11. Install the 8 x 53 mm ATF joint pipe (A) with the filter end into its mounting hole (B).
12. Check the height (A) of the 8 x 53 mm ATF joint pipe (B) between the top (C) of the pipe and solenoid valve body mounting surface (D). The
height is about 7 mm (0.3 in.) If the height is over 7 mm (0.3 in.) push the pipe until it bottoms in the accumulator body.