
MDX V6-3471cc 3.5L (2002)
1.
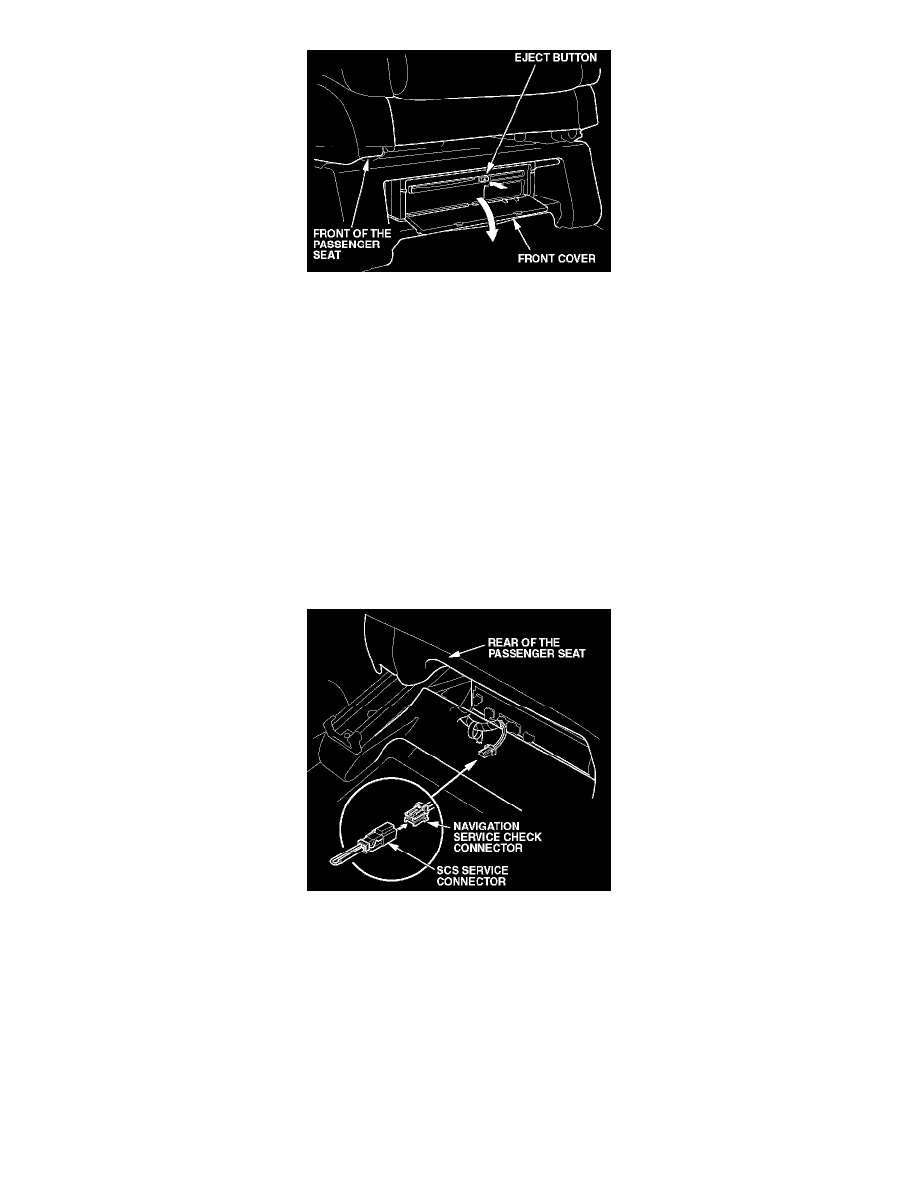
Slide the front passenger's seat to the rear.
2.
Turn the ignition switch to ON (II).
3.
Open the front cover of the navigation unit.
4.
Press the EJECT button, and remove the customer's DVD-ROM. See if CD is 2.05a or earlier. If it is not, the update is not needed. If it is 2.05a or
earlier, go to step 5.
5.
Insert the patch disk with the writing side up. Close the front cover.
6.
Check that the Navigation screen goes black for several seconds.
^
If a "DVD Read Error" message appears, go to step 7.
^
If the screen displays an "Updating Software" load progress bar, the system is operating properly. Go to step 14.
7.
Turn off the ignition switch, and slide the passenger's seat forward.
8.
Remove the navigation unit cover and attach the SCS service connector to the navigation service check connector (located behind the navigation
unit).
9.
Turn the ignition switch to ON (II).
10.
Verify that the "Diagnosis" menu for the picture diagnosis starts up and then changes to the "System Links" menu. Touch the "Return" icon on the
screen to access the "Diagnostic" menu.
11.
From the "Diagnostic" menu, touch the "Unit Check" icon.
12.
From the "Unit Check" menu, touch the "Force Download" icon.
NOTE:
Do not touch any other "Diagnostic" menu icons; doing so could result in the loss of the customer's personal data.