
MDX V6-3471cc 3.5L (2002)
Headliner: Service and Repair
Headliner Removal/Installation
NOTE:
-
When prying with a flat-tip screwdriver, wrap it with protective tape to prevent damage.
-
Take care not to bend and scratch the headliner.
-
Be careful not to damage the dashboard and other interior trim.
1. Remove these items
-
Front door opening trim, both sides as necessary
-
A-pillar trim, both sides
-
Rear door opening trim, both sides as necessary
-
Front seat belt upper anchor bolt, both sides
-
B-pillar upper trim, one side
2. Remove these items
-
Second row seat belt upper anchor bolt, both sides
-
C-pillar trim, one side
-
Third row seat belt upper anchor bolt, both sides
-
D-pillar trim, both sides
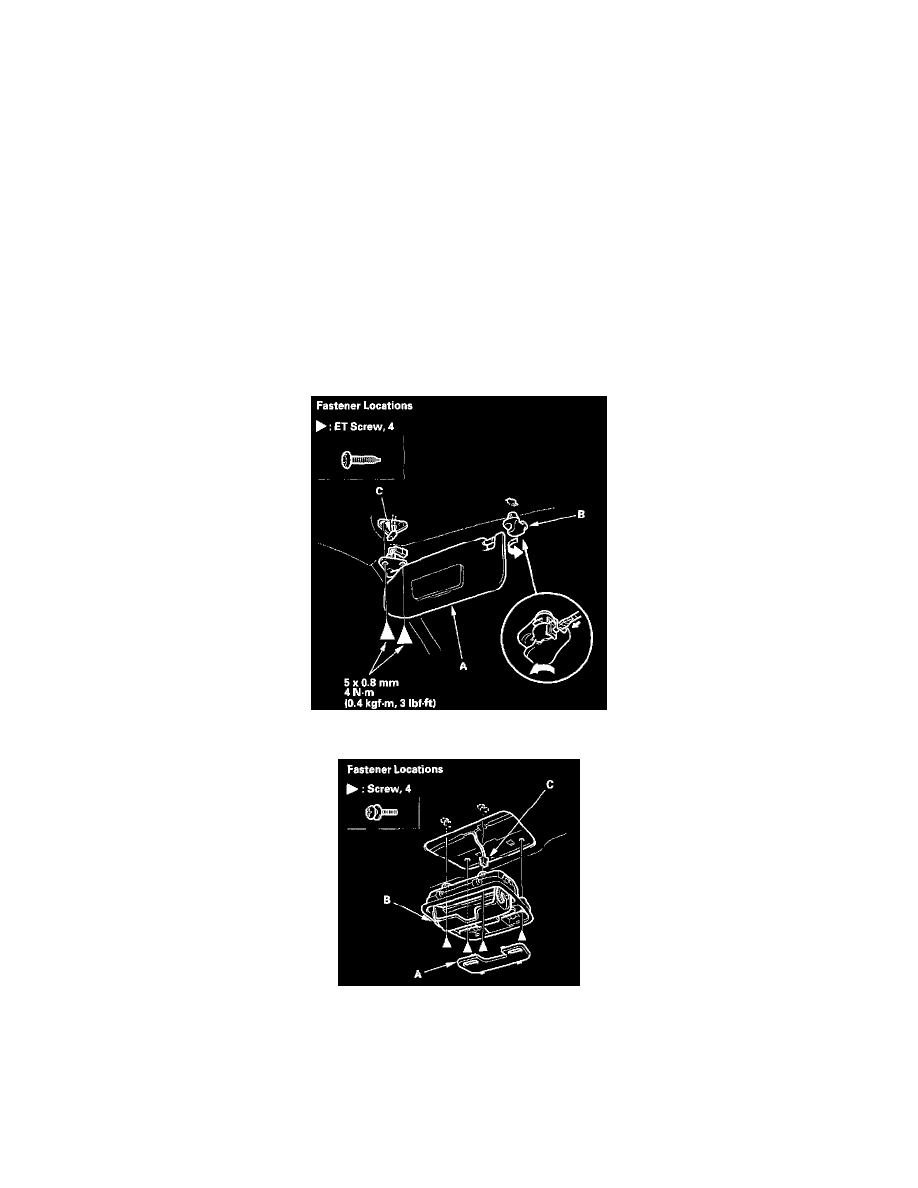
3. Remove the ET screws, then remove the sunvisor (A) and holder (B) from each side. Disconnect the vanity mirror light connectors (C).
4. Remove the roof console.
1. Remove the lens (A).
2. Remove the screws.
3. Pull out the roof console (B), and disconnect the front individual map light connector (C).