
MDX V6-3471cc 3.5L (2002)
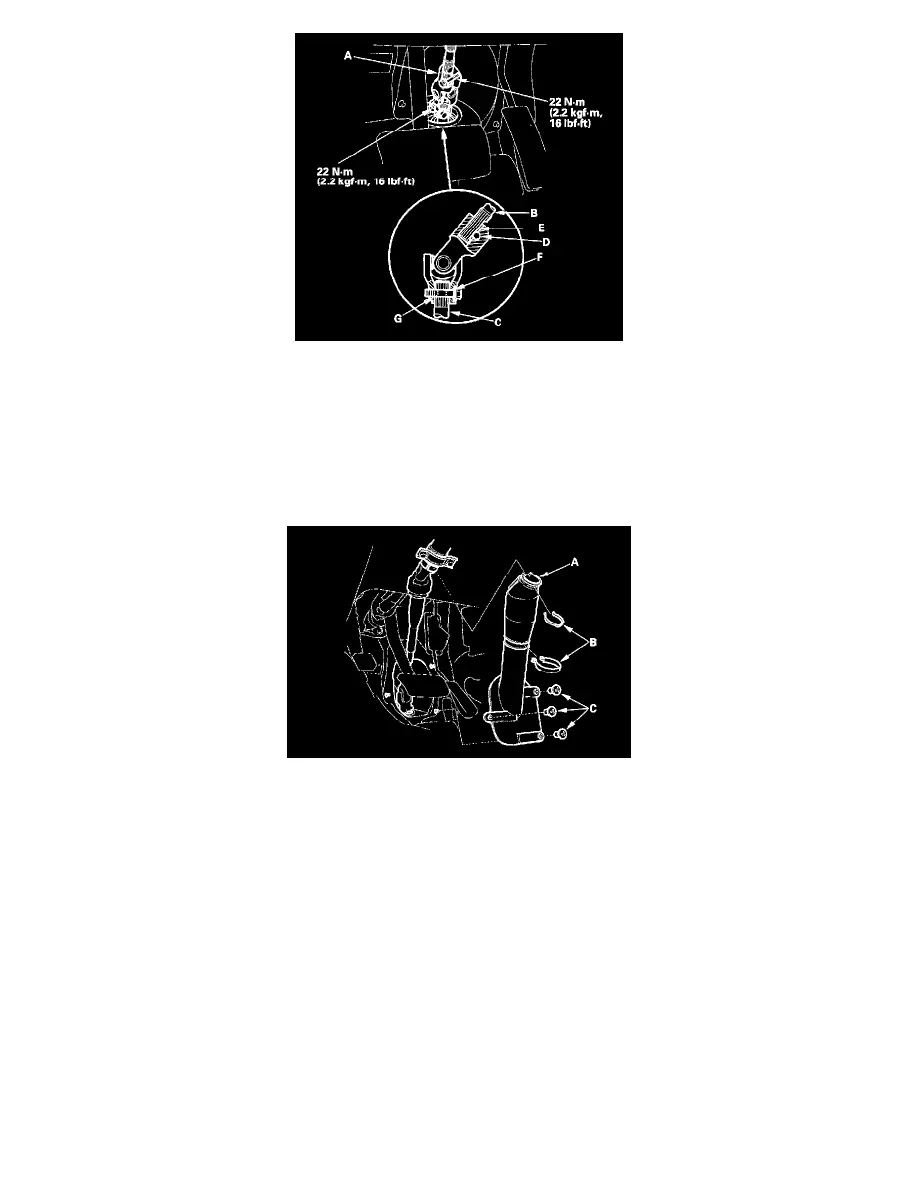
25. Center the steering rack within its stroke, then install the steering joint (A), and reconnect the steering shaft (B) and pinion shaft (C). Make sure the
steering joint is connected as follows:
^
Insert the upper end of the steering joint onto the steering shaft (line up the bolt hole (D) with the flat portion (E) on the shaft).
^
Slip the lower end of the steering joint onto the pinion shaft (line up the bolt hole (F) with the groove (G) around the shaft), and loosely install
the lower joint bolt. Be sure that the lower joint bolt is securely in the groove in the pinion shaft.
^
Pull on the steering joint to make sure that the steering joint is fully seated. Then install the upper joint bolt and tighten it.
26. Center the cable reel first by rotating it clockwise until it stops. Then rotate it counterclockwise (about two and half turns) until the arrow mark
on the label points straight up. Reinstall the steering wheel.
27. Install the steering joint cover (A) with the clamps (B)and clips (C).
28. Install the front wheels.
29. Connect the battery cable.
30. Fill the system with power steering fluid, and bleed air from the system.
31. After installation, perform the following checks.
^
Start the engine, allow it to idle, and turn the steering wheel from lock-to-lock several times to warm up the fluid. Check the gearbox for leaks.
^
Adjust the front toe.
^
Check the steering wheel spoke angle. Adjust by turning the right and left tie-rods equally, if necessary.