
MDX V6-3471cc 3.5L (2002)
Control Arm: Service and Repair
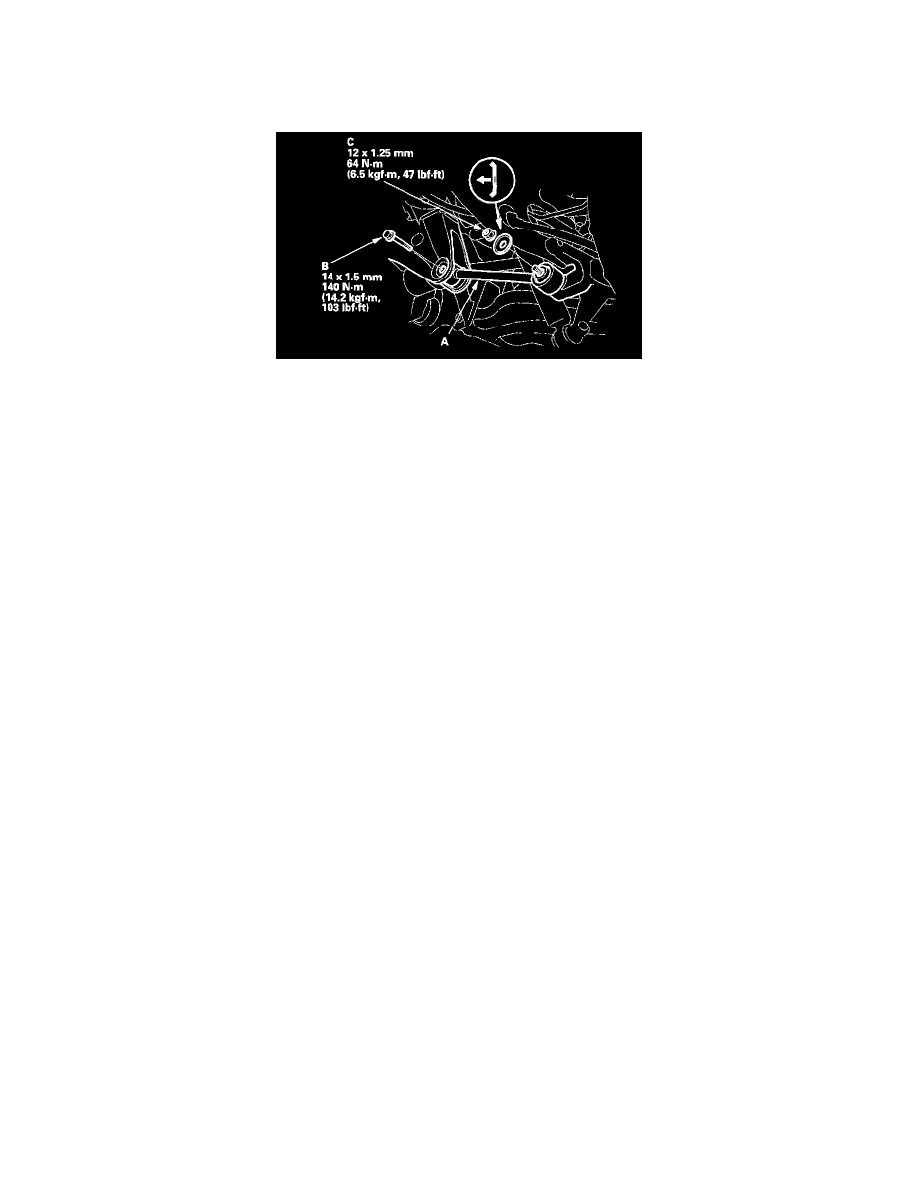
Lower Arm A
Replacement
1. Raise the rear of the vehicle, and make sure it is securely supported. Remove the rear wheels.
2. Remove lower arm A mounting bolt (B).
3. Remove lower arm A mounting nut (C).
4. Remove lower arm A from the vehicle.
5. Install lower arm A in the reverse order of removal, and note these items:
^
Tighten all mounting hardware to the specified torque values.
^
Before installing the wheel, clean the mating surfaces of the brake disc/drum and the inside of the wheel.
^
Check the rear wheel alignment, and adjust it if necessary.