
MDX V6-3471cc 3.5L (2002)
Transmission Cooler: Service and Repair
ATF Cooler Flushing
Flushing
Special Tools Required
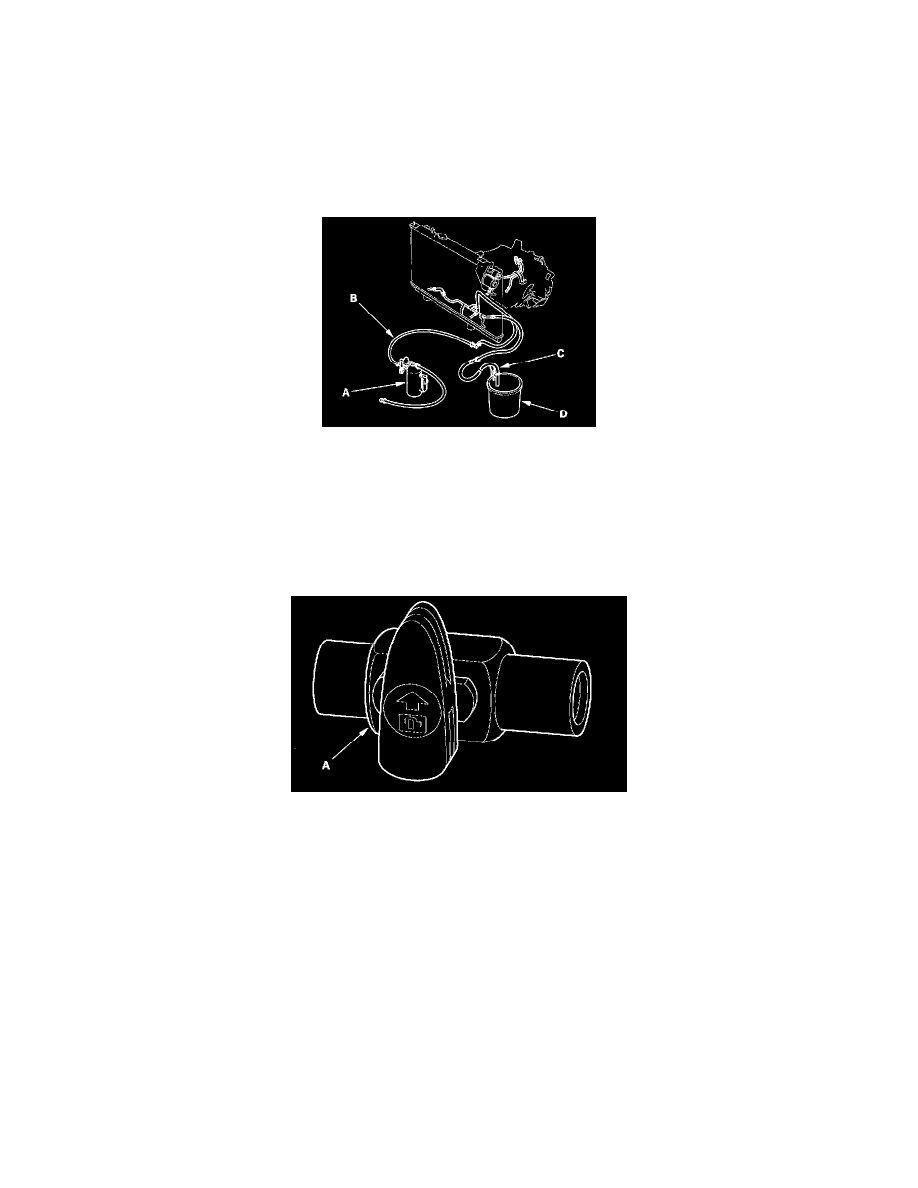
Commercially Available Transmission Cooler Flusher Kent-Moore J38405-A or equivalent
This procedure should be performed before reinstalling the transmission.
1. Check the equipment for wear and cracks before using it. Replace any worn or cracked components.
2. Using the measuring cup, fill the flusher (A) with 21 ounces (approximately 2/3 full) of biodegradable flushing fluid (J35944-20). Do not
substitute with any other fluid. Follow the handling procedure on the fluid container.
3. Secure the flusher filler cap, and pressurize the flusher with compressed air to 550 - 829 kPa (5.6 - 8.45 kgf/cm2, 80 - 120 psi). The air line
should be equipped with a water trap to ensure a dry air system.
4. Hang the flusher under the vehicle.
5. Attach the flusher discharge hose (B) to the return line of the ATF cooler using a clamp.
6. Connect the drain hose (C) to the inlet line on the ATF cooler using a clamp. Securely clamp the opposite end of the drain hose to a bucket (D) or
floor drain.
7. With the water and air valves (A) off, attach the water and air supplies to the flusher. (Hot water if available.)
8. Turn on the water valve for 10 seconds. If water does not flow through the cooler, it is completely plugged, cannot be flushed, and must be
replaced.
9. Depress the trigger to mix the flushing fluid into the water flow. Use the wire clip to hold the trigger down.
10. While flushing with the water and flushing fluid for 2 minutes, turn the air valve on for 5 seconds every 15 - 20 seconds to create a surging
action.
AIR PRESSURE: MAX 845 kPa (8.45 kgf/cm2, 120 psi)
11. Turn the water valve off. Release the trigger, then reverse the hoses to the cooler so you can flush in the opposite direction. Repeat steps 8 through
10.
12. Release the trigger, and rinse the cooler with water for 1 minute.
13. Turn the water valve and the water supply off.
14. Turn the air valve on for 2 minutes, or until no moisture is visible leaving the drain hose. Residual moisture in the cooler or lines can damage the
transmission.
15. Remove the flusher from the cooler line. Attach the drain hose to an ATF container.
16. Install the transmission, and leave the drain hose attached to the cooler line.
17. Make sure the transmission is in the [P] position. Fill the transmission with ATF, and run the engine for 30 seconds or until approximately 0.95 L
(1.0 US qt., 0.8 Imp qt.) is discharged.
18. Remove the drain hose, and reconnect the cooler return hose to the transmission.
19. Refill the transmission with ATF to the proper level.