
NSX V6-3.0L DOHC (1991)
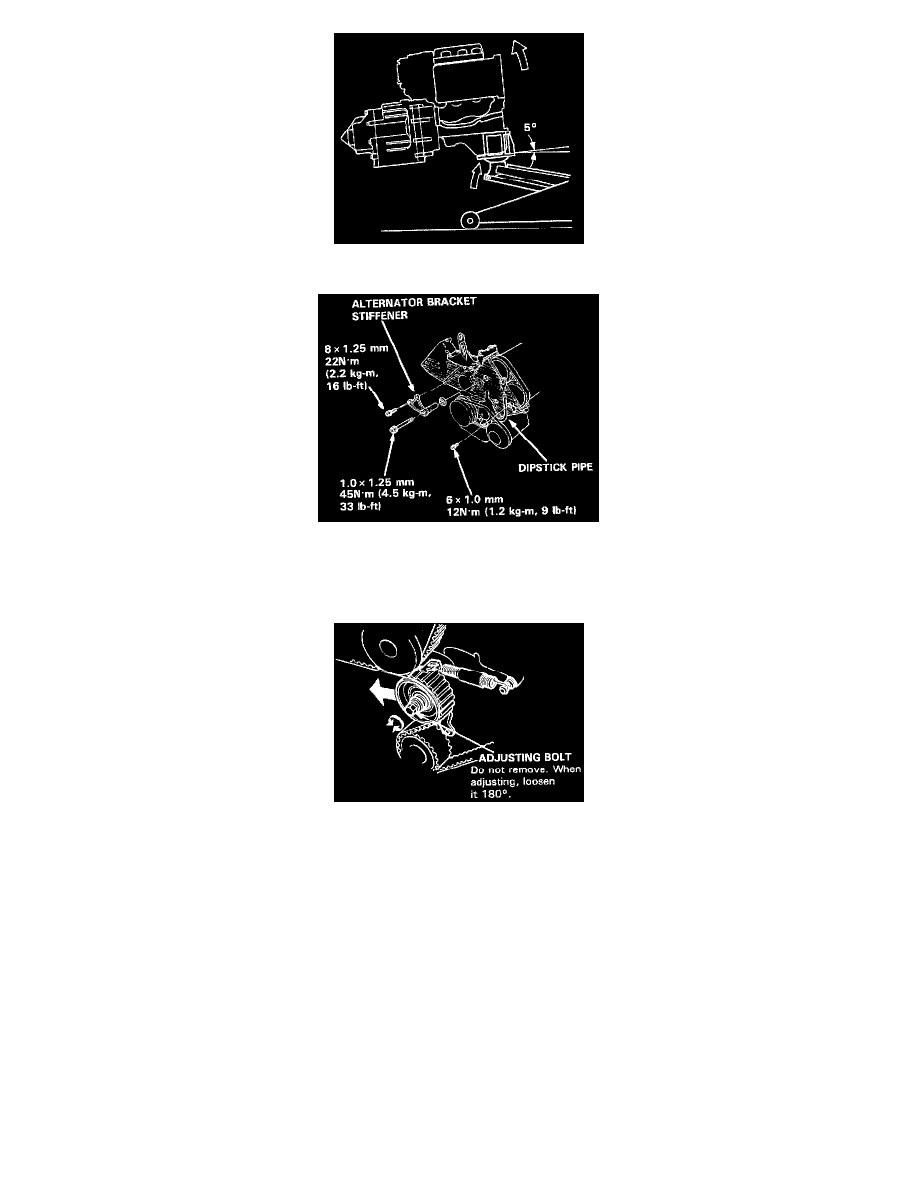
19. Install a brace under the engine, then tilt the engine approximately 5° using a jack.
20. Remove the alternator bracket stiffener.
21. Remove the air conditioning (A/C) compressor adjusting pulley and belt.
22. Remove the dipstick pipe mounting bolt, then remove the front and rear timing belt middle covers.
23. Remove the crankshaft pulley, then remove the timing belt lower cover.
24. Loosen the timing belt adjusting bolt 18° and release the belt tension.
NOTE: Push the tensioner to release tension from the belt, then retighten the adjusting bolt.
25. Remove the timing belt from the pulleys.
CAUTION: Do not crimp or bend the timing belt more than 90° or less than 25 mm (1 in.) in diameter.