
RDX L4-2.3L Turbo (2008)
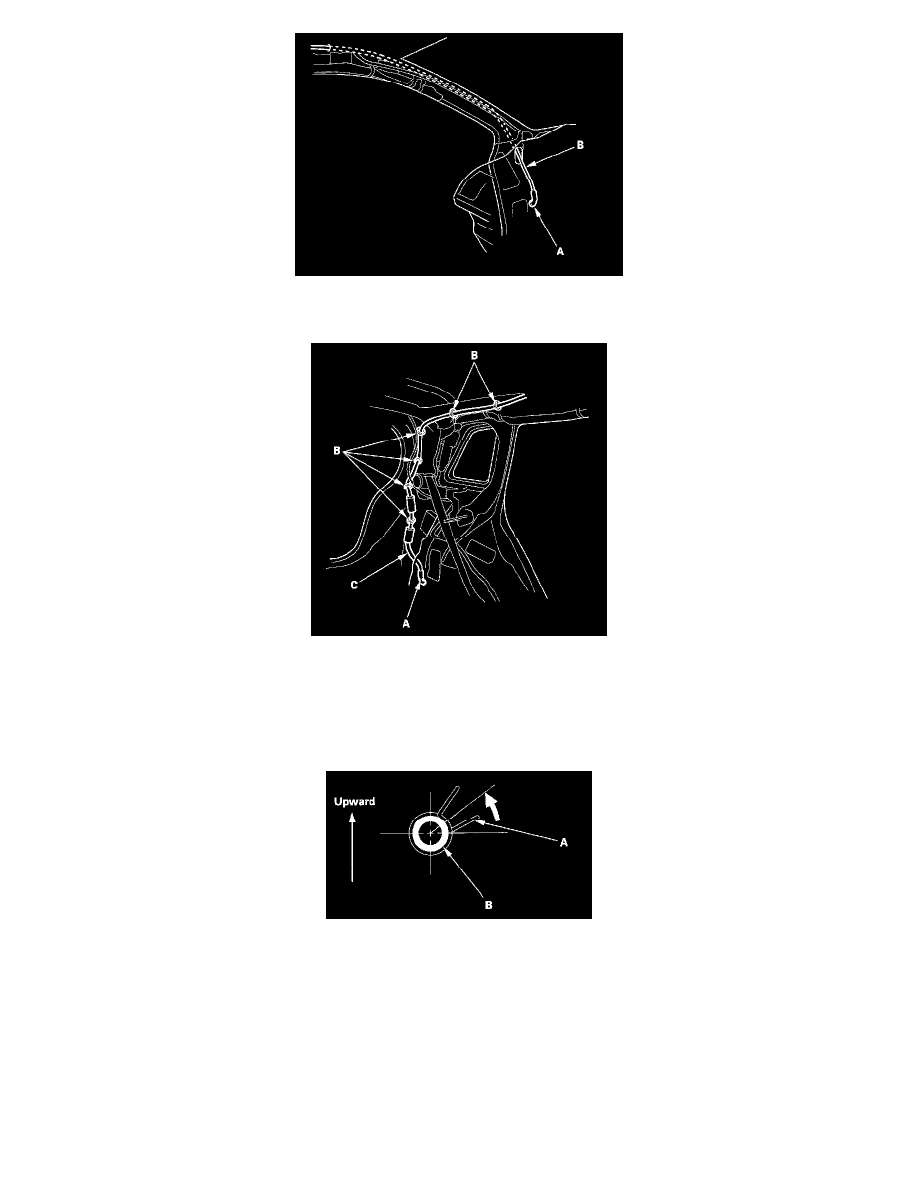
7. To remove a front drain valve (A) from the body, remove the kick panel, left or right, and the driver's dashboard undercover or passenger's
dashboard undercover. Remove the drain tube by pulling it down out of the A-pillar.
8. To remove a rear drain valve (A) from the body, remove these parts:
-
Cargo area floor.
-
Quarter pillar trim panel.
-
Cargo area side trim panel
9. Detach the clips (B), then remove the tube (C) by pulling it down out of the pillar.
10. Install the frame and drain tube in the reverse order of removal, and note these items:
-
Before installing the frame, clear the drain tubes and drain valves using compressed air.
-
When installing, tie a string to the top end of the new drain tube and pull it up into the roof.
-
Check the frame seal.
-
Clean the surface of the frame.
-
When installing the frame, first attach the rear hooks into the body holes.
-
Make sure the connectors are plugged in properly.
-
When connecting the drain tube, slide it over the frame nozzle at least 10 mm (0.39 in.).
-
Install the tube clip (A) on the drain tube (B) as shown.
11. Check for water leaks. Let the water run freely from a hose without a nozzle. Do not use a high-pressure spray.