
RDX L4-2.3L Turbo (2008)
15. Check the fuel quick-connect fitting for dirt, and clean it if needed.
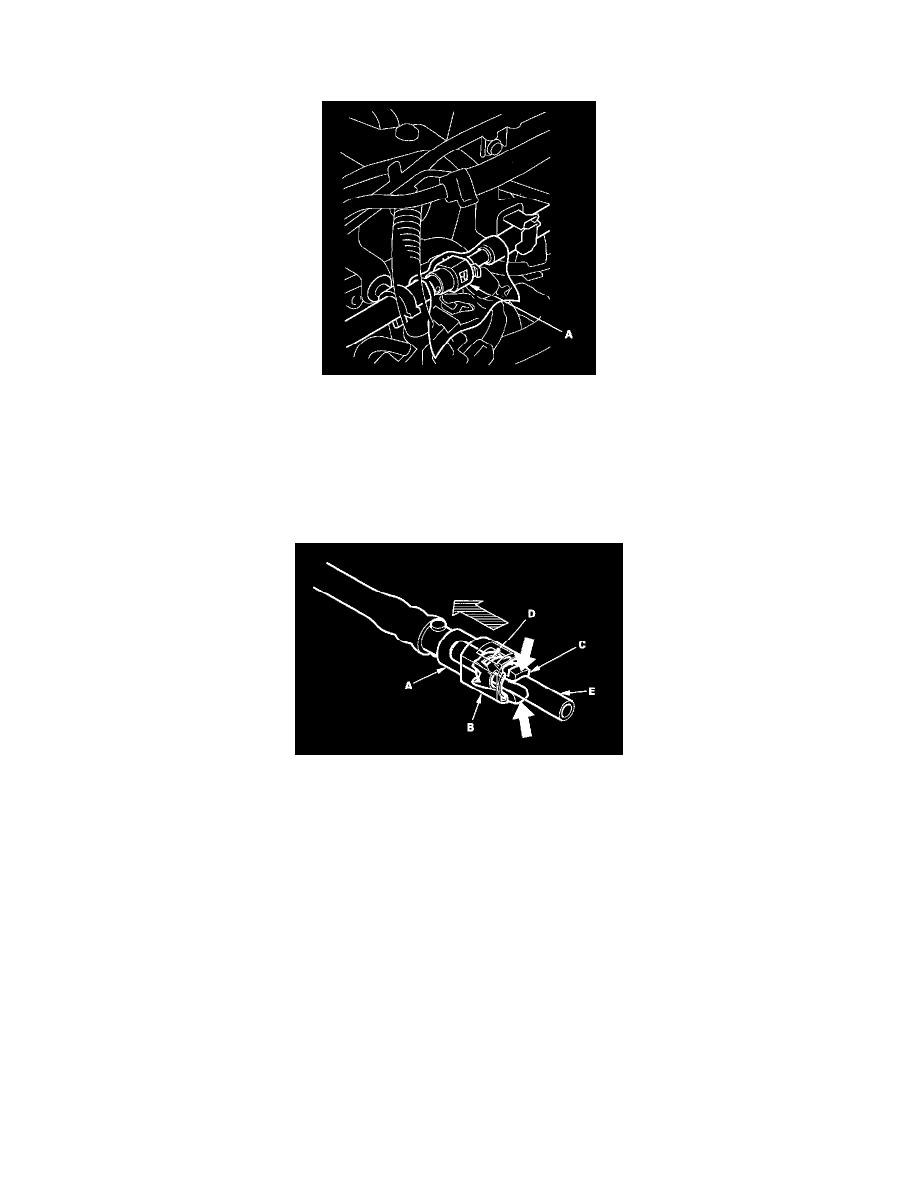
16. Place a rag or shop towel over the quick-connect fitting (A).
17. Disconnect the quick-connect fitting (A): Hold the connector (B) with one hand, and squeeze the retainer tabs (C) with the other hand to release
them from the locking tabs (D). Pull the connector off.
NOTE:
-
Be careful not to damage the line (E) or other parts.
-
Do not use tools.
-
If the connector does not move, keep the retainer tabs pressed down, and alternately pull and push the connector until it comes off easily.
-
Do not remove the retainer from the line; once removed, the retainer must be replaced with a new one.
18. After disconnecting the quick-connect fitting, check it for dirt or damage.
19. Reconnect the negative cable to the battery, then do this:
-
Enter the anti-theft codes for the audio system and the navigation system (if equipped).
-
Set the clock (on vehicles without navigation).
Without the HDS
1. Make sure you have the anti-theft codes for the audio system and the navigation system (if equipped).
2. Remove the driver's dashboard under cover, then remove PGM-FI main relay 2 (FUEL PUMP) (A) from the under-dash fuse/relay box.