
RDX L4-2.3L Turbo (2008)
Timing Chain: Testing and Inspection
Cam Chain Inspection
Special Tools Required
Cam chain inspection gauge 07AAJ-RWCA100
1. Remove the front wheels.
2. Remove the splash shield.
3. Remove four spark plugs.
4. Remove the cylinder head cover.
5. Rotate crankshaft pulley two turns clockwise.
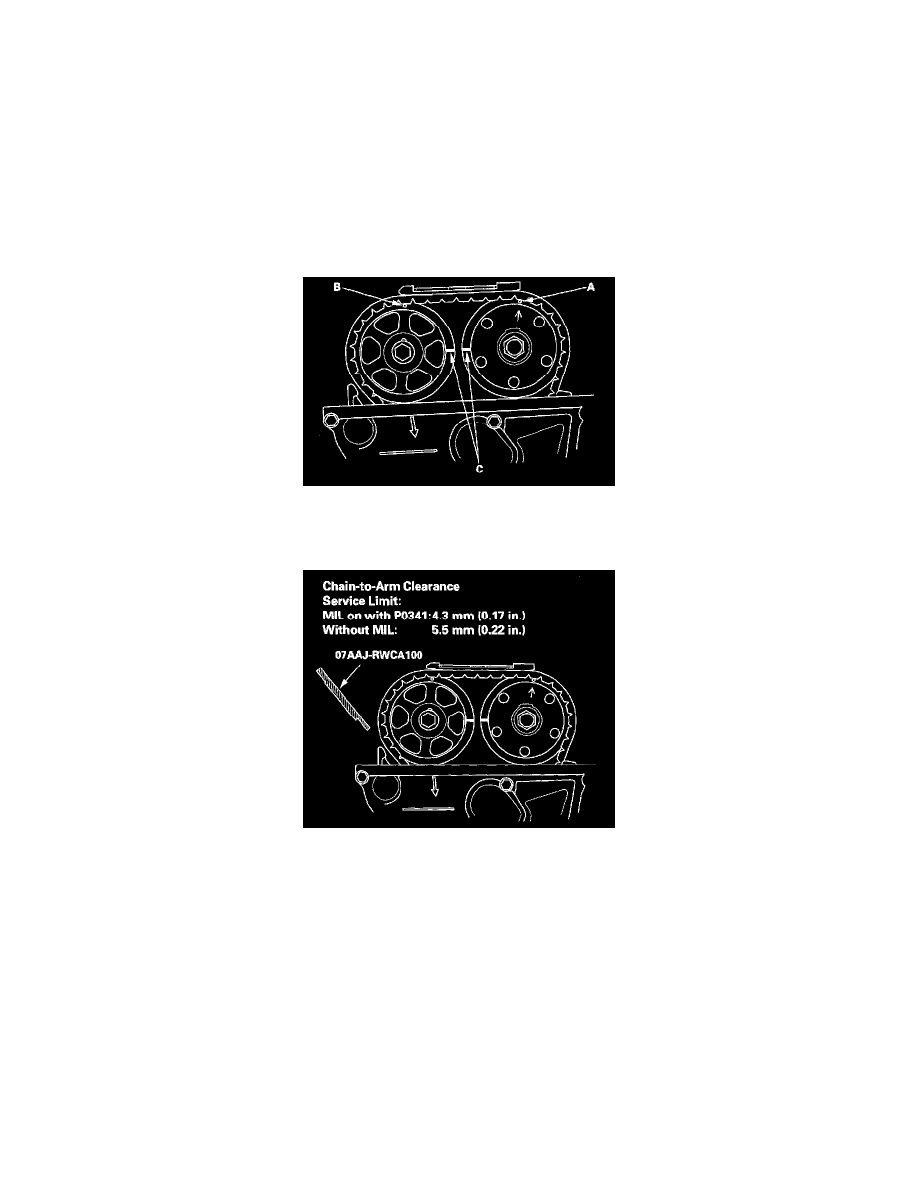
6. Set the No. 1 piston at top dead center (TDC). The punch mark (A) on the variable valve timing control (VTC) actuator and the punch mark (B) on
the exhaust camshaft sprocket should be at the top. Align the TDC marks (C) on the VTC actuator and exhaust, camshaft sprocket.
7. Measure the clearance between the cam chain and the tensioner arm with the cam chain inspection gauge.
^
If the clearance is OK, Go to step 22.
^
If the clearance is more than the service limit, Go to step 8.
8. Remove the cam chain, and check the teeth on the crankshaft sprocket, VTC actuator, and exhaust camshaft sprocket for wear and damage. If any
of them worn or damaged, replace if necessary.
9. Check the oil passage on the auto-tensioner for clog. If the auto-tensioner is clogged, replace it.
10. Remove the power steering (P/S) pump. Do not disconnect the P/S hoses from the pump.
11. Attach the universal eyelet to the drive belt auto-tensioner.
12. Remove the top corner clip from the front grill on both sides. Place the engine support mount pads over the hood edge cushions, and align the pins
with the clip hole. Remove the lids from both side of the cowl cover. Install the engine support hanger (AAR-T-12566), then attach the hook to the
universal eyelet. Tighten the wing nut by hand to lift and support the engine/transmission assembly.
13. Remove the oil pan.
14. Measure the oil pump chain auto-tensioner rod length.