RDX L4-2.3L Turbo (2008)

Fuel Pressure: Testing and Inspection
Fuel Pressure Test
Special Tools Required
-
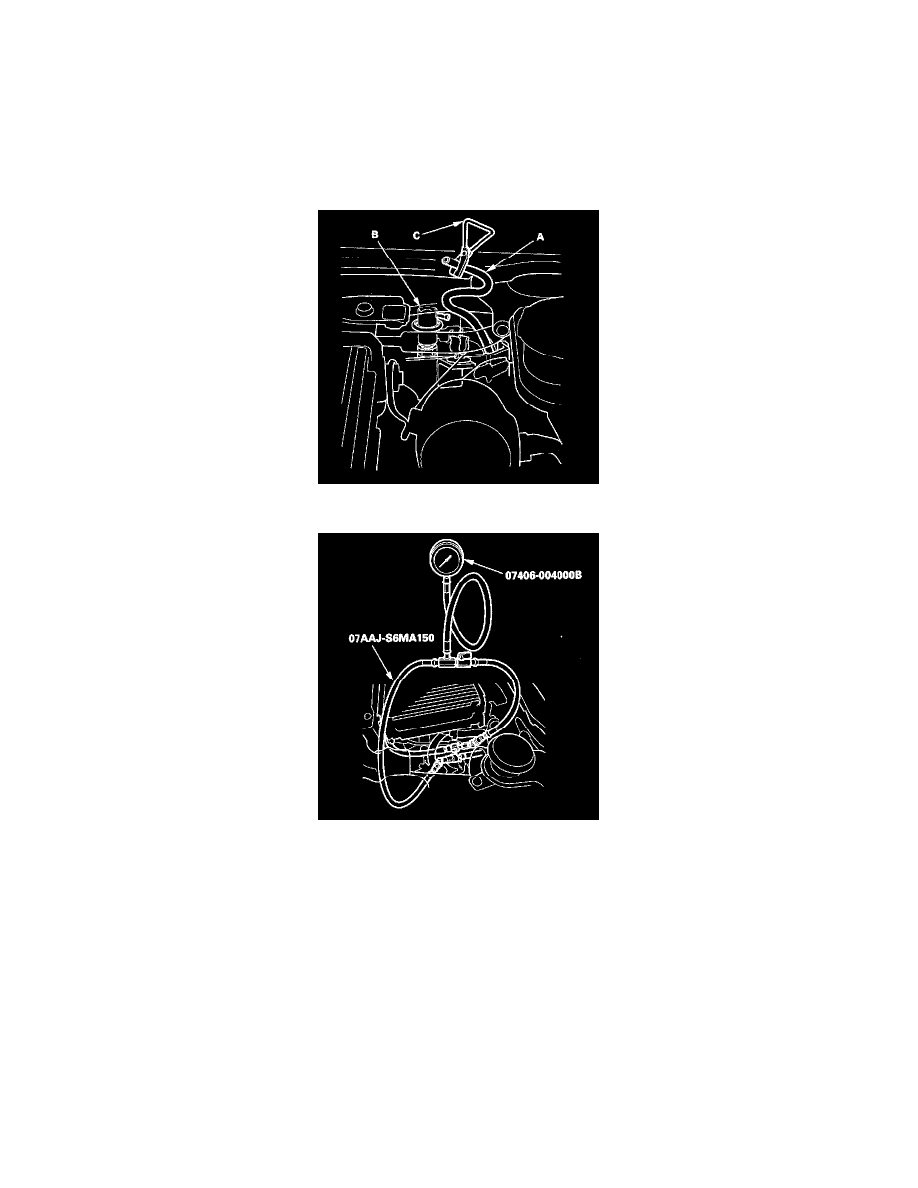
Fuel pressure gauge 07406-004000B
-
Fuel pressure gauge attachment set 07AAJ-S6MA150
1. Relieve the fuel pressure.
2. Disconnect the vacuum hose (A) from the fuel pressure regulator (B), and pinch it closed with a clamp (C).
3. Disconnect the quick-connect fitting. Attach the fuel pressure gauge attachment set and the fuel pressure gauge.
4. Reinstall the intake air duct (airflow tube).
5. Start the engine, and let it idle.
-
If the engine starts, go to step 7.
-
If the engine does not run, go to step 6.
6. Check to see if the fuel pump is running: Listen to the fuel filler port with the fuel fill cap removed. The fuel pump should run for 2 seconds when
the ignition switch is first turned on.
-
If the pump runs, go to step 7.
-
If the pump does not run, refer to the DTC troubleshooting. See: Powertrain Management/Computers and Control Systems/Testing and
Inspection/Diagnostic Trouble Code Descriptions
7. Read the fuel pressure gauge. The pressure should be 320 - 370 kPa (3.3 - 3.8 kgf/sq.cm, 47 - 54 psi).
8. With the engine running, unpinch and reconnect the vacuum hose while you watch the pressure gauge. The pressure should fall when you
connected the hose.
-
If the pressure falls, and the fuel pressure was OK in step 7, the test is complete.
-
If the pressure did not fall, check the vacuum line between the pressure regulator and the intake manifold. If the line is OK, replace the fuel
pressure regulator.
-
If the pressure falls, but the fuel pressure was lower than specified in step 7, check for a clogged fuel filter, and for leaks in the fuel lines.
