RDX L4-2.3L Turbo (2008)

Throttle Body: Removal and Replacement
Throttle Body Removal/Installation
CAUTION: Do not insert your fingers into the installed throttle body when you turn the ignition switch ON (II) or while the ignition switch is
ON (II). If you do, there will be serious injury to your fingers if the throttle valve is activated.
NOTE: If you are replacing or cleaning the throttle body, start at step 1. If you are removing the throttle body, start at step 4.
1. USA, Canada models: Connect the HDS to the DLC while the engine is stopped.
2. USA, Canada models: Select the INSPECTION MENU on the HDS.
3. USA, Canada models: Do the TP POSITION CHECK in the ETCS TEST.
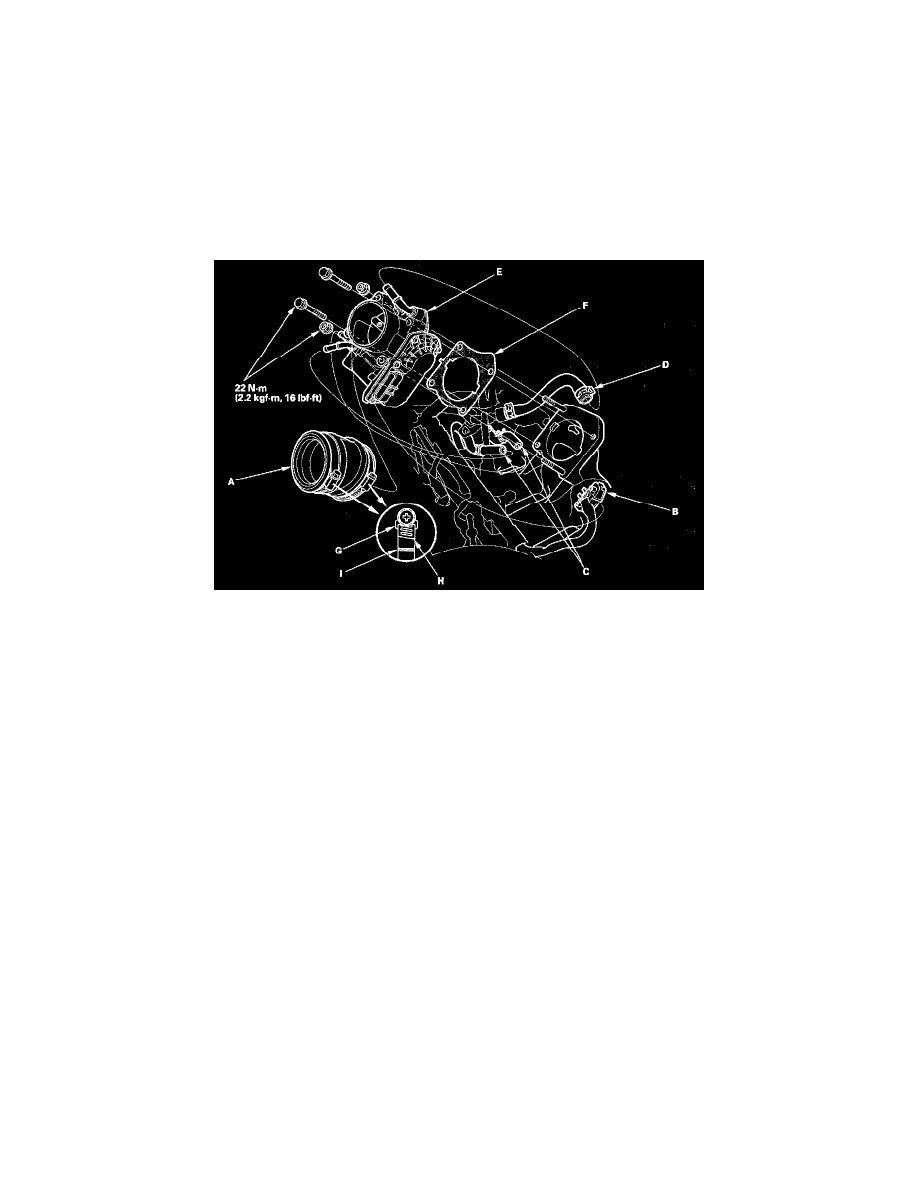
4. Remove the charge air cooler, then remove the intake air duct (charge air cooler outlet tube) (A).
5. Disconnect the throttle body connector (B), the water bypass hoses (C), and the vacuum hose (D).
NOTE: Plug the water bypass hoses after disconnecting them.
6. Remove the throttle body (E).
7. Install the parts in the reverse order of removal with a new gasket (F).
NOTE: When torquing the screw of the hose band (G), align the edge of the hose band (H) with the mark (I) painted on the hose band. If you
tighten the screw over the mark, replace the hose band.
8. Check these items.
-
Do the PCM idle learn procedure after replacing the throttle body.
-
Refill the radiator with engine coolant.
