
RDX L4-2.3L Turbo (2008)
Air Bag Control Module: Service and Repair
SRS Unit Replacement
SRS Unit Replacement
Removal
NOTE: If you are only disconnecting SRS unit connector A, skip step 2.
1. Disconnect the battery negative cable, then wait for 3 minutes before starting work.
2. Disconnect both seat belt tensioner connectors and both seat belt buckle tensioner connectors.
3. Remove the center console.
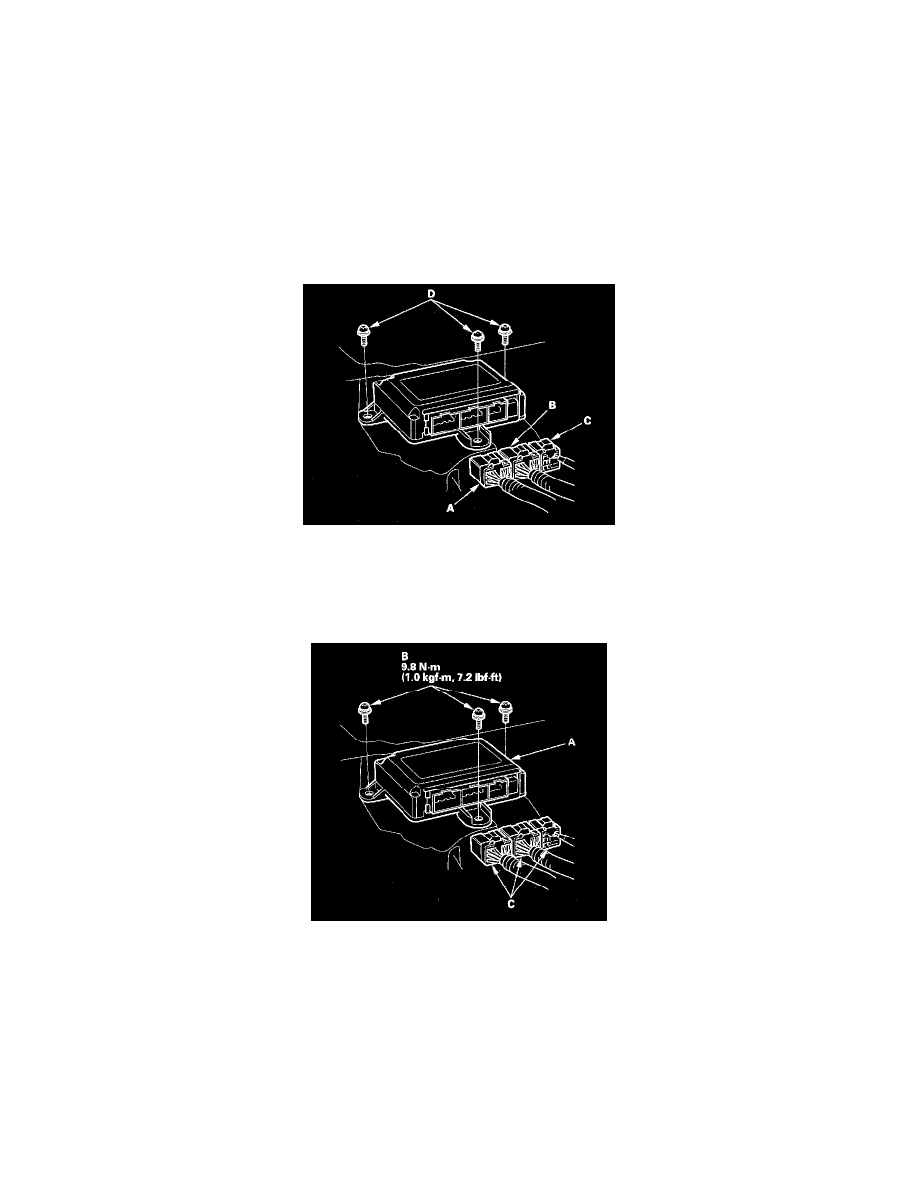
4. Disconnect the SRS unit connector A (28P), SRS unit connector B (28P), SRS unit connector C (16P), and remove the TORX bolts (D), then pull
out the SRS unit.
Installation
1. Install the new SRS unit (A) with TORX bolts (B), then connect the connectors (C) to the SRS unit; push them into position until they click.
NOTE: Be sure the SRS unit is sitting squarely against it's bracket before torquing the TORX bolts.
2. Reconnect both seat belt tensioner connectors and both seat belt buckle tensioner connectors.
3. Reconnect the negative cable to the battery.
4. Calibrate the ODS unit.
5. Do the ODS unit operation check.
6. After installing the SRS unit, confirm proper system operation: Turn the ignition switch ON (II); the SRS indicator should come on for about 6
seconds and then go off.
7. Reinstall all removed parts.