
RDX L4-2.3L Turbo (2008)
Shift Solenoid: Service and Repair
Shift Solenoid Valve Test, Replacement, and Shift Solenoid Wire Harness Replacement
1. Connect the HDS to the DLC (A).
2. Select SHIFT SOLENOID A, B, C, and Din the MISCELLANEOUS TEST MENU on the HDS.
NOTE: If the HDS does not communicate with the PCM, troubleshoot the DLC circuit.
3. Check that shift solenoid valves A, B, C, and D operate with the HDS. A clicking sound should be heard.
^
If a clicking sound is heard, the valves are OK. The test is complete, disconnect the HDS.
^
If no clicking sound is heard, go to step 4, and test the solenoid valves.
4. Make sure you have the anti-theft codes for the audio system and the navigation system (if equipped).
5. Disconnect the negative cable from the battery, then disconnect the positive cable.
6. Remove the battery hold-down bracket, and remove the battery cover, the battery, and the battery tray.
7. Remove the battery base.
8. Remove the intercooler cover, the air cleaner housing, and the intake air duct.
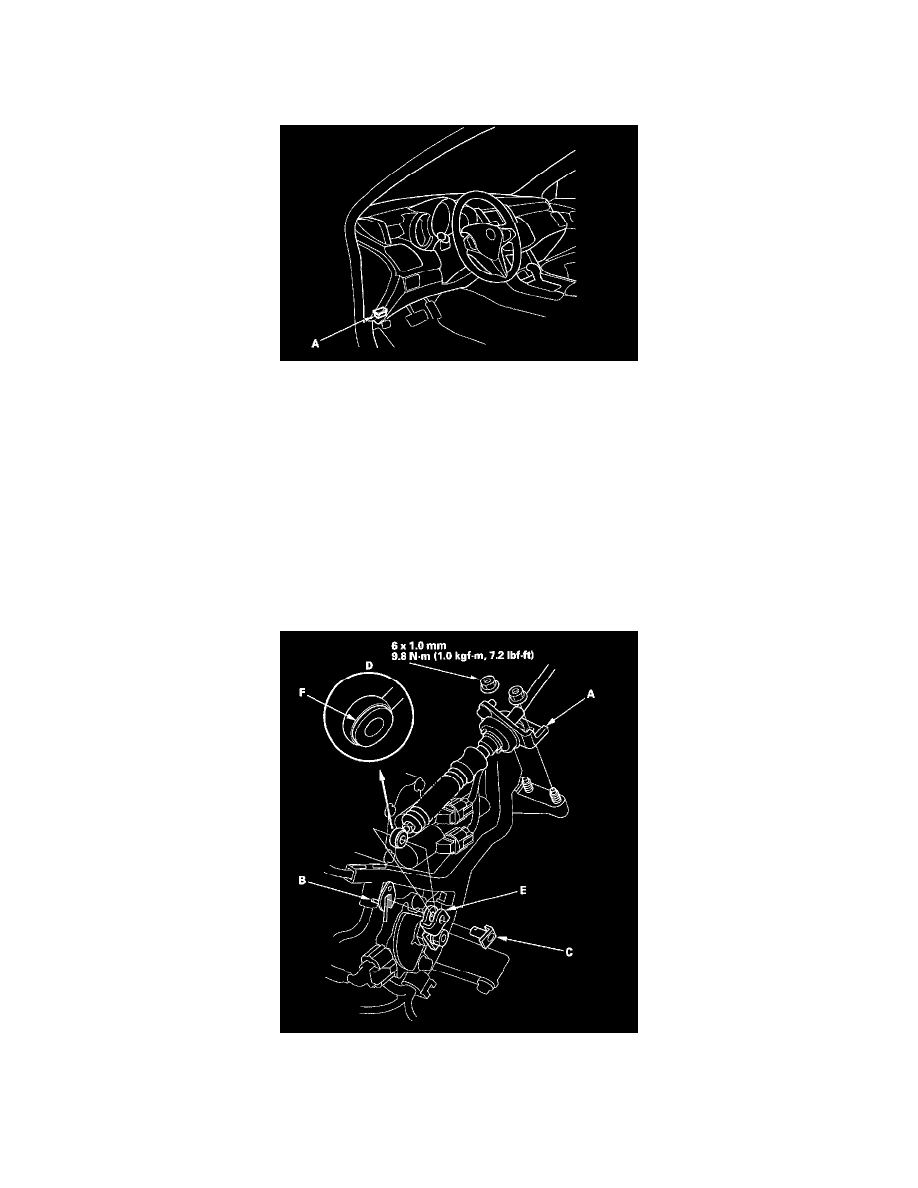
9. Remove the nuts securing the shift cable bracket (A).
10. Remove the spring clip/washer (B) and the control pin (C), then separate the shift cable end (D) from the control lever (E).
11. Check the bushing (F) in the shift cable end for a proper fit and wear. If the bushing is loose or worn, replace the shift cable.
12. Disconnect the input shaft (mainshaft) speed sensor connector (A), output shaft (countershaft) speed sensor connector (B), 3rd clutch transmission
fluid pressure switch connector (C), and ATF temperature sensor connector (D).