
RDX L4-2.3L Turbo (2008)
Fluid - A/T: Service and Repair
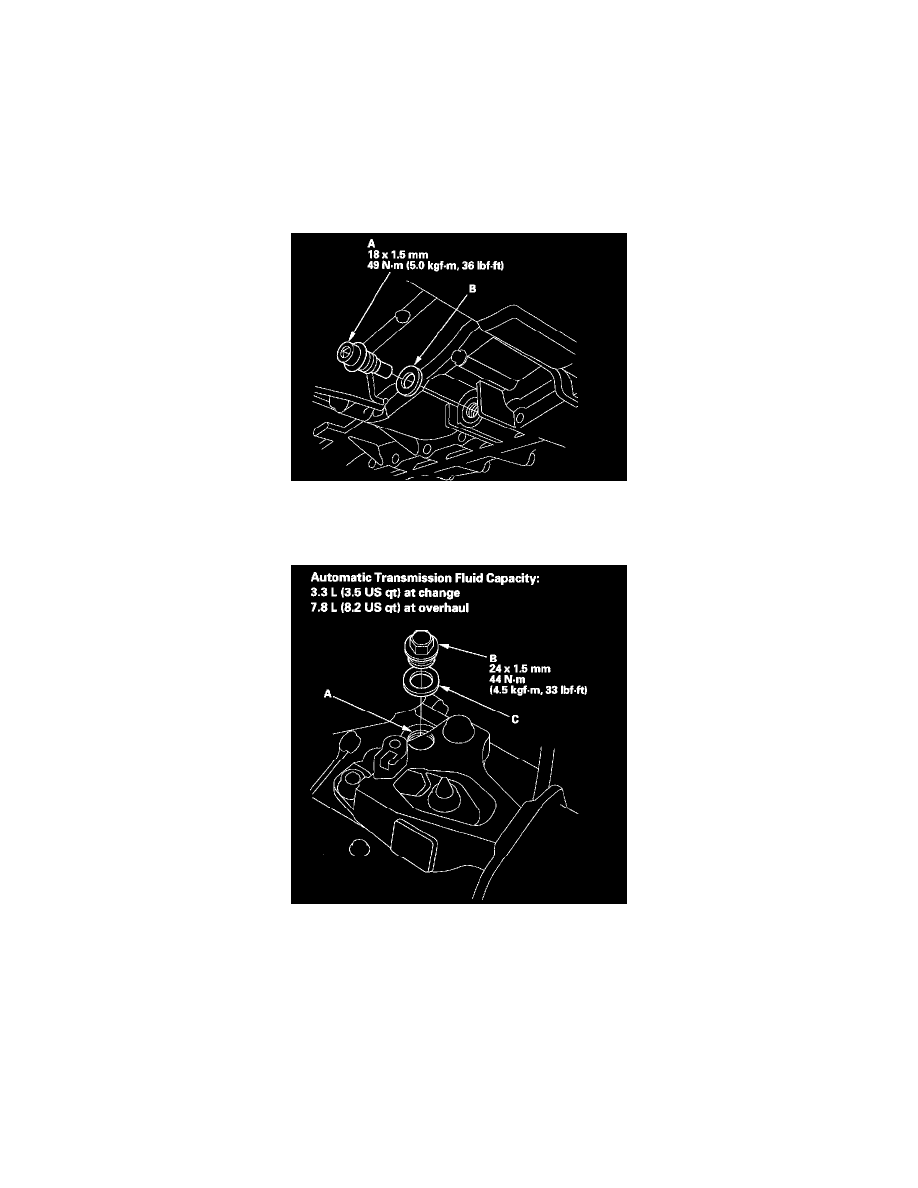
ATF Replacement
ATF Replacement
NOTE: Keep all foreign particles out of the transmission.
1. Warm up the engine to normal operating temperature (the radiator fan comes on), and turn the engine off.
2. Remove the ATF filler bolt and the drain plug (A), and drain the automatic transmission fluid (ATF).
NOTE: If a cooler cleaning is done, refer to ATF Cooler Cleaning.
3. Reinstall the drain plug with a new sealing washer (B).
4. Refill the transmission with the recommended fluid into the filler hole (A). Always use Acura ATF-Z1 Automatic Transmission Fluid (ATF).
Using a non-Acura ATF can affect shift quality.
5. Install the ATF filler bolt (B) and a new sealing washer (C).
6. Check that the fluid level is between the upper mark and lower mark on the dipstick.
7. If the maintenance minder required to replace the ATF, reset the maintenance minder, and this procedure is complete. If the maintenance minder
did not require to replace the ATF, go to step 9 and reset the ATF life with the HDS.
8. Connect the HDS to the DLC (A), and go to the BODY ELECTRICAL. If the HDS does not communicate with the PCM, troubleshoot the DLC
circuit.