
RDX L4-2.3L Turbo (2008)
-
Be sure the convex portion (F) of the left and right clips toward left.
-
Be careful not to touch the windshield where adhesive will be applied.
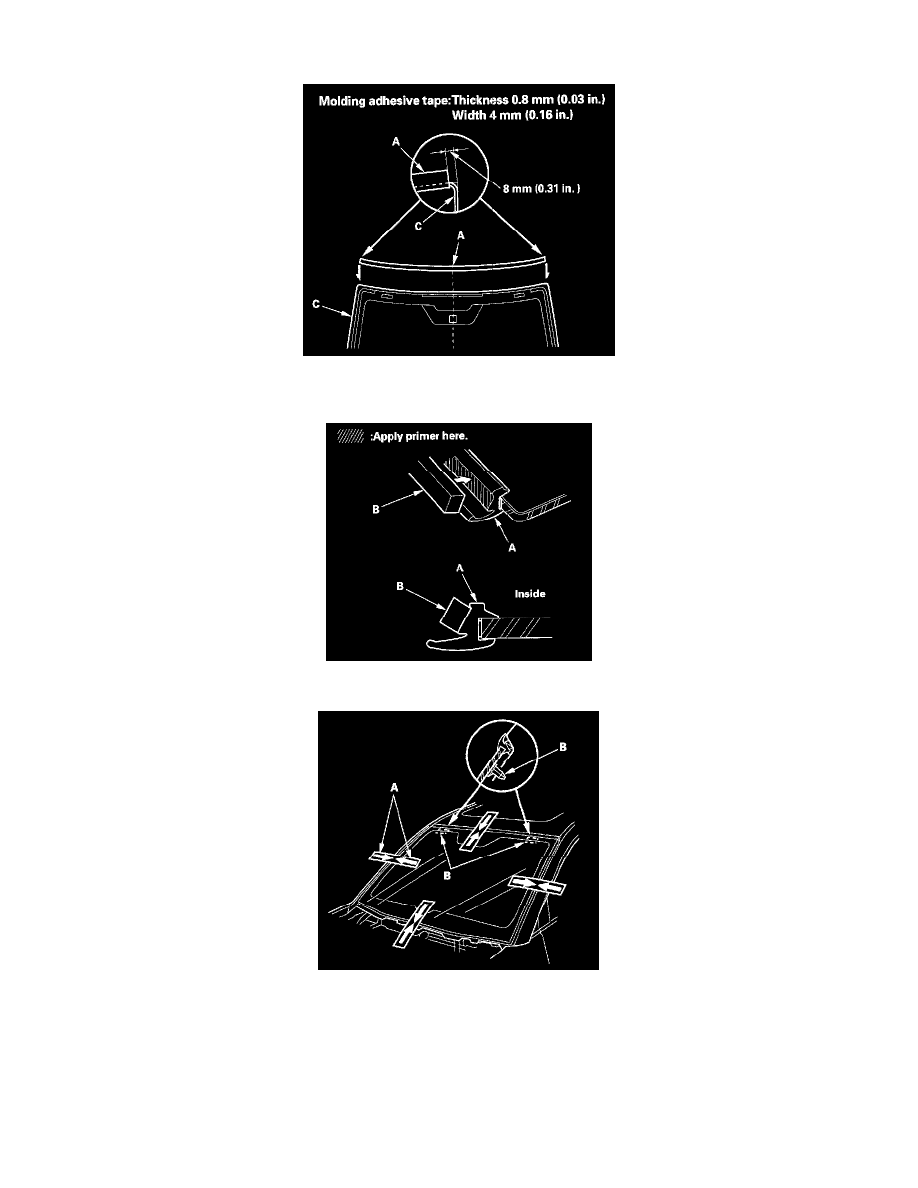
12. Attach the molding (A) with adhesive tape (B) to the upper edge of the windshield (C). Be careful not to touch the windshield where the adhesive
will be applied.
13. Apply primer to the molding (A), then attach the molding upper seal (B) with adhesive tape to the inside surface of the molding as shown.
14. Set the windshield in the opening, and center it. Make alignment marks (A) across the windshield and body with a grease pencil at the four points
shown. Make sure both clips (B) contact with the edge of the body holes. Be careful not to touch the windshield where adhesive will be applied.
15. Remove the windshield.