
RDX AWD L4-2.3L Turbo (2010)
Trim Panel: Service and Repair
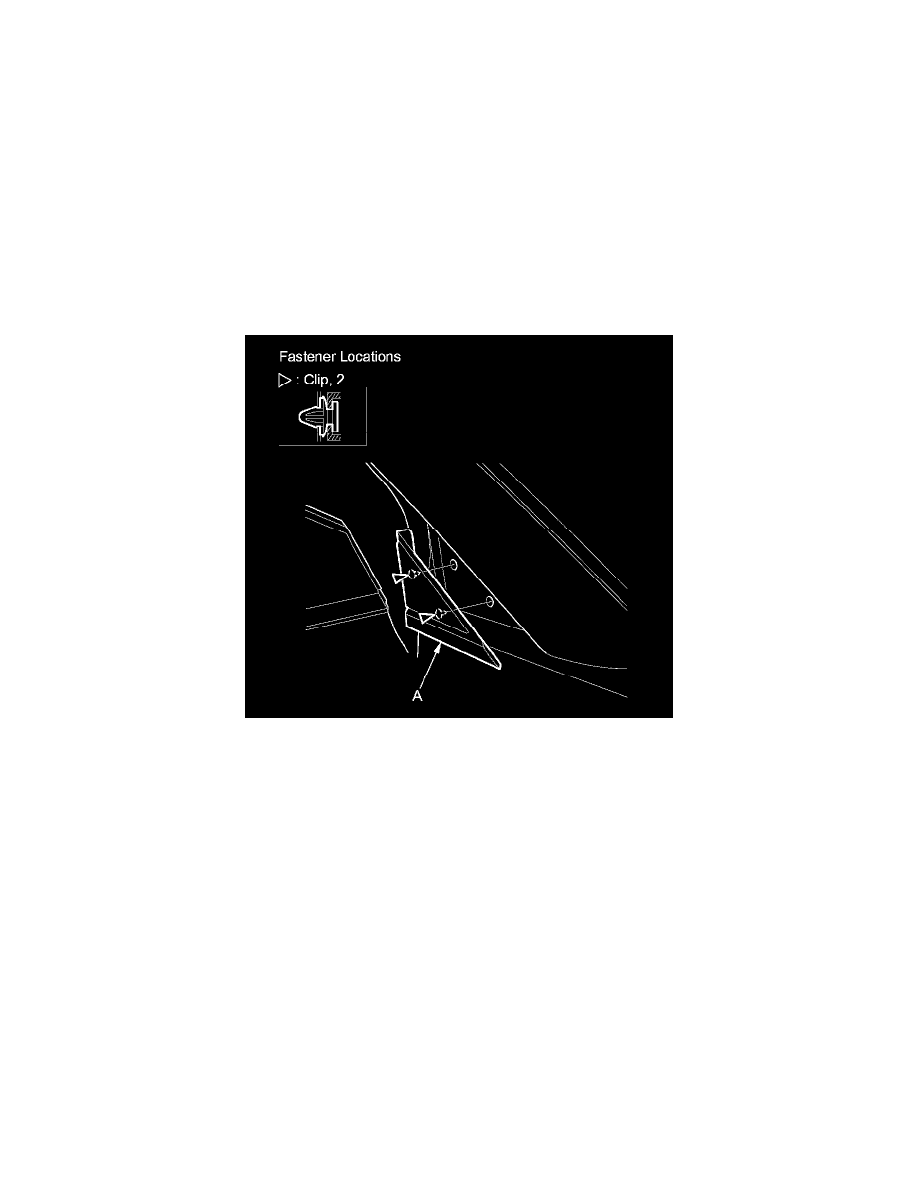
A-Pillar Corner Trim Replacement
A-Pillar Corner Trim Replacement
Special Tools Required
-
KTC Trim Tool Set SOJATP2014
*Available through the Acura Tool and Equipment Program; 888-424-6857
NOTE: Use the appropriate tool from the KTC trim tool set to avoid damage when removing components.
1. Open the front door.
2. Apply protective tape around the body to prevent damage. Carefully insert a trim tool next to the upper clip, and detach the clip by prying on the
A-pillar corner trim (A). Take care not to scratch the body and related parts.
3. Pull the A-pillar corner trim back by hand to detach the remaining lower clips, then remove the trim.
4. Install the trim in the reverse order of removal, and note these items:
-
If the clips are damaged or stress-whitened, replace them with new ones.
-
Push the clips into place securely.