RDX AWD L4-2.3L Turbo (2010)

Rear Door Weatherstrip: Service and Repair
Rear Door Weatherstrip Replacement
Rear Door Weatherstrip Replacement
NOTE:
-
Put on gloves to protect your hands.
-
Take care not to scratch the door or the related parts.
-
Use a clip remover to remove the clips.
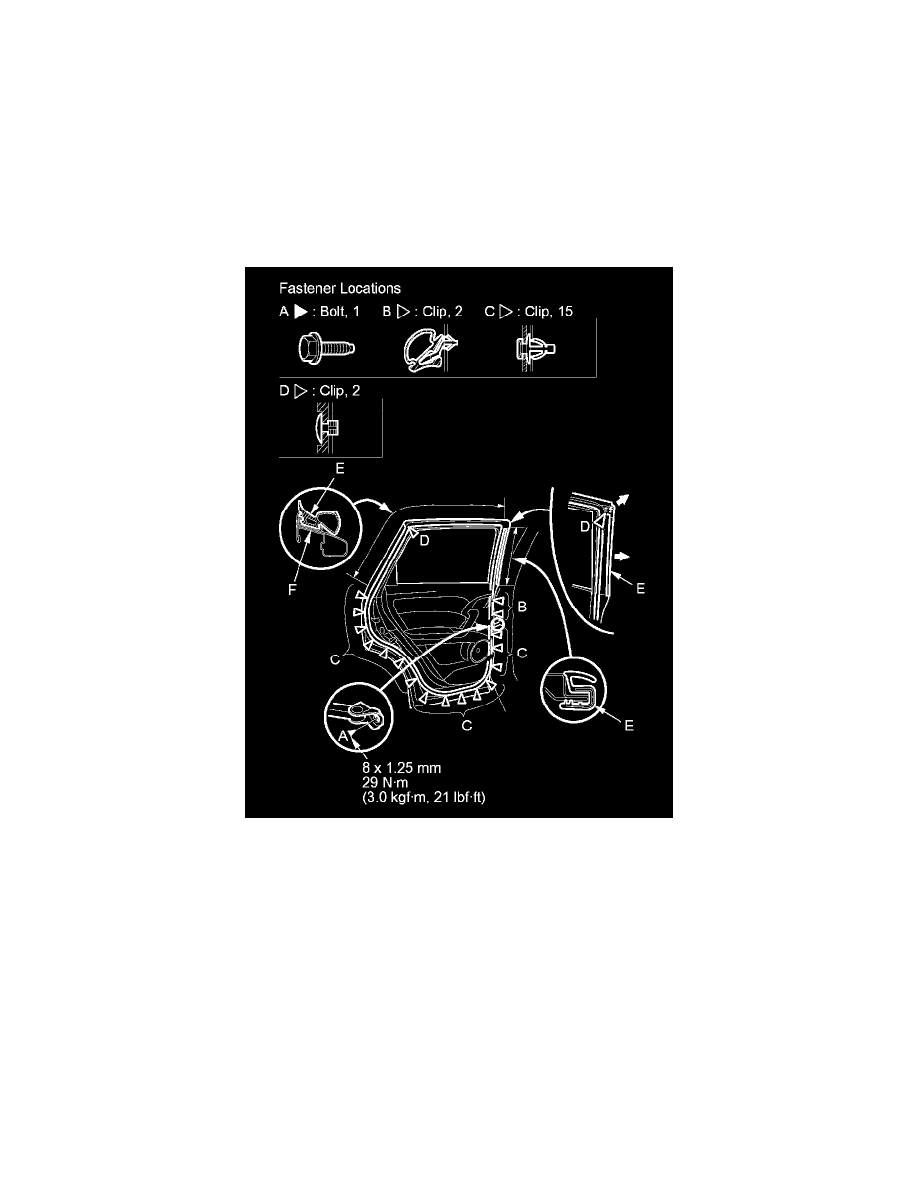
1. Remove the door checker mounting bolt (A) at the B-pillar.
2. Detach the clips (B, C, D) and release the door weatherstrip (E) from the holder (F), then remove the door weatherstrip.
3. Install the door weatherstrip in the reverse order of removal, and note these items:
-
If the clips are damaged or stress-whitened, replace them with new ones.
-
Push the clips into place securely.
-
Make sure the door weatherstrip is installed in the holder securely.
-
Apply medium strength liquid thread lock to the door checker mounting bolt before installation.
-
Check for water leaks See: Doors, Hood and Trunk/Doors/Front Door/Front Door Window Glass/Adjustments.
