
Front Brake Pad Inspection and Replacement | RDX AWD L4-23L Turbo (2010)
Brake Pad: Service and Repair
Rear Brake Pad Inspection and Replacement
Rear Brake Pad Inspection and Replacement
Special Tools Required
-
Brake Caliper Piston Compressor 07AAE-SEPA101
CAUTION
Frequent inhalation of brake pad dust, regardless of material composition, could be hazardous to your health.
-
Avoid breathing dust particles.
-
Never use an air hose or brush to clean brake assemblies. Use an OSHA-approved vacuum cleaner.
Inspection
1. Raise and support the vehicle See: Maintenance/Vehicle Lifting/Service and Repair.
2. Remove the rear wheels.
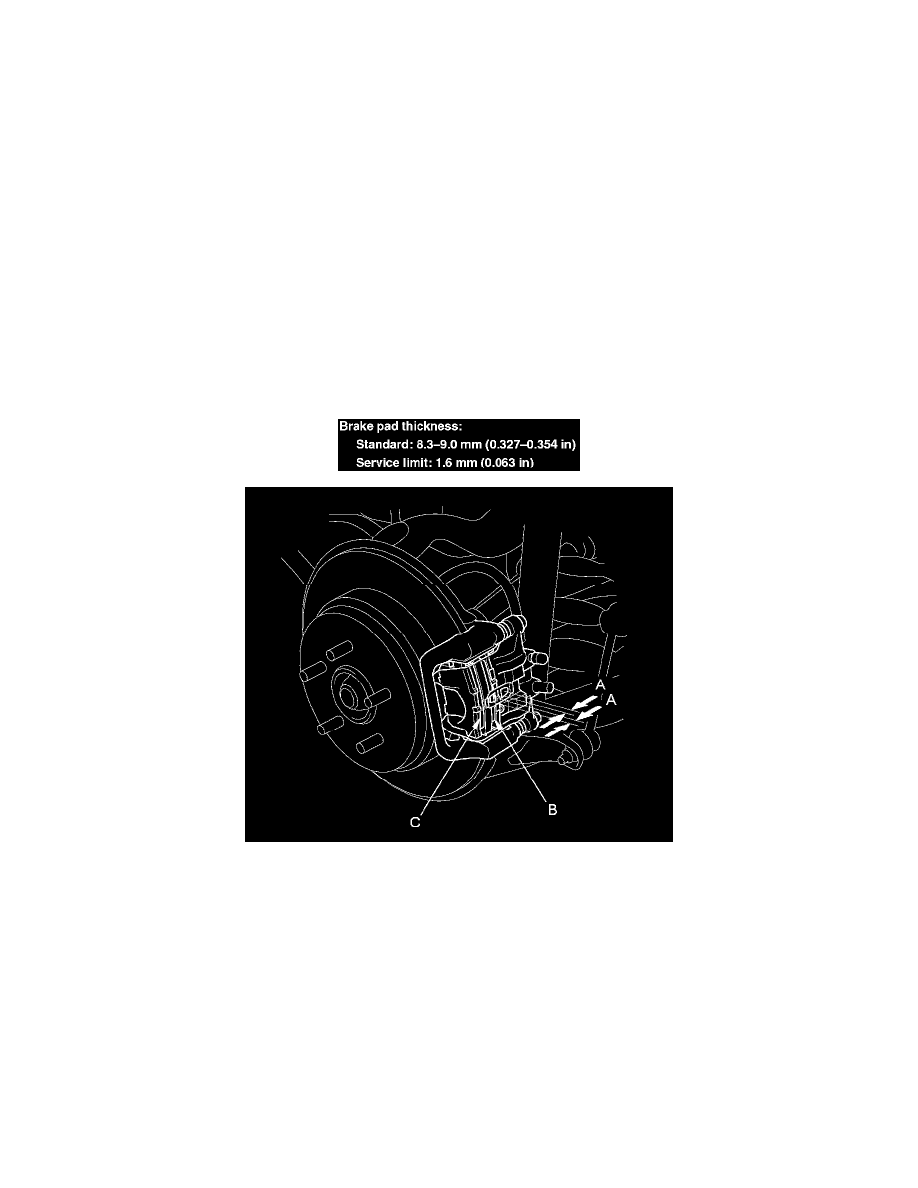
3. Check the thickness (A) of the inner pad (B) and outer pad (C). Do not include the thickness of the backing plate.
4. If any part of the brake pad thickness is less than the service limit, replace the rear brake pads as a set.
5. Clean the mating surface between the brake disc/drum and the inside of the wheel, then install the rear wheels.
Replacement (With SH-AWD)
1. Remove some brake fluid from the master cylinder.
2. Raise and support the vehicle See: Maintenance/Vehicle Lifting/Service and Repair.
3. Remove the rear wheels.
4. Remove the flange bolt (A) while holding the caliper pin (B) with a wrench. Be careful not to damage the pin boot, and pivot the caliper (C) up out
of the way. Check the hose and pin boots for damage and deterioration.