
RDX AWD L4-2.3L Turbo (2010)
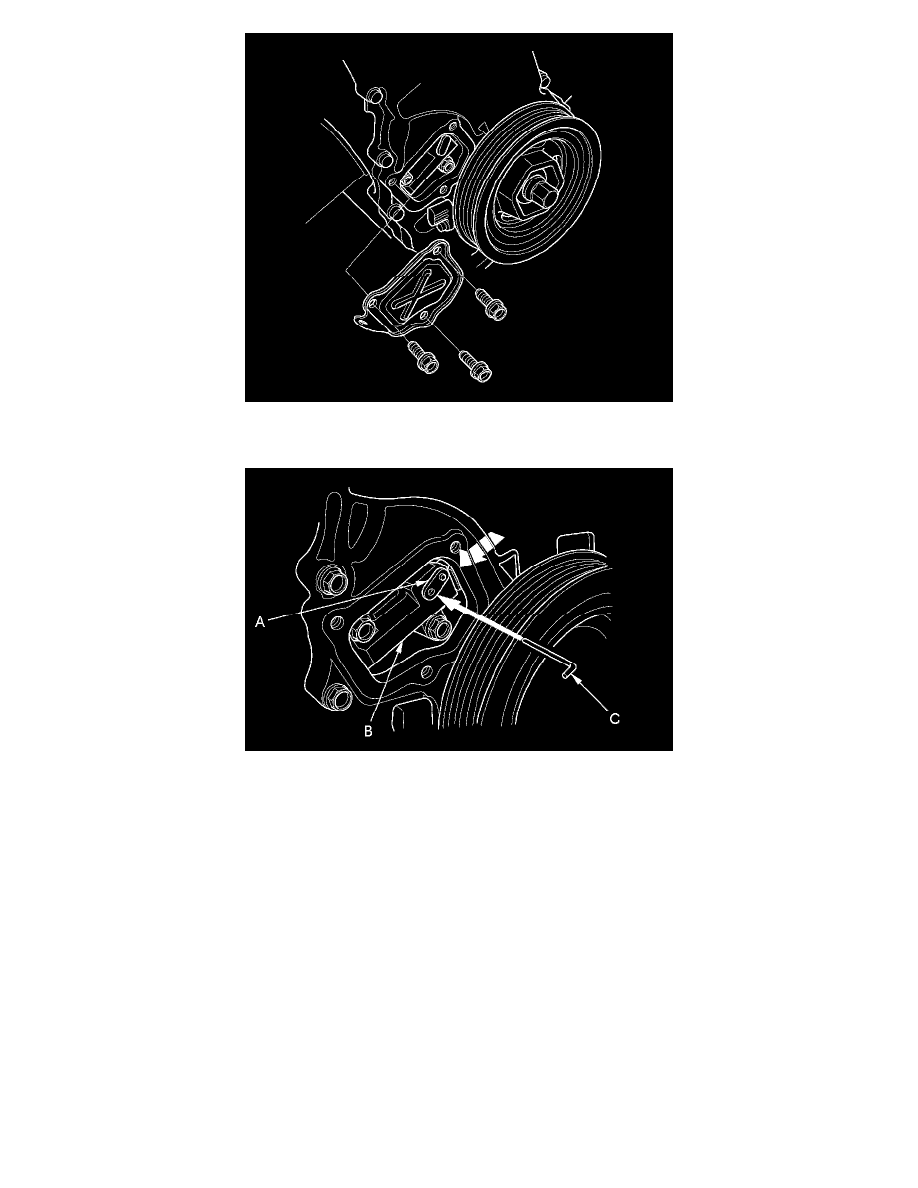
5. Rotate the crankshaft counterclockwise and align the holes on the lock (A) and the cam chain auto-tensioner (B), then insert a 1.2 mm (3/64 in)
diameter pin or lock pin (C) into the holes.
6. Turn the crankshaft clockwise to secure the pin and the TDC on the No.1 cylinder.
7. Loosen the rocker arm adjusting screws See: Cylinder Head Assembly/Service and Repair/Overhaul/Rocker Arm Assembly Removal.
8. Remove the camshaft holder bolts See: Cylinder Head Assembly/Service and Repair/Overhaul/Rocker Arm Assembly Removal.
9. Remove the five camshaft holders and cam chain guide B.
10. Carefully tip up the intake camshaft on the transmission side of the engine until there is enough slack in the chain to lift the chain off of the VTC
gear.
11. Remove the intake and exhaust camshafts while keeping some tension on the cam chain.
12. Secure the cam chain to the A/C compressor suction hose or the power steering hose with the wire tie to prevent the chain from falling down into
the cam chain case.
13. Remove the VTC actuator and the exhaust camshaft sprocket.
14. Install the VTC actuator and the exhaust camshaft sprocket.
NOTE: Install the VTC actuator while in the unlock position.