
RDX AWD L4-2.3L Turbo (2010)
Timing Chain: Service and Repair
Cam Chain Removal
Cam Chain Removal
NOTE: Keep the cam chain away from magnetic fields.
1. Remove the front wheels.
2. Remove the splash shield See: Body and Frame/Splash Guard/Service and Repair/Front Splash Shield Replacement.
3. Remove the drive belt See: Drive Belts, Mounts, Brackets and Accessories/Drive Belt/Service and Repair.
4. Remove the cylinder head cover See: Cylinder Head Assembly/Valve Cover/Service and Repair/Cylinder Head Cover Removal.
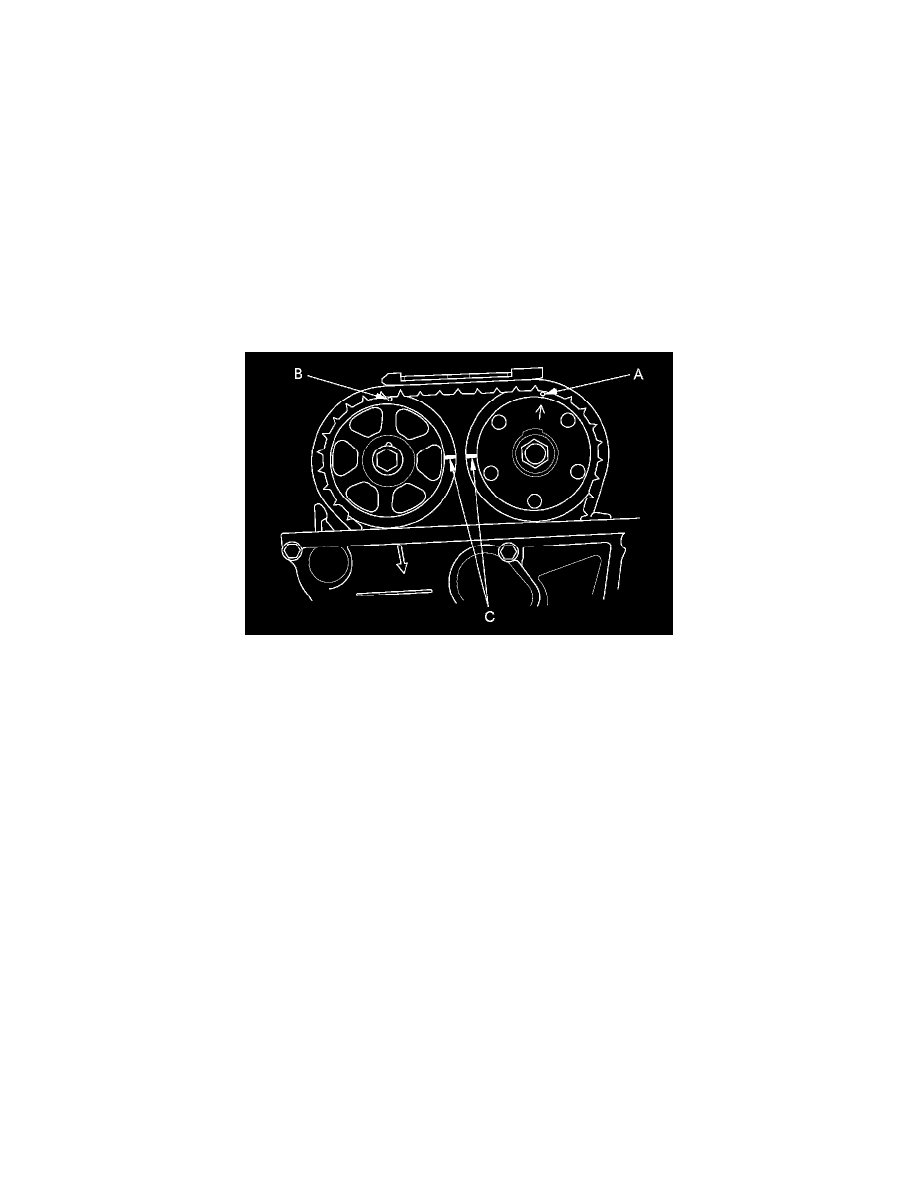
5. Set the No. 1 piston at top dead center (TDC). The punch mark (A) on the variable valve timing control (VTC) actuator and the punch mark (B) on
the exhaust camshaft sprocket should be at the top. Align the TDC marks (C) on the VTC actuator and exhaust camshaft sprocket.
6. Remove the VTC oil control solenoid valve See: Variable Valve Timing/Variable Valve Timing Actuator/Service and Repair/VTC Oil Control
Solenoid Valve Removal/Test/Installation.
7. Remove the crankshaft pulley See: Cylinder Block Assembly/Harmonic Balancer - Crankshaft Pulley/Service and Repair.
8. Support the engine with a jack and a wood block under the oil pan.
9. Remove the torque rod stiffener (A) and upper torque rod (B).