RDX AWD L4-2.3L Turbo (2010)

Fuel Gauge Sender: Testing and Inspection
Secondary Fuel Gauge Sending Unit Test
Secondary Fuel Gauge Sending Unit Test
1. Fold the rear seat down, then remove the right rear door sill trim See: Body and Frame/Interior Moulding / Trim/Scuff Plate/Service and Repair.
2. Pull back the carpet to expose the access panel See: Body and Frame/Interior Moulding / Trim/Carpet/Service and Repair.
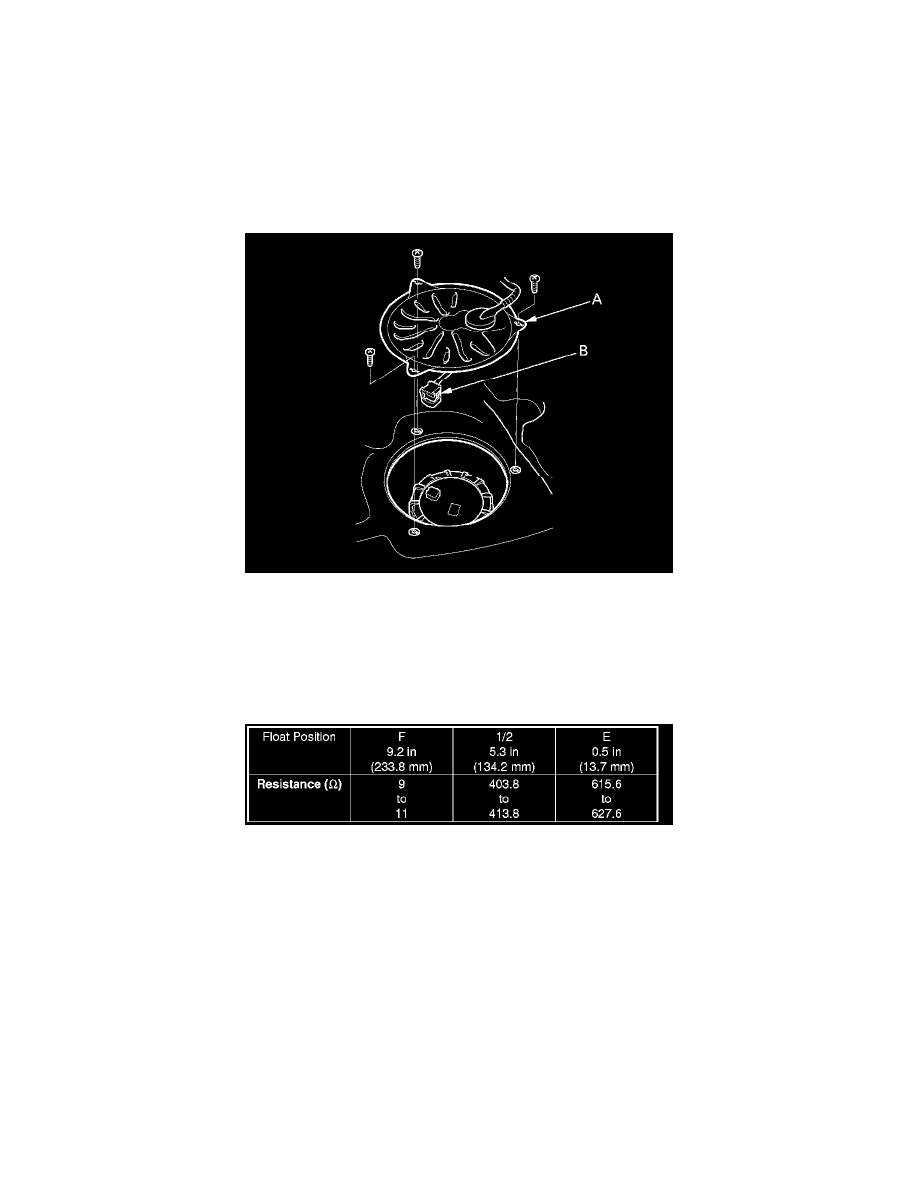
3. Remove the access panel (A) from the right side of the floor.
4. Disconnect the secondary fuel gauge sending unit 4P connector (B).
5. Remove the secondary fuel gauge sending unit from the fuel tank See: Service and Repair/Secondary Fuel Gauge Sending Unit
Removal/Installation.
6. Measure the resistance between the No. 1 and No. 3 terminals of the secondary fuel gauge sending unit 4P connector with the float at E (EMPTY),
1/2 (HALF FULL), and F (FULL) positions.
NOTE: Remove the No. 23 BACK UP (10 A) fuse from the under-hood fuse/relay box for at least 10 seconds after completing troubleshooting,
otherwise it may take up to 20 minutes for the fuel gauge to indicate the correct fuel level.
