
RDX AWD L4-2.3L Turbo (2010)
Valve Clearance: Adjustments
Valve Clearance Adjustment
Special Tools Required
-
Adjuster 07MAA-PR70110
-
Locknut Wrench 07MAA-PR70120
NOTE: Connect the HDS to the DLC See: Powertrain Management/Computers and Control Systems/Testing and Inspection/Initial Inspection and
Diagnostic Overview, and monitor the ECT sensor 1. Adjust the valve clearance only when the ECT is less than 100 °F (38 °C).
1. Remove the cylinder head cover See: Engine, Cooling and Exhaust/Engine/Cylinder Head Assembly/Valve Cover/Service and Repair/Cylinder
Head Cover Removal.
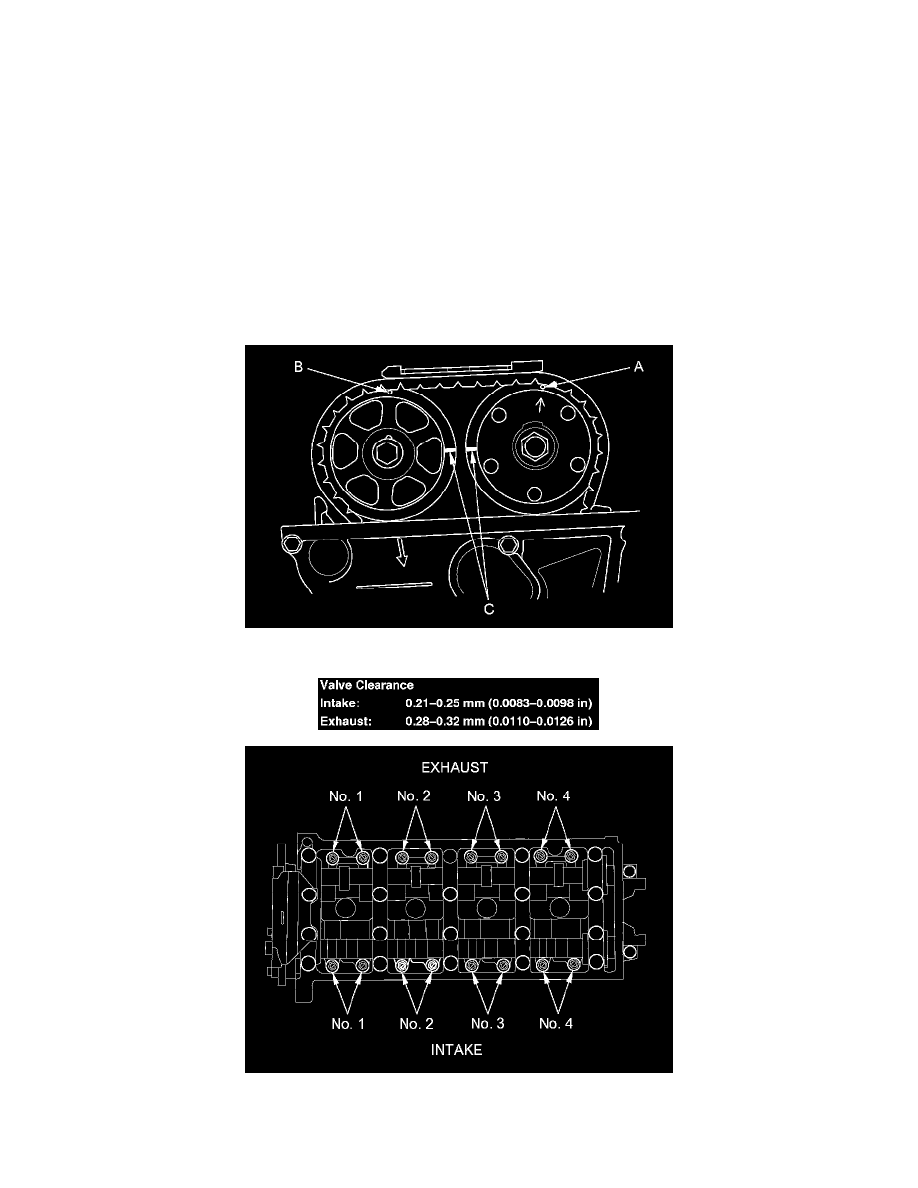
2. Set the No. 1 piston at top dead center (TDC). The punch mark (A) on the VTC actuator and the punch mark (B) on the exhaust camshaft sprocket
should be at the top. Align the TDC marks (C) on the VTC actuator and exhaust camshaft sprocket.
3. Select the correct feeler gauge for the valve clearance you are going to check.
4. Insert the feeler gauge (A) between the adjusting screw (B) and the end of the valve stem on the No.1 cylinder, and slide it back and forth; you
should feel a slight amount of drag.