
RDX AWD L4-2.3L Turbo (2010)
Wheel Fastener: Service and Repair
Wheel Bolt Replacement
NOTICE
-
Do not use a hammer or impact tools (pneumatic or electric) to remove and install the wheel bolts.
-
Be careful not to damage the threads of the wheel bolts.
1. Remove the front hub See: Wheel Hub/Service and Repair/Front Knuckle/Hub/Wheel Bearing Replacement or rear hub bearing unit See: Steering
and Suspension/Suspension/Rear Knuckle/Service and Repair.
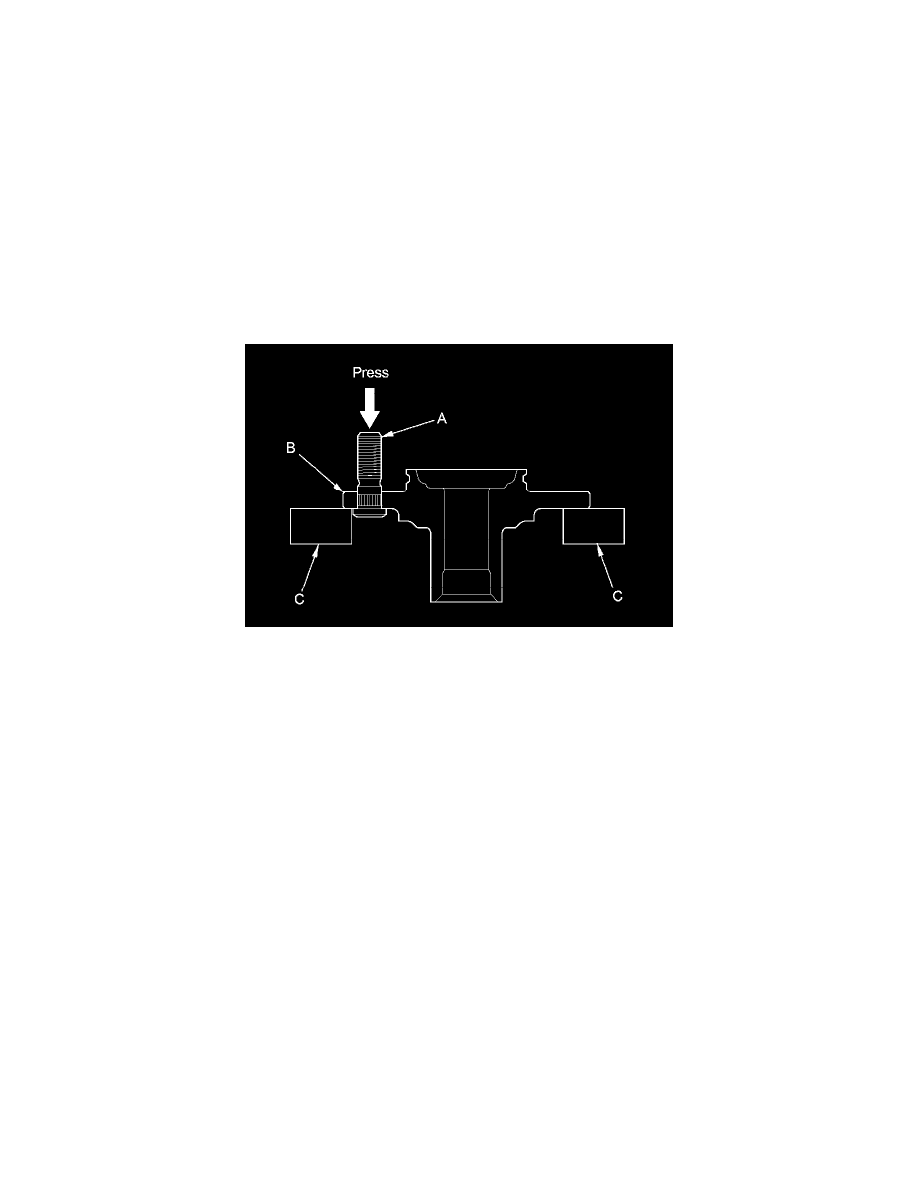
2. Separate the wheel bolt (A) from the hub (B) using a hydraulic press. Support the hub with hydraulic press attachments (C) or equivalent tools.
NOTE:
-
Before installing the new wheel bolt, clean the mating surface on the bolt and the hub.
-
The illustration shows a front hub.
3. Insert the new wheel bolt into the hub while aligning the splined surfaces on the hub hole with the wheel bolt.
NOTE:
-
Degrease the area around the wheel bolt.
-
Make sure the wheel bolt is installed vertically in relation to the hub disc surface.
4. Install the wheel bolt using a hydraulic press until the wheel bolt shoulder is fully seated.
5. Install the front hub See: Wheel Hub/Service and Repair/Front Knuckle/Hub/Wheel Bearing Replacement or rear hub bearing unit See: Steering
and Suspension/Suspension/Rear Knuckle/Service and Repair.
NOTE: If you cannot tighten the wheel nut to the specified torque when installing the wheel, replace the front hub or rear hub bearing unit as an
assembly.