
RL V6-3.5L (2007)
Rear Shelf: Service and Repair
Trim Removal/Installation - Rear Shelf Area
Special Tools Required
KTC trim tool set SOJATP2014 *
* Available through the American Honda Tool and Equipment Program
SRS components are located in this area. Review the SRS component locations and the precautions and procedures before doing repairs or service.
NOTE:
-
Put on gloves to protect your hands.
-
Take care not to bend or scratch the trim and panels.
-
Use the appropriate tool from the KTC trim tool set to avoid damage when prying components.
1. Remove the C-pillar trim from both sides.
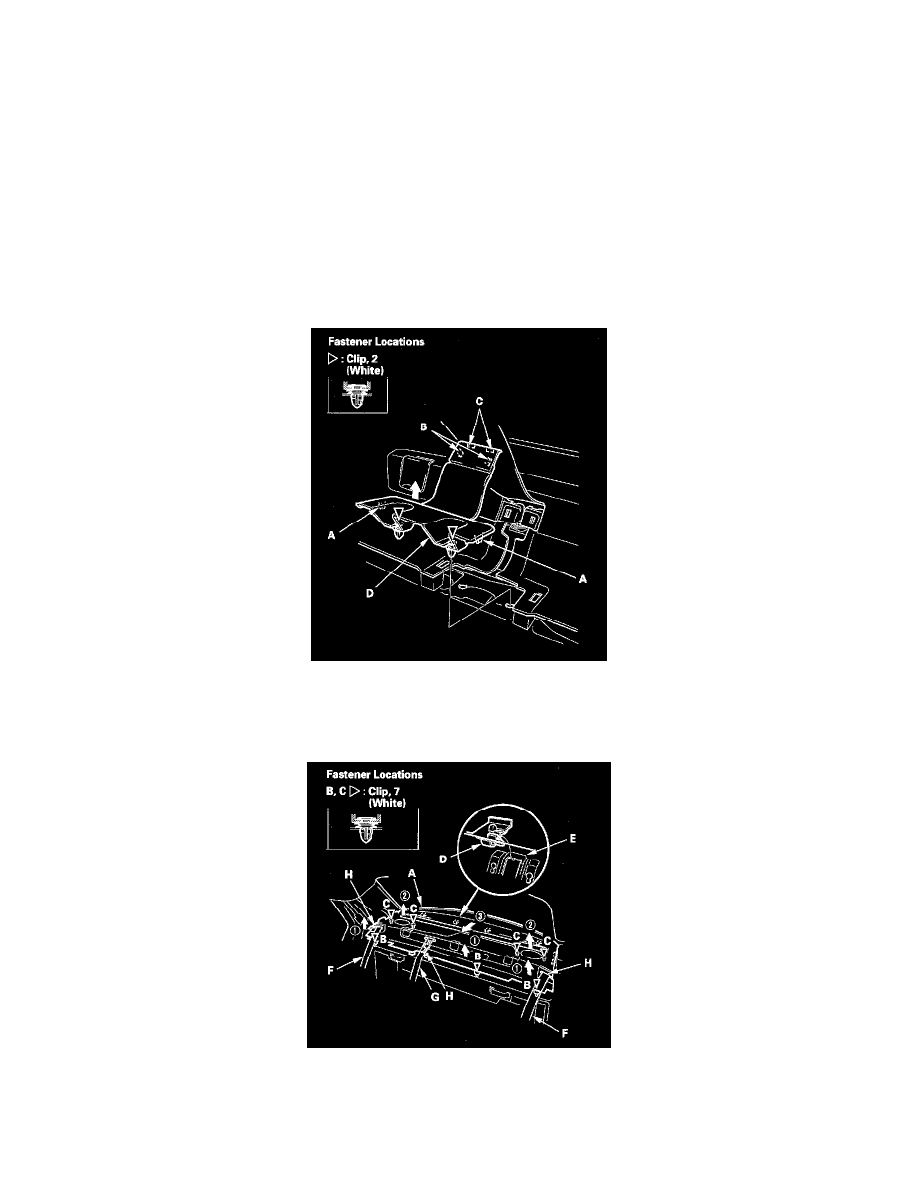
2. Detach the clips and release the hooks (A, B, C), then remove the rear center seat belt cover (D).
3. Remove the rear shelf (A).
1. Pull up on the front edge of the rear shelf with a door panel tool to release the three clips (B) and the four clips (C).
2. Pull the rear shelf up and forward to release the four hooks (D) from the rear window sunshade brackets (E).
3. Pull both rear seat belts (F) and rear center seat belt (G) out through the slits (H) in the rear shelf.
4. Install the rear shelf.
1. Using a clip remover, remove any clips left in the body, and reinstall them on the rear shelf.
2. Check if the clips are damaged or stress-whitened, and if necessary, replace them with new ones.