
RL V6-3.5L (2007)
Brake Switch (Cruise Control): Service and Repair
Brake Fluid Pressure Sensor Replacement
NOTE:
-
Do not spill brake fluid on the vehicle; it may damage the paint; if brake fluid gets on the paint, wash it off immediately with water.
-
To prevent dripping brake fluid, cover disconnected hose joints with rags or shop towels.
-
Do not twist the brake hose and line when removed.
1. Drain the brake fluid.
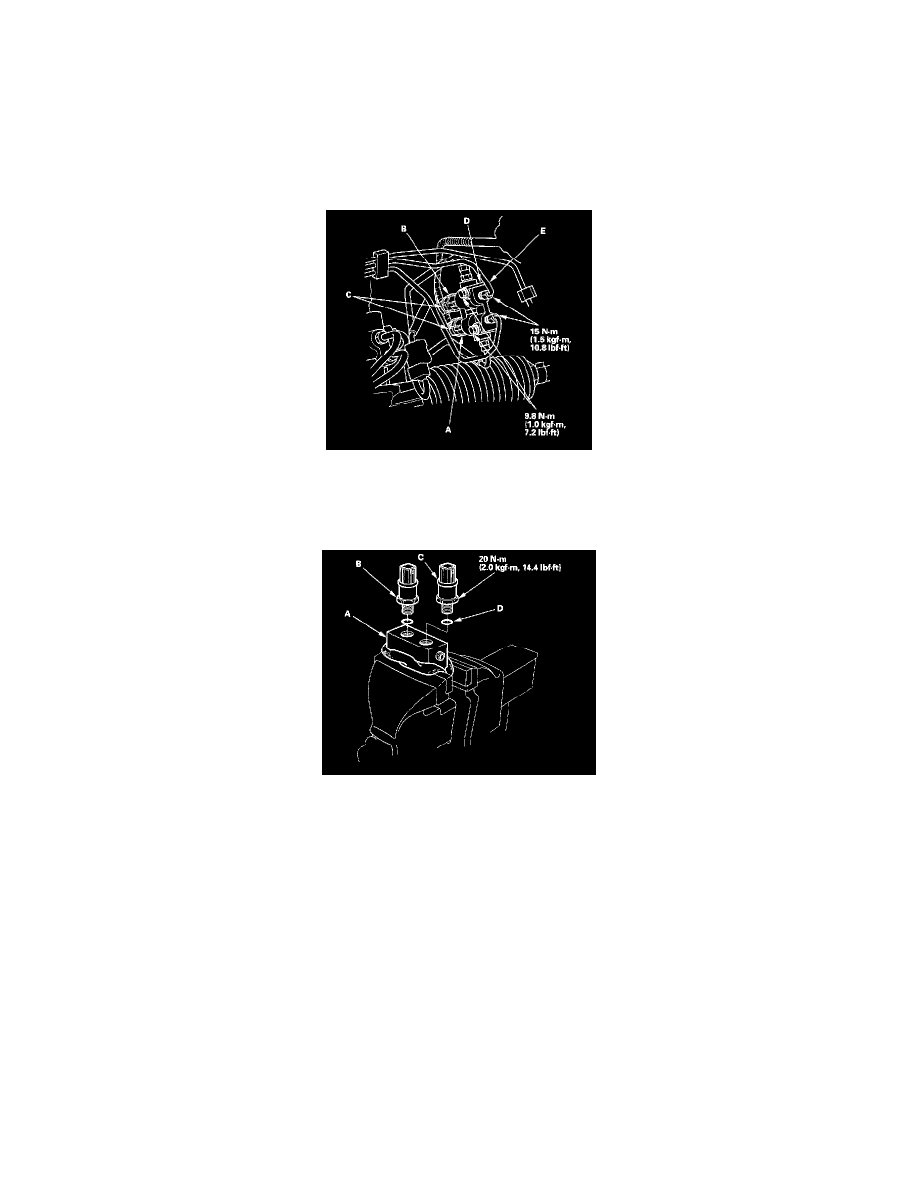
2. Disconnect the 3P connector (BLU) (A) from the right front pressure sensor (B).
3. Disconnect the 3P connector (GRY) (C) from the left front pressure sensor (D).
4. Remove the brake lines (E). from the 4-way joint (F).
5. Remove the brake 4-way joint.
6. Remove the right (A) and left (B) pressure sensors from the brake 4-way joint (C).
7. Install the parts in the reverse order of removal with new O-rings (D).
NOTE: Make sure the connector colors and pressure sensor locations are correct.
8. After installation, refill the brake fluid, and bleed the brake system.
9. Do these checks.
-
Check the brake hose and line joint for leaks, and tighten if necessary.
-
Check the brake hoses for interference and twisting.
10. Connect the HDS to the data link connector.
11. Turn the ignition switch ON (II).
12. Turn the adaptive cruise control (ACC) switch ON.
13. Clear the DTCs with the HDS.
14. Select ADAPTIVE CRUISE CONTROL (ACC) from DRIVING SUPPORT menu, then enter FUNCTION TEST.
15. Activate BRAKE ACTUATOR 3 from the FUNCTION TEST.
NOTE: BRAKE ACTUATOR 3 operates the adaptive cruise control brake in this order (pressurization- stop-pressurization-stop). It takes about
6 seconds.
16. Check for DTCs with the HDS.