
RL V6-3.5L (2007)
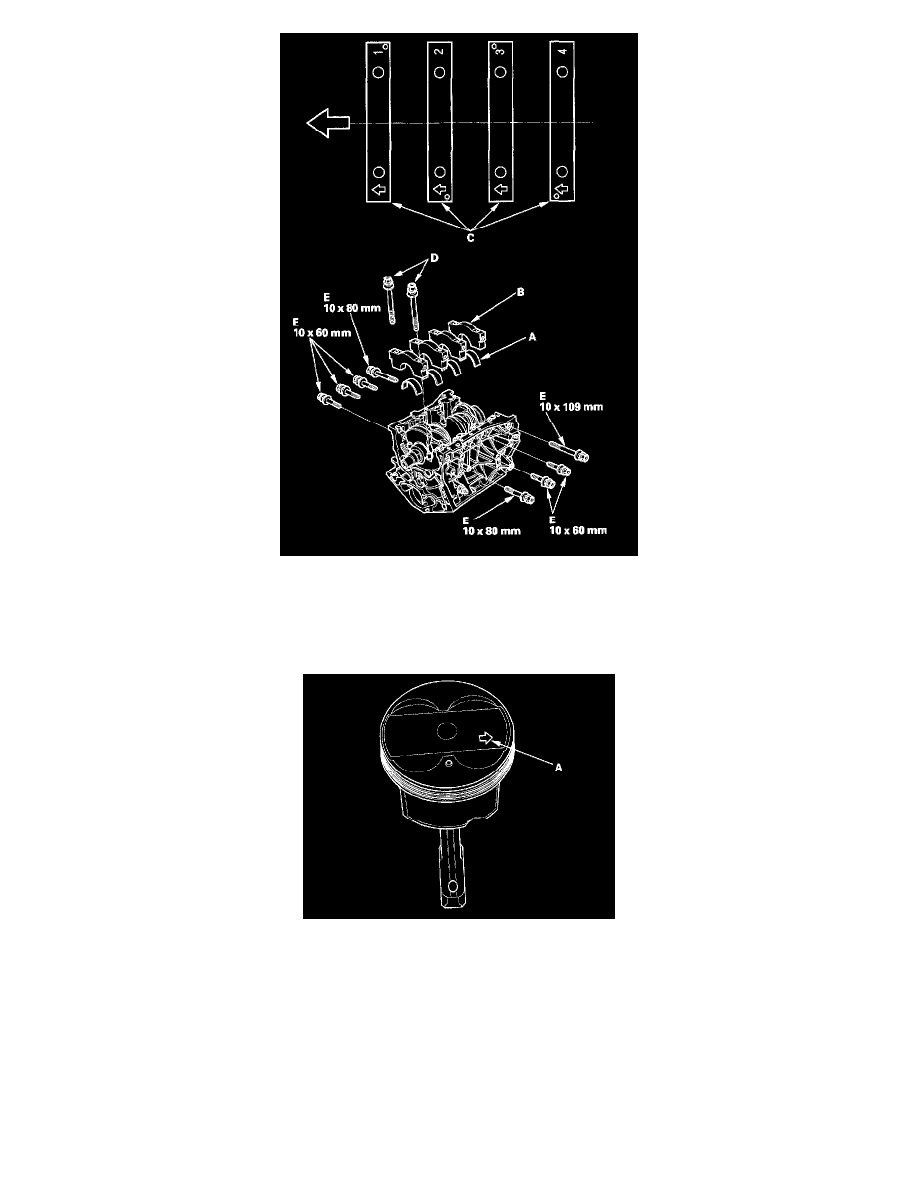
7. Install the bearings (A) and bearing caps (B) with the arrow (C) facing the timing belt end of the engine.
8. Apply new engine oil to the bolt threads and flanges, then loosely install the bearing cap bolts (D) and bearing cap side bolts (E).
9. Set the crankshaft to bottom dead center (BDC) for the cylinder you are installing the piston in.
10. Apply new engine oil to the piston, inside of the ring compressor, and the cylinder bore.
11. Attach the ring compressor to the piston/connecting rod assembly, and check that the bearing is securely in place.
12. Position the piston/connecting rod assembly with the arrow (A) facing the timing belt side of the engine.