
RL V6-3.5L (2007)
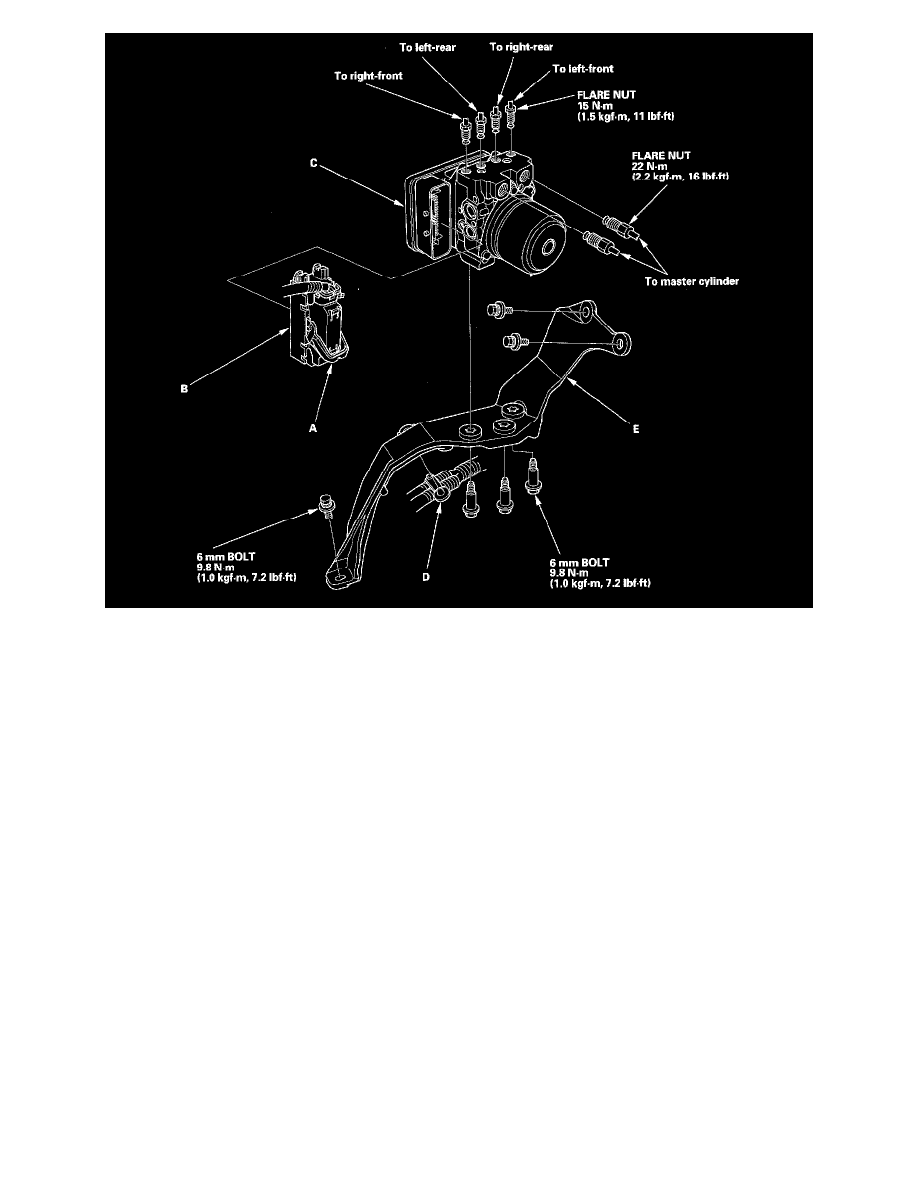
7. Disconnect the six brake lines from the VSA modulator-control unit (C).
8. Disconnect the harness clip (D).
9. Remove the three 6 mm bolts, then remove the VSA modulator-control unit with bracket (E) from the body.
10. Remove the three 6 mm bolts, then remove the VSA modulator-control unit from the bracket.
Installation
1. Install the VSA modulator-control unit on the bracket, then tighten the three 6 mm bolts.
2. Install the VSA modulator-control unit/bracket on the body, then tighten the three 6 mm bolts.
3. Reconnect the six brake lines, then tighten the nuts.
4. Align the connecting surface of the VSA modulator-control unit 47P connector.
5. Carefully push in the lock of the VSA modulator-control unit 47P connector until you hear it click into place, then confirm the connector is fully
seated.
6. Install the power steering fluid reservoir bracket and upper portion of the washer reservoir.
7. Install the engine mount bracket mounting bolts.
8. Install the A/C line mounting bolt.
9. Install the right front fender trim.
10. Bleed the brake system, starting with the front wheels.
11. Do VSA sensor neutral position memorization.
12. Do the adaptive front lighting control unit learning procedure.
13. Start the engine, and check that the ABS and VSA indicators go off.
14. Test-drive the vehicle, and check that the ABS and VSA indicators do not come on.
15. If the brake pedal is now spongy, there may be air trapped in the modulator and then induced into the normal brake system during modulation.
Bleed the brake system again, starting with the front wheels.