
RL V6-3.5L (2007)
Control Arm: Service and Repair
Upper Arm Removal & Installation
Upper Arm Replacement
Special Tools Required
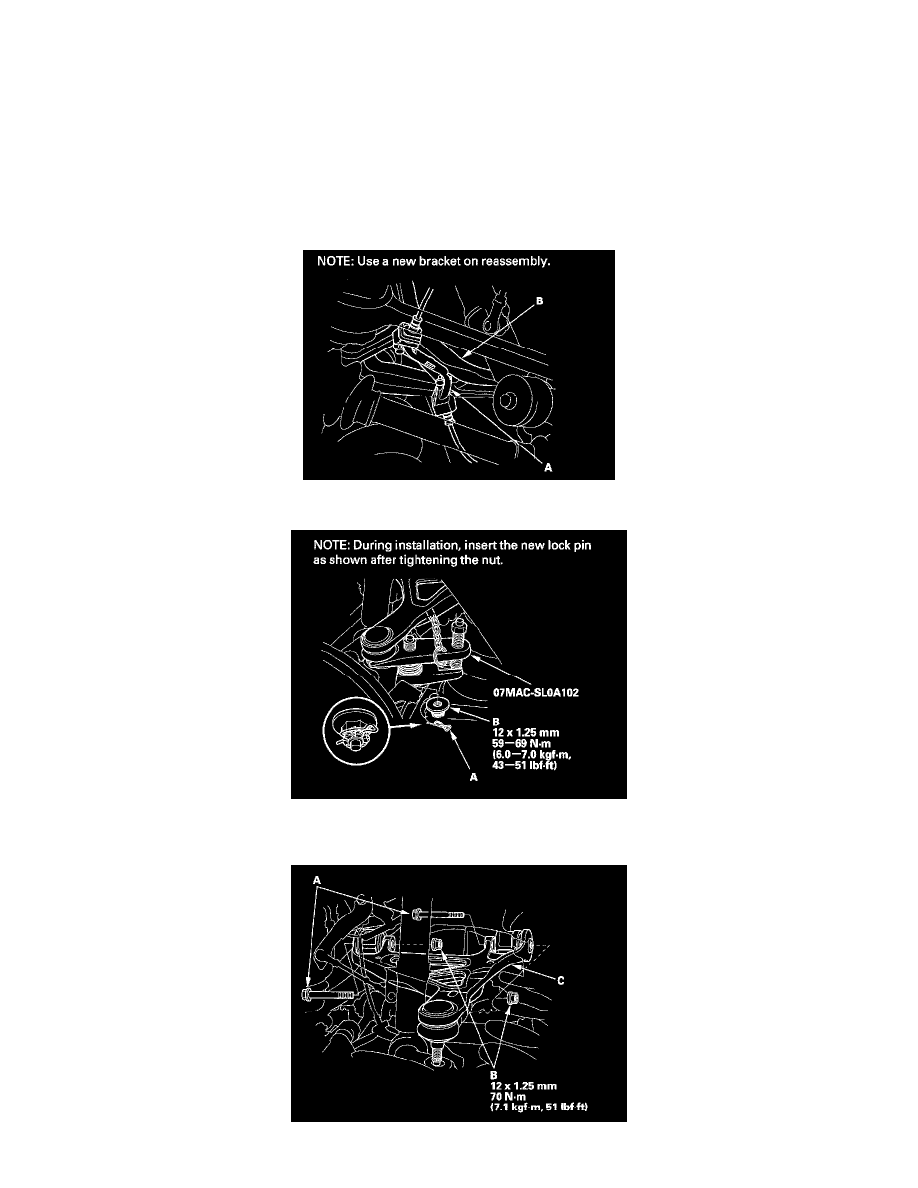
Ball joint remover, 32 mm 07MAC-SL0A102
1. Raise the rear of the vehicle, and support it with safety stands in the proper locations.
2. Remove the rear wheels.
3. Place a floor jack under the trailing arm, and support the suspension.
4. Remove the wheel sensor harness bracket (A) from the upper arm (B).
5. Remove the lock pin (A) from the upper arm ball joint, and loosen the nut (B).
6. Disconnect the upper arm ball joint from the knuckle using the ball joint remover.
7. Remove the flange bolts (A) and nuts (B), and remove the upper arm (C).