
RL V6-3.5L (2007)
Stabilizer Link: Service and Repair
Rear Suspension
Stabilizer Link Removal/Installation
1. Raise the rear of the vehicle, and support it with safety stands in the proper locations.
2. Remove the rear wheels.
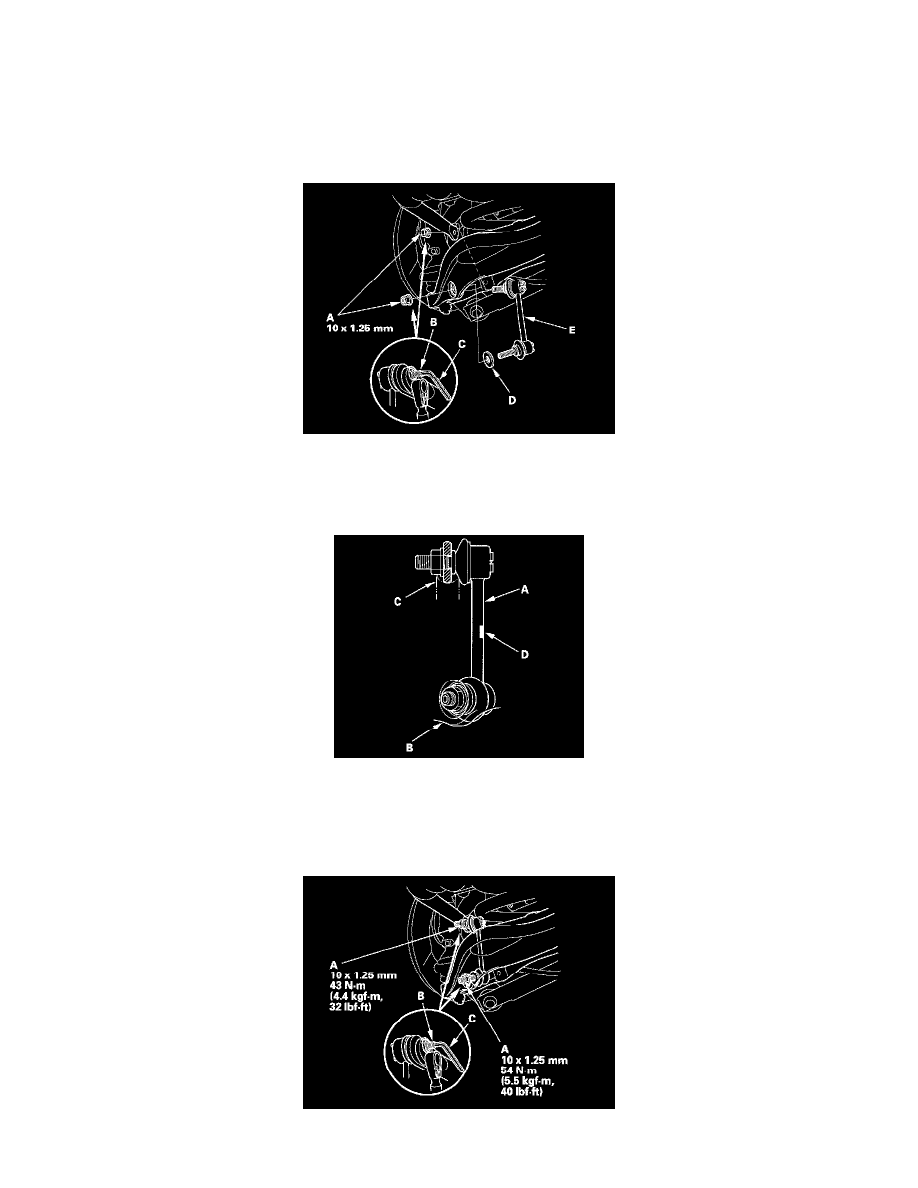
3. Remove the self-locking nuts (A) while holding the respective joint pin (B) with a hex wrench (C), then remove the washer (D) and the stabilizer
link (E).
4. Place a floor jack at the connecting point of lower arm B and the stabilizer link, and raise the suspension.
5. Install the stabilizer link (A) on the stabilizer bar (C) and lower arm B with the joint pins set at the center of their range of the movement.
NOTE: The left stabilizer link has a yellow paint mark (D), while the right stabilizer link has a white paint mark.
6. Install the washer and self-locking nuts, and lightly tighten them.
NOTE: Use a new self-locking nuts on reassembly.
7. Tighten the self-locking nuts (A) to the specified torque values while holding the respective joint pin (B) with a hex wrench (C).
8. Reinstall all removed parts, and test-drive the vehicle.