
RL V6-3.5L (2007)
Fluid - A/T: Service and Repair
ATF Level Check
ATF Level Check
NOTE: Keep all foreign particles out of the transmission.
1. Warm up the engine to normal operating temperature (the radiator fan comes on).
2. Park the vehicle on level ground, and turn the engine off.
NOTE: Check the fluid level within 60-90 seconds after turning the engine off.
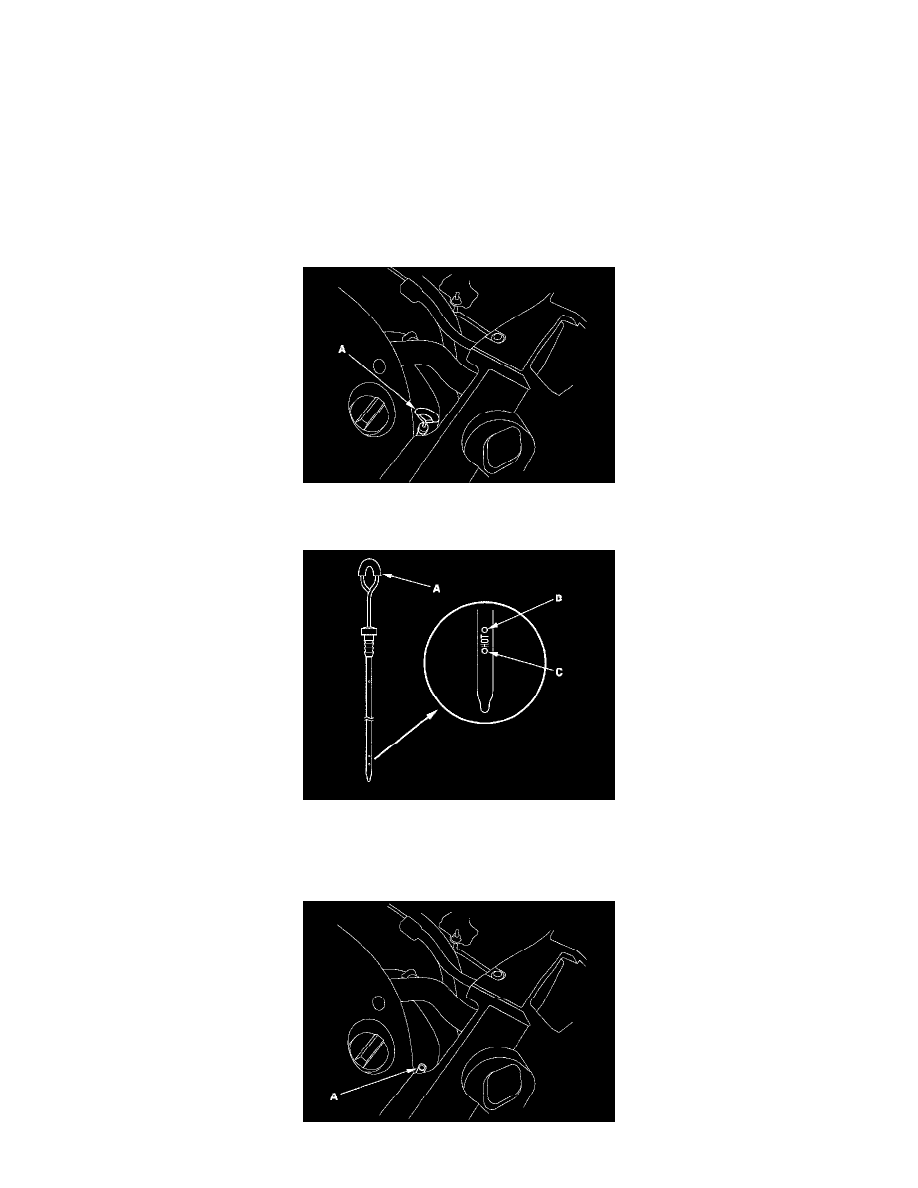
3. Remove the dipstick (yellow loop) (A) from the dipstick tube, and wipe it with a clean cloth.
4. Insert the dipstick into the tube.
5. Remove the dipstick (A) and check the fluid level. It should be between the upper mark (B) and lower mark (C).
6. If the level is below the lower mark, check for fluid leaks at the transmission, hose and line joints. If a problem is found, fix it before filling the
transmission. If the level is above the upper mark, drain the ATF to the proper level.
7. If necessary fill the transmission through the dipstick guide pipe opening (A) to bring the fluid level up to the upper mark. Always use Acura
ATF-Z1 Automatic Transmission Fluid (ATF). Using a non-Acura ATF can affect shift quality.