
RL V6-3.5L (2007)
Shifter A/T: Removal and Replacement
Shift Lever Installation
Shift Lever Installation
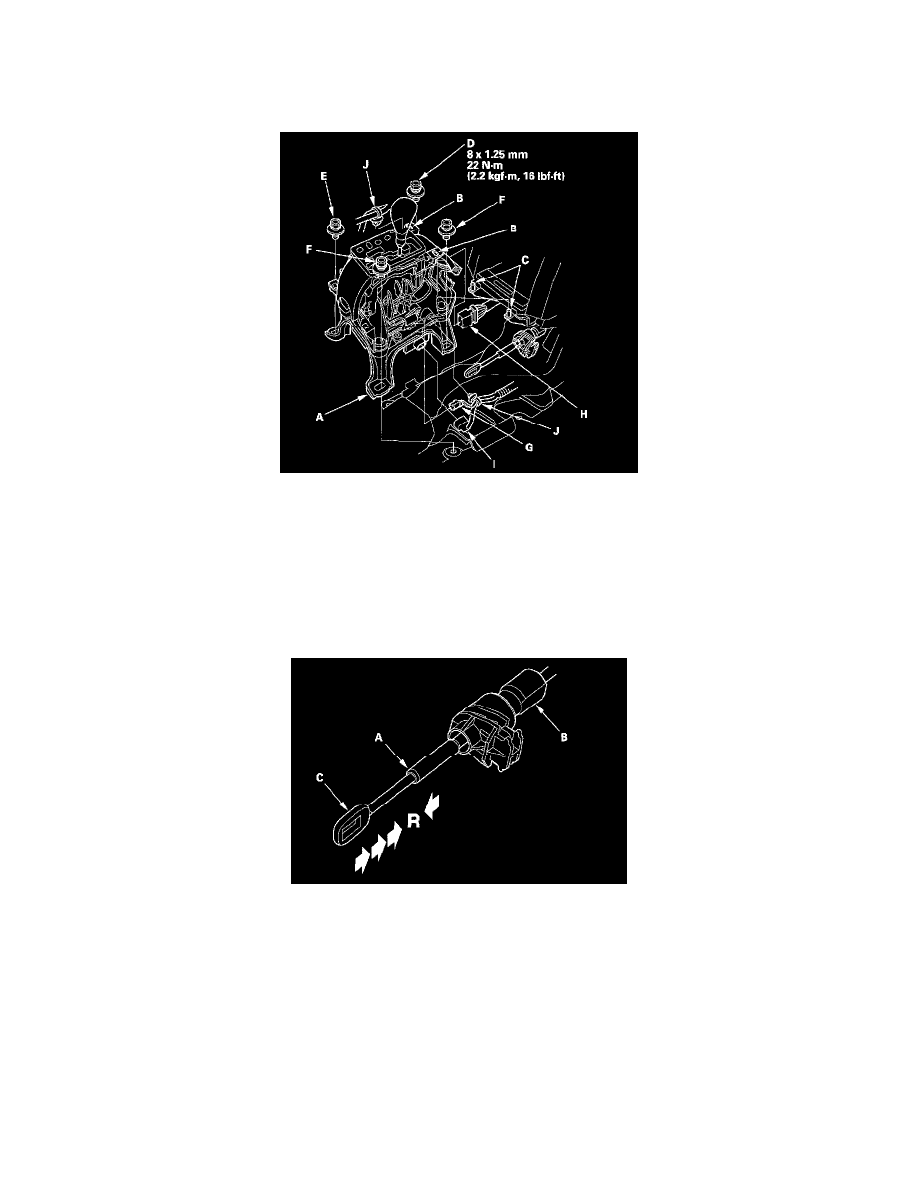
1. Install the shift lever assembly (A) by aligning the positioning holes (B) with the tips (C) on the console panel.
2. Loosely install the mounting bolt (D) on the left front of the shift lever, then install and tighten the mounting bolt (E) on the left rear to 22 N-m
(2.2 kgf-m, 16 lbf-ft).
3. Install and tighten the mounting bolts (F) on the right side, and tighten the bolt (D) to 22 N-m (2.2 kgf-m, 16 lbf-ft).
4. Connect the shift lock solenoid connector (G), the transmission gear selection switch/park pin switch connector (H), and the sensor cluster
connector (I).
5. Install the harness clamps (J) on the shift lever bracket base.
6. Turn the ignition switch ON (II), and verify that the R position indicator comes on.
7. If necessary, push the shift cable until it stops, then release it. Pull the shift cable back one step so that the shift position is in R. Do not hold the
shift cable guide (A) and damper (B) to adjust the shift cable (C).
8. Turn the ignition switch OFF.
9. Place the shift lever in the R position, then insert a 6.0 mm (0.24 in.) pin (A) through the positioning hole (B) on the shift lever bracket base,
through the positioning hole (C) on the shift lever, and into the positioning hole (D) on the shift lever bracket base. The shift lever is secured in
then position.