
RL V6-3.7L (2009)
Hood Latch: Service and Repair
Hood Latch Replacement
1. Remove the upper grille. See: Grille/Service and Repair/Upper Grille Replacement
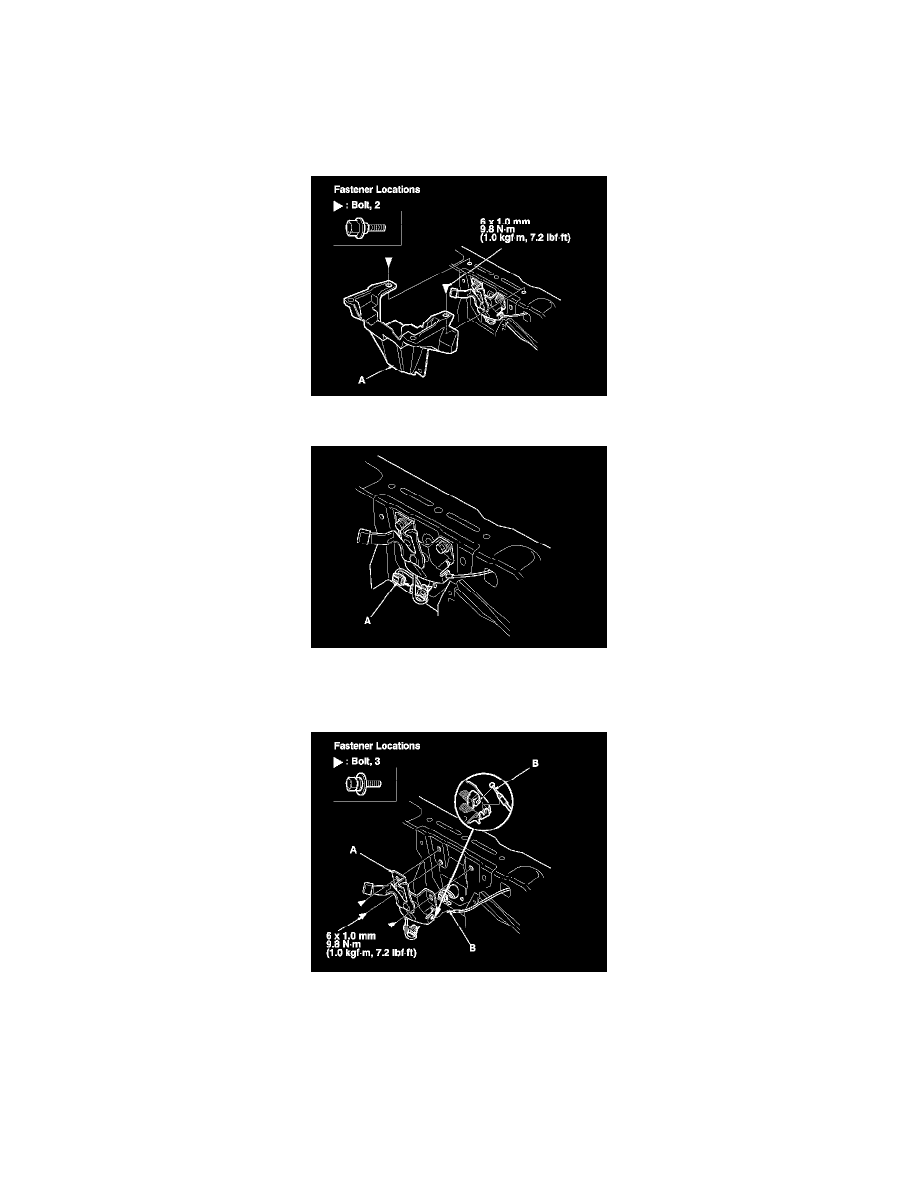
2. Remove the bolts, then remove the hood latch cover (A).
3. Disconnect the hood latch switch connector (A), then remove the connector clip from the body.
4. Remove the bolts, then remove the hood latch (A) from the body.
5. Disconnect the hood opener cable (B) from the hood latch. Take care not to kink the cable.
6. Install the latch in the reverse order of removal, and note these items:
-
Apply multipurpose grease to the hood latch as indicated by the arrows.
-
Make sure the hood opener cable is connected properly and the hood latch switch connector is plugged in properly.
-
Make sure the cable actuates the latch before you close the hood.
-
Adjust the hood latch alignment. See: Adjustments