
RL V6-3.7L (2009)
Vacuum Brake Booster: Adjustments
Brake Booster Pushrod Clearance Adjustment
Special Tools Required
-
Booster piston holder 070AB-SJA0100
NOTE:
-
Brake booster pushrod-to-piston clearance must be checked and readjusted before installing the master cylinder.
-
The master cylinder assembly comes with the specific plate that adjusts the clearance between the brake booster and the specific master cylinder
piston.
-
Every time you change the master cylinder; use only the enclosed plate to check the brake booster pushrod clearance.
-
Do not use anything other than the enclosed plate to check the clearance. Make sure to discard the plate supplied with master cylinder after its use.
-
The brake booster has to be on the vehicle before the adjustment.
-
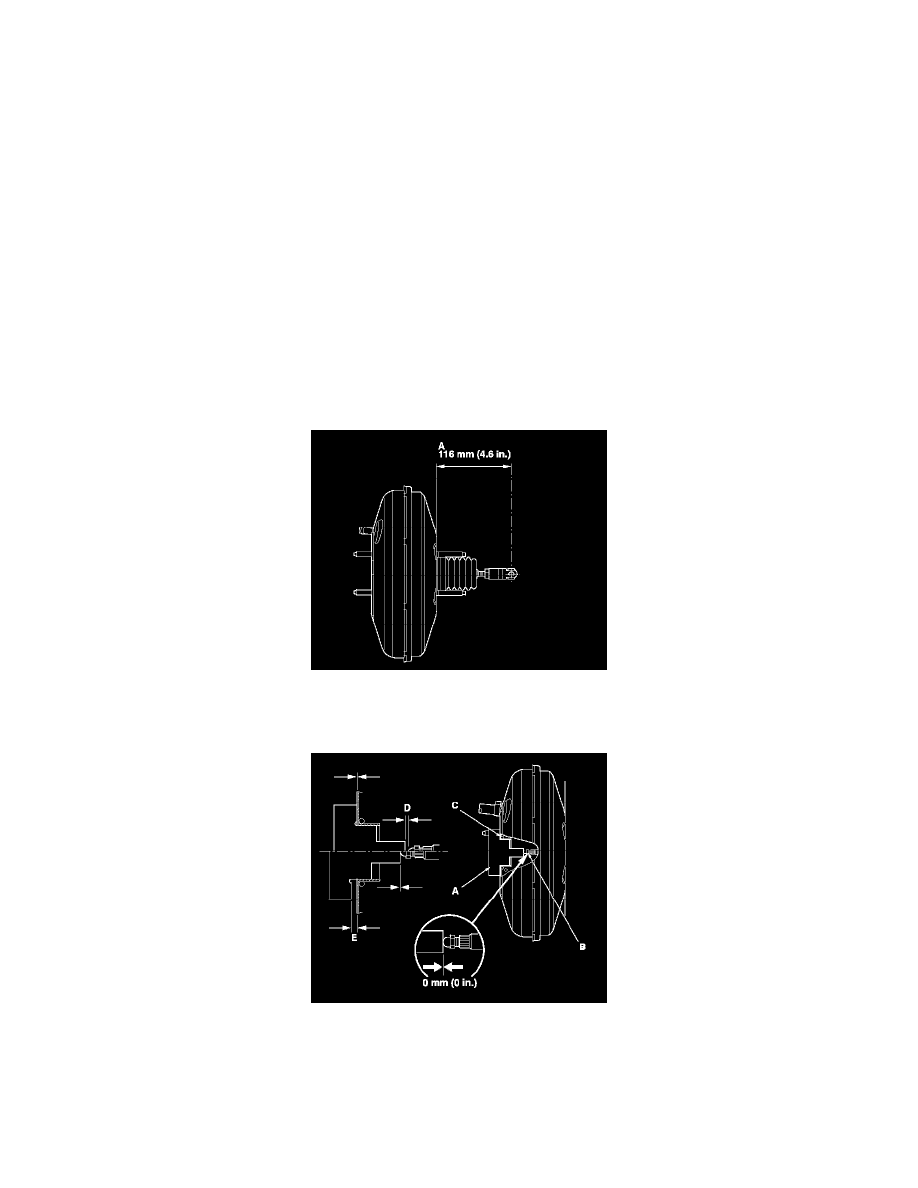
If the brake booster pushrod and clevis were removed as an assembly, measure the pushrod reference valve (A), and adjust the clevis as needed
before installing the brake booster. In some situations, install the clevis after installing the brake booster, then adjust the brake pedal height.
1. Measure the clearance between the plate (A), supplied with the master cylinder, and the brake booster pushrod (B). Make sure that the enclosed
plate touches contacting surface (C) between the master cylinder and brake booster. If there is a gap between the tip of the plate and the pushrod
(D) or a gap between the contacting surface and the plate (E), go to step 2.
2. Use the special tool to hold the nut, and turn the 6 mm pushrod (A) clockwise or counterclockwise to adjust the pushrod inward or outward.
3. Install the master cylinder. See: Hydraulic System/Brake Master Cylinder/Service and Repair