
RL V6-3.7L (2009)
Blower Motor: Service and Repair
Blower Unit Removal/Installation
Blower Unit Removal/Installation
1. Remove the glove box. See: Body and Frame/Interior Moulding / Trim/Glove Compartment/Service and Repair/Glove Box Removal/Installation
2. Remove the passenger's kick panel. See: Body and Frame/Interior Moulding / Trim/Scuff Plate/Service and Repair/Interior Trim
Removal/Installation - Front Door Sill Area
3. Remove the USB adapter unit. See: Accessories and Optional Equipment/Radio, Stereo, and Compact Disc/Service and Repair/USB Adapter Unit
Replacement
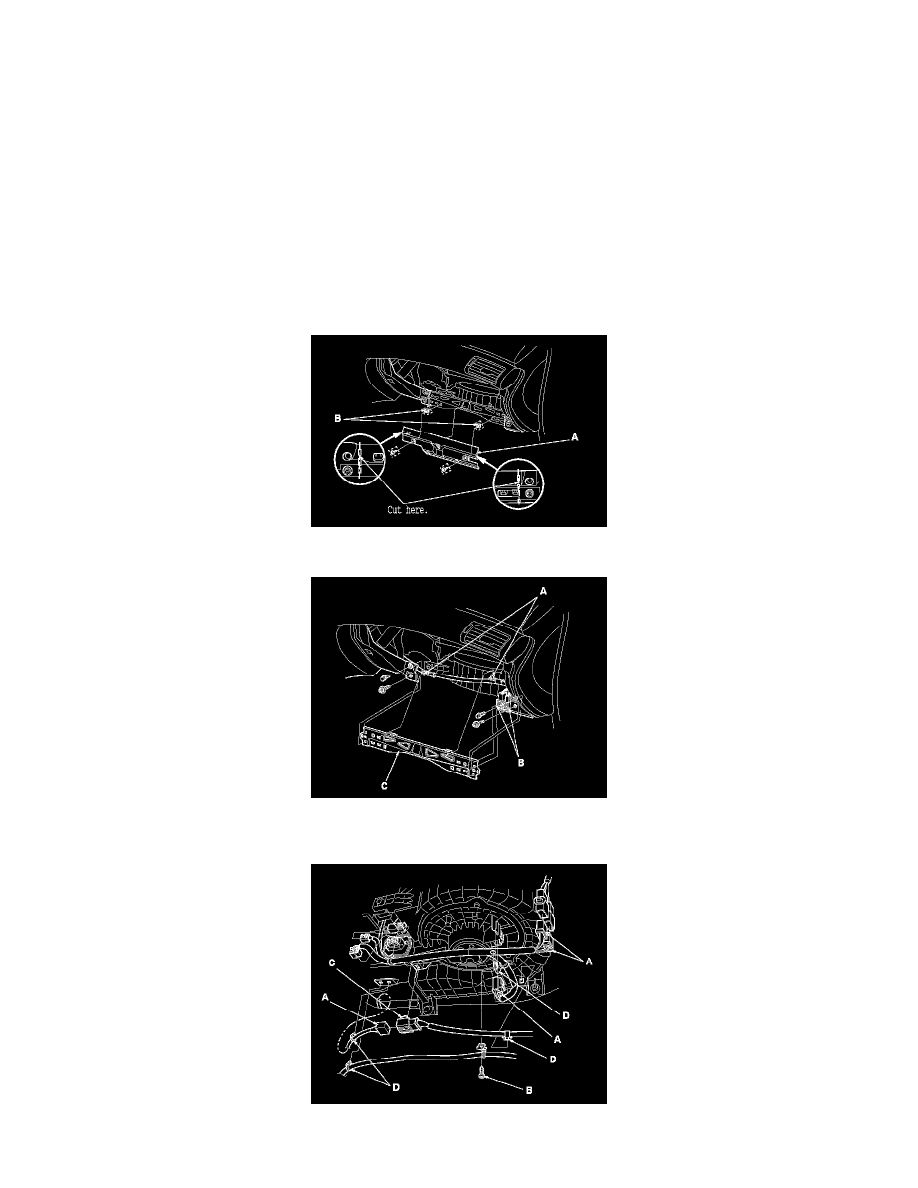
4. Cut the plastic cross brace (A) in the glove box opening with diagonal cutters in the area shown. Retain the plastic cross brace to be reinstalled
later.
NOTE: Use the grommets (B) and the self-tapping screws to reinstall the plastic cross brace.
5. Remove the wire harness clips (A) and the connector clips (B). Remove the bolts and the glove box frame (C).
6. Disconnect the connectors (A) from the blower motor, the throttle actuator control module subharness, and the dashboard wire harnesses. Remove
the self-tapping screw (B), the connector clip (C) and the wire harness clips (D).
7. Disconnect the connector (A) from the recirculation control motor. Remove the mounting nuts, the bolts, and the blower unit (B).