
RL V6-3.7L (2009)
Compressor Clutch: Service and Repair
A/C Compressor Clutch Overhaul
Special Tools Required
-
A/C clutch holder, Robinair 10290 or Kent-Moore J37872, or Honda Tool and Equipment ACT 499A, commercially available
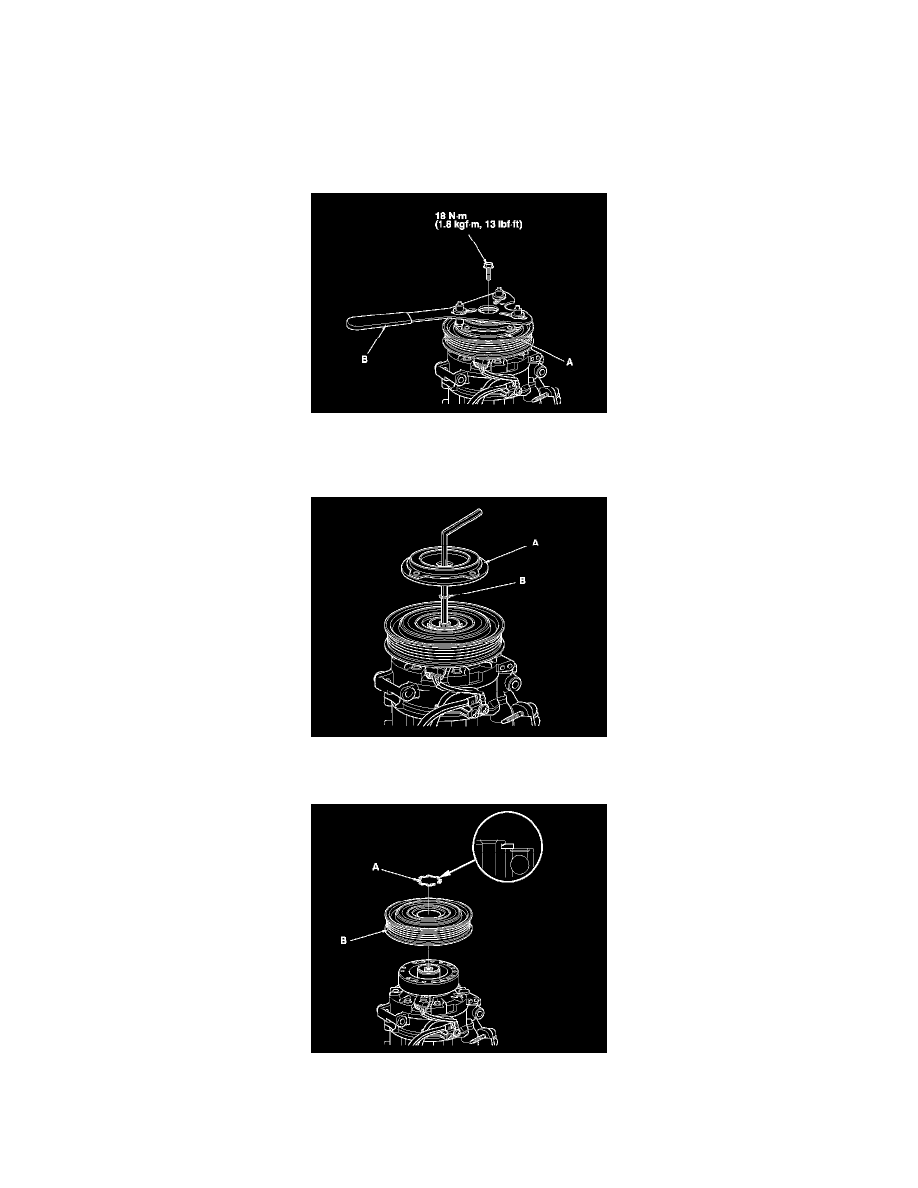
1. Remove the center bolt while holding the pressure plate (A) with a commercially available A/C clutch holder (B).
2. Remove the pressure plate (A) and shim(s) (B), taking care not to lose the shim(s). If the clutch needs adjustment, increase or decrease the number
and thickness of shims as necessary, then reinstall the pressure plate, and recheck its clearance. See: Testing and Inspection
NOTE: The shims are available in three thicknesses: 0.1 mm, 0.3 mm, and 0.5 mm.
3. If you are replacing the field coil, remove the snap ring (A) with snap ring pliers, then remove the pulley (B). Be careful not to damage the pulley
or the A/C compressor.
4. Remove the screw from the field coil ground terminal (A) and the bracket (B). Disconnect the connectors (C) from the field coil and the variable
capacity control solenoid valve, then remove the wire harness (D). Remove the snap ring (E) with snap ring pliers, then remove the field coil (F).
Be careful not to damage the field coil or the A/C compressor.