
RL V6-3.7L (2009)
Map Light: Service and Repair
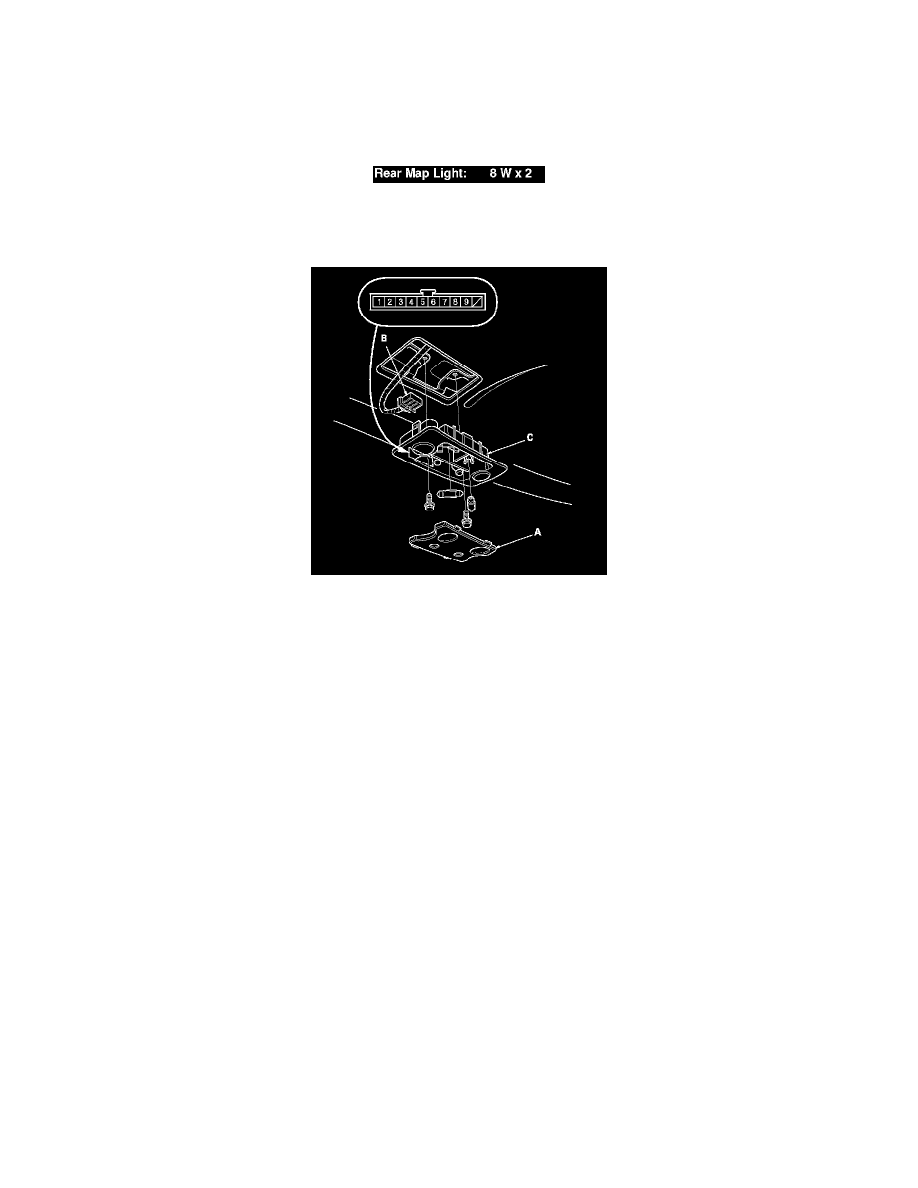
Rear Individual Map Light Test/Replacement
Rear Individual Map Light Test/Replacement
1. Carefully pry off the lens (A) with a small screwdriver.
2. Remove the two mounting bolts.
3. Disconnect the 10P connector (B) from the rear map light (C).
Switch Test
4. Check for continuity between terminals No. 5 (or No. 6) and No. 7 with the left (or right) rear map light switch ON. There should be continuity.
5. Check for continuity between the terminals No. 5 (or No. 6) and No. 7 with the left (or right) rear map light switch OFF. There should be no
continuity.
6. If the continuity is not as specified, replace the rear map light assembly.
Map Light Test
7. Connect battery power to the terminal No. 4 and ground terminal No. 8. The left map light should come on.
8. Connect battery power to terminal No. 4 and ground terminal No. 9. The right map light should come on.
9. If the test result is not as specified, check the bulb. If the bulb is OK, replace the rear map light assembly.
Ambient Lights Test
10. Connect battery power to terminal No. 3 and ground terminal No. 1. The ambient lights should come on.
11. If the test result is not as specified, replace the rear map light assembly.
Switch Lights Test
12. Connect battery power to the terminal No. 3 and ground terminal No. 2. The switch lights should come on.
13. If the test result is not as specified, check the bulbs. If the bulbs are OK, replace the rear map light assembly.