
RL V6-3.7L (2009)
Horn Switch: Testing and Inspection
Horn Switch Test
1. Remove the driver's dashboard undercover, See: Body and Frame/Interior Moulding / Trim/Dashboard / Instrument Panel/Service and
Repair/Driver's Dashboard Undercover Removal/Installation and the driver's dashboard lower cover, See: Body and Frame/Interior Moulding /
Trim/Dashboard / Instrument Panel/Service and Repair/Driver's Dashboard Lower Cover Removal/Installation then remove the steering column
covers. See: Steering and Suspension/Steering/Steering Column/Service and Repair/Steering Column Removal and Installation
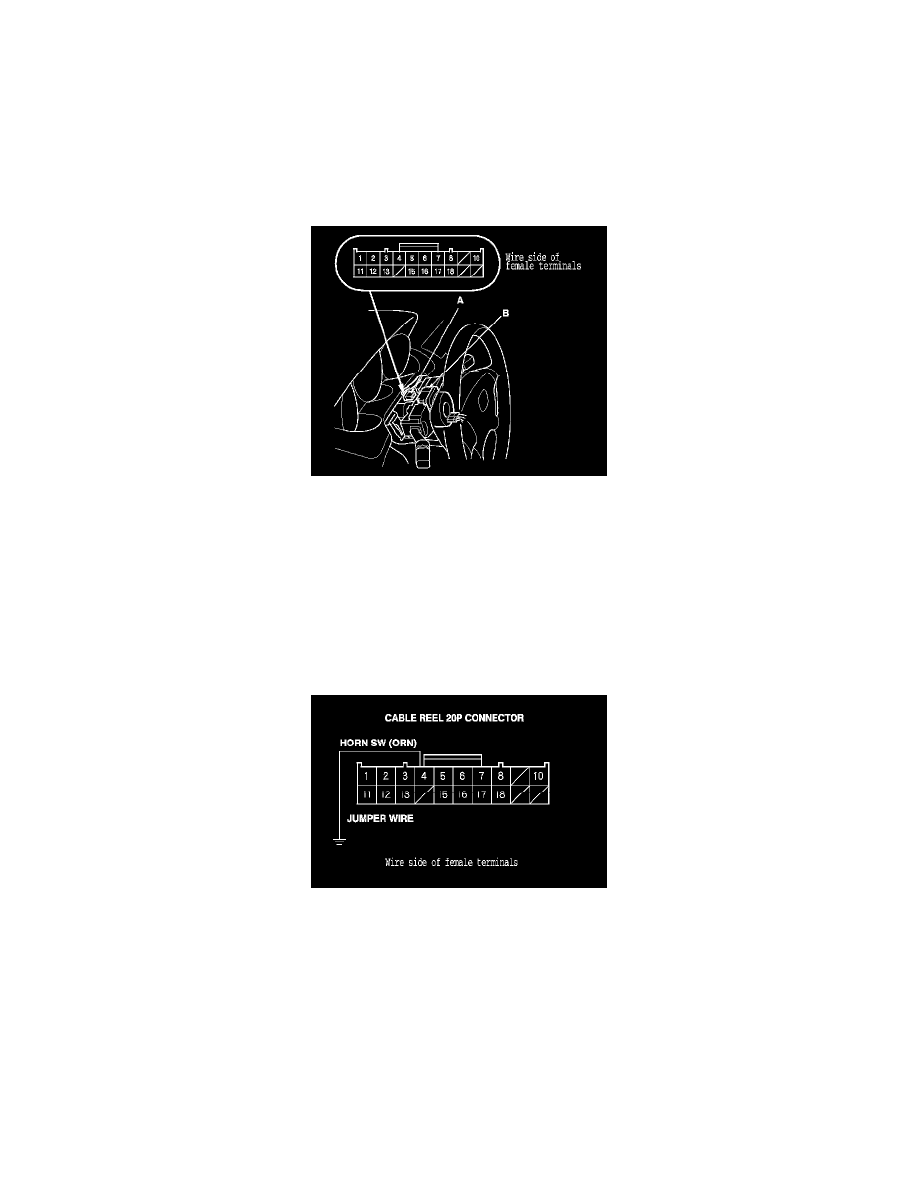
2. Disconnect the 20P connector (A) from the cable reel (B).
3. Using a jumper wire, connect the dashboard wire harness 20P connector terminal No. 4 to body ground. The horns should sound.
-
If the horns sound, go to step 4.
-
If the horns don't sound, check these items:
-
No. 13 (15 A) fuse in the under-hood fuse/relay box
-
Relay control module in the under-hood fuse/relay box
-
Horns See: Horn/Service and Repair
-
An open in the wire
4. Reconnect the 20P connector (A) to the cable reel (B).
5. Remove the driver's airbag assembly, See: Restraint Systems/Air Bag Systems/Air Bag/Service and Repair/Removal and Replacement/Driver's
Airbag Replacement and disconnect the horn switch 1P connector (C) from the driver's airbag.