
RL V6-3.7L (2009)
Oil Filter: Service and Repair
Engine Oil Filter Replacement
Special Tools Required
-
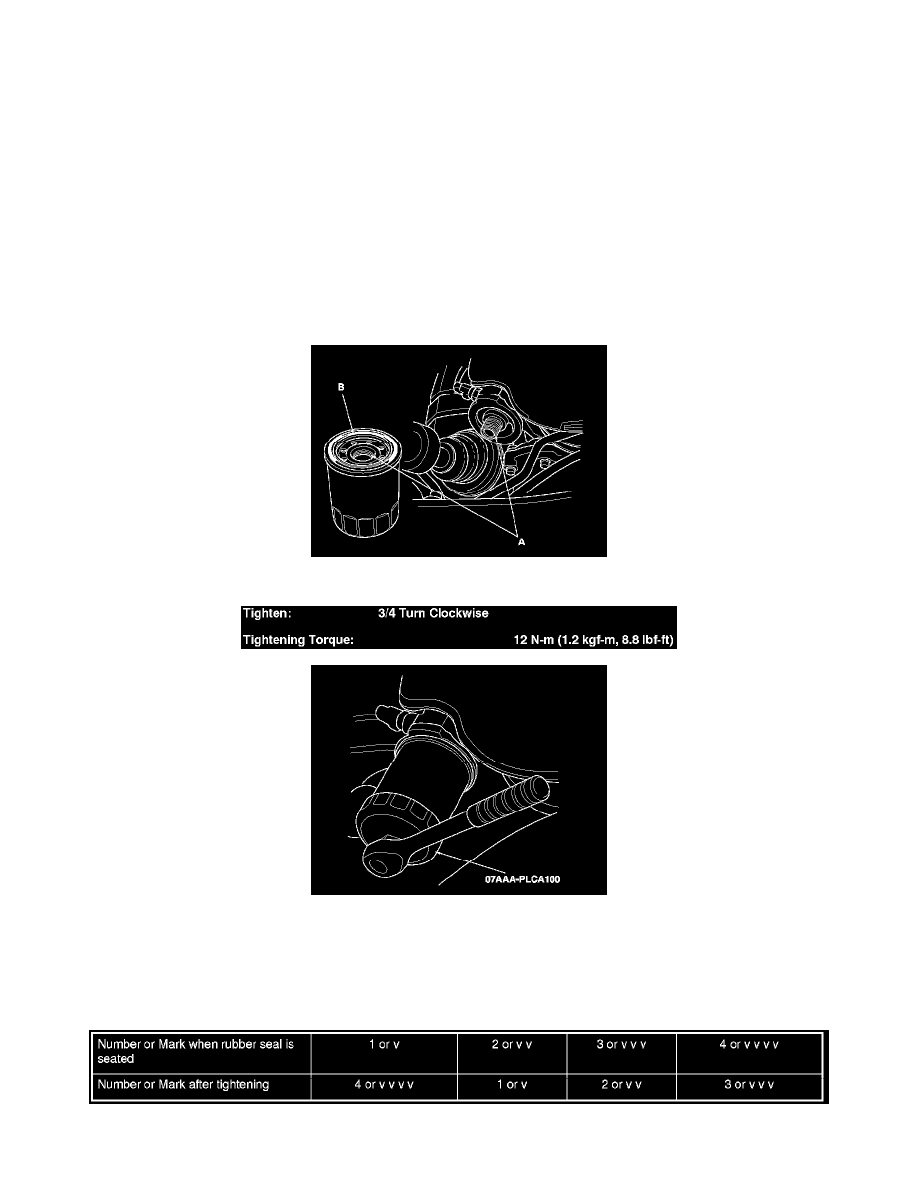
Oil filter wrench 07AAA-PLCA100
1. Drain the engine oil. See: Fluids/Engine Oil/Service and Repair
2. Remove the oil filter with the oil filter wrench.
3. Inspect the filter to make sure the rubber seal is not stuck to the oil filter seating surface of the engine.
4. Inspect the threads (A) and the rubber seal (B) on the new filter. Clean the seat on the engine block, then apply a light coat of new engine oil to the
filter rubber seal. Use only filters with a built-in bypass system.
5. Install the oil filter by hand.
6. After the rubber seal seats, tighten the oil filter clockwise with the oil filter wrench.
7. If four numbers or marks (1 to 4 or v to v v v v ) are printed around the outside of the filter, you can use the following procedure to tighten the
filter.
-
Spin the filter on until its seal lightly seats against the block, and note which number or mark is at the bottom.
-
Tighten the filter by turning it clockwise three numbers or marks from the one you noted. For example, if mark v is at the bottom when the seal
is lightly seated, tighten the filter until the mark v v v v comes around to the bottom.
8. Refill with new engine oil, See: Fluids/Engine Oil/Service and Repair run the engine for more than 3 minutes, then recheck the oil level and check